
Can you fix worn spots on kitchen cabinets? Yes, you absolutely can! Whether it’s a minor scuff or a deeper gouge, worn spots on your kitchen cabinets are a common issue. Over time, daily use, cleaning, and even sunlight can take a toll, leaving your cabinets looking tired. But don’t worry, with a little effort and the right approach, you can restore their beauty and prolong their life. This guide will walk you through various methods for cabinet surface damage, from simple touch-ups to more involved DIY cabinet repair. Let’s learn how to restore kitchen cabinets and combat everyday cabinet wear and tear.
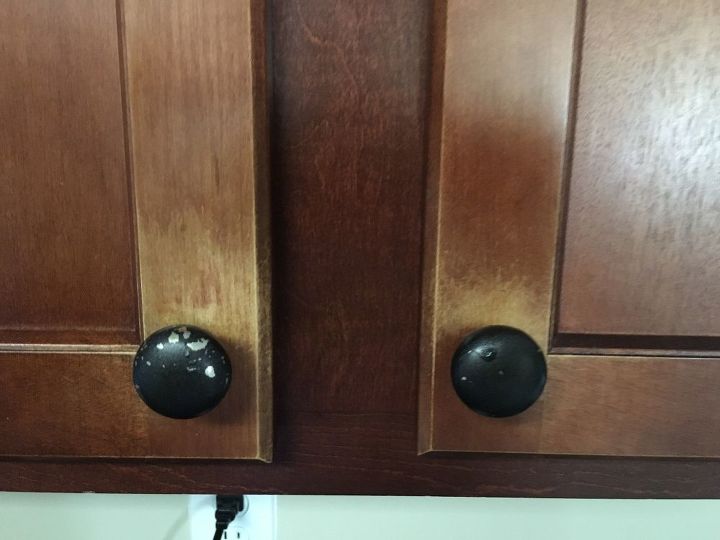
Image Source: cdn-fastly.hometalk.com
Identifying the Problem: What Kind of Wear Are We Facing?
Before you grab any tools, it’s important to figure out what kind of wear and tear your cabinets are showing. This will help you choose the best fix. Are you dealing with:
- Surface Scratches and Scuffs: These are usually light marks that haven’t gone through the finish. They might look like lighter lines on the cabinet’s surface.
- Deeper Gouges: These go through the finish and into the wood itself. They can be noticeable dents or chips.
- Fading or Discoloration: Sunlight or harsh cleaners can cause areas to lose their color or become unevenly toned.
- Worn Edges and Corners: Constant touching and friction can wear away the finish on edges and corners, leaving them looking dull or bare.
- Peeling Finish: In some cases, the protective layer of your cabinets might start to peel or flake.
Quick Check: What’s the Finish Type?
Knowing your cabinet’s finish helps a lot. Most kitchen cabinets have one of these:
- Laminate: This is a plastic-like coating. Scratches on laminate are harder to fix and might require specialized laminate repair kits.
- Veneer: This is a thin layer of real wood glued to a cheaper material. If the veneer is scratched or chipped, it needs careful repair.
- Solid Wood: This is the most common and often the easiest to repair. You can usually sand, stain, and refinish solid wood.
- Painted: Painted cabinets can be touched up with paint.
Table 1: Common Cabinet Wear and Tear Types
| Wear Type | Appearance | Difficulty of Repair | Best Approach |
|---|---|---|---|
| Surface Scratches | Light lines, no deep damage | Easy | Cabinet stain touch-up, scratch repair pens |
| Deeper Gouges | Visible dents or chips in the wood | Medium | Cabinet wood filler, Cabinet scratch repair |
| Fading/Discoloration | Uneven color, lighter or darker spots | Medium | Cabinet stain touch-up, re-staining parts |
| Worn Edges/Corners | Dull or bare wood showing on edges | Medium | Cabinet stain touch-up, Cabinet refinishing |
| Peeling Finish | Flaking or bubbling of the top coat | Harder | Cabinet refinishing, sanding and recoating |
| Laminate Scuffs | Marks on a plastic-like surface | Hard | Laminate repair kits |
Essential Tools and Materials for Cabinet Repair Kit Success
To tackle those worn spots, having the right tools is key. A good cabinet repair kit will likely contain many of these items.
Must-Have Tools:
- Screwdriver Set: For removing cabinet doors and hardware.
- Putty Knife or Spatula: For applying wood filler.
- Sandpaper: Various grits (e.g., 120, 180, 220) for smoothing.
- Tack Cloth: To remove dust after sanding.
- Clean Cloths: For applying stains and cleaning.
- Small Paintbrushes: For precise stain application.
- Disposable Gloves: To protect your hands.
- Safety Glasses: Always protect your eyes!
- Optional: Orbital Sander: For larger cabinet refinishing jobs.
- Optional: Wood Stain Pen or Touch-Up Marker: For minor color fixes.
Key Materials:
- Cabinet Wood Filler: Choose one that matches your cabinet’s color or is stainable.
- Wood Stain: If you need to match the existing color. Test it first!
- Polyurethane or Clear Coat: To protect the repaired area.
- Furniture Polish or Wax: For final conditioning.
- Rubbing Alcohol or Mineral Spirits: For cleaning.
Step-by-Step Guide: Tackling Cabinet Wear and Tear
Let’s get down to business! Here’s how to fix common cabinet issues.
Fixing Surface Scratches and Scuffs
This is often the easiest fix.
H4: The Quick Cabinet Stain Touch-Up Method
For light scratches that haven’t removed the finish:
- Clean the Area: Wipe the scuff mark with a damp cloth and mild soap. Let it dry completely.
- Choose Your Tool:
- Stain Pens/Markers: These are great for matching the cabinet color. Select a shade that’s very close to your cabinet’s original stain.
- Walnut or Pecan: Rubbing the meat of a walnut or pecan over the scratch can sometimes fill and disguise it, especially on lighter woods.
- Apply Carefully: Gently rub the stain pen or marker over the scratch. Use light, even strokes. Wipe away any excess immediately with a clean cloth.
- Buff and Protect: Once the stain is dry, buff the area with a soft cloth. If the scratch was in a high-traffic area, you might consider a very light coat of clear protection.
H4: The Cabinet Scratch Repair Kit Approach
Many kits come with crayons or putty that can fill and color scratches.
- Clean: Ensure the scratched area is clean and dry.
- Select Color: Match the crayon or putty to your cabinet’s finish.
- Apply: Rub the crayon firmly into the scratch, or use a putty knife to apply the putty.
- Smooth: Use a plastic scraper or your finger to remove excess and smooth the surface.
- Buff: Buff with a soft cloth.
Repairing Deeper Gouges and Chips
When the damage goes into the wood, cabinet wood filler is your best friend.
H4: Using Cabinet Wood Filler for Deeper Damage
This method fills the void and can be stained to match.
- Clean the Damaged Area: Remove any loose wood splinters or debris. Wipe with a tack cloth.
- Apply Wood Filler:
- Choose the Right Filler: Select a stainable cabinet wood filler. If you have dark cabinets, you might find pre-tinted fillers.
- Loading the Filler: Use a putty knife to press the filler firmly into the gouge or chip. Overfill it slightly, as wood filler can shrink as it dries.
- Smooth While Wet: Scrape off excess filler with the putty knife, leaving it just slightly proud of the surrounding surface.
- Let it Dry: Follow the manufacturer’s instructions for drying time. This can range from a few minutes to several hours.
- Sand Smooth: Once dry, gently sand the filled area with fine-grit sandpaper (220 grit is good). Feather the edges so the repair blends seamlessly. Use a sanding block for flat surfaces. Wipe away dust with a tack cloth.
- Stain Touch-Up:
- Test First: Always test your stain on a scrap piece of wood or an inconspicuous area of the cabinet to ensure a good color match.
- Apply Stain: Using a small, clean cloth or a fine paintbrush, apply the stain to the repaired area. Work it into the filler to blend it with the surrounding wood.
- Wipe Excess: Wipe away any excess stain immediately with a clean cloth, following the grain of the wood. You might need multiple light applications to achieve the desired depth of color.
- Apply Protective Coat: Once the stain is completely dry, apply a thin coat of clear polyurethane or a matching topcoat using a small brush. Let it dry and add a second coat if needed.
- Final Polish: After the clear coat is dry, you can lightly buff the area with furniture polish for a smooth finish.
Addressing Fading and Discoloration
This requires a bit more finesse.
H4: Blending Color with Cabinet Stain Touch-Up
If the fading is minor and localized:
- Clean: Wash the cabinet surface with a mild cleaner and water. Let it dry thoroughly.
- Assess Fading: Identify the areas that are lighter or have lost color.
- Prepare Stain: If you have leftover stain from the original cabinets, use that. If not, purchase a new stain that closely matches. You might need to mix stains to get the perfect shade.
- Test the Match: Apply a small amount of the stain to an inconspicuous area to check the color.
- Apply Stain:
- Light Coats: Apply the stain very lightly with a clean cloth or a small brush. Build up the color gradually.
- Work in Sections: Focus on the faded areas, but try to blend the color outwards slightly to avoid harsh lines.
- Wipe Excess: Always wipe off excess stain promptly to prevent blotching.
- Seal: Once the stain is dry, apply a thin coat of matching topcoat or clear sealant.
H4: Re-Staining Specific Areas (Partial Cabinet Refinishing)
If fading is more widespread but you don’t want to refinish the whole cabinet:
- Clean and Prep: Thoroughly clean the cabinet. Lightly sand the entire cabinet door or drawer front with fine-grit sandpaper (220 grit) to remove any old finish and create a surface for the new stain to adhere to.
- Dust Off: Use a tack cloth to remove all sanding dust.
- Apply Stain: Apply your matching stain evenly over the entire surface. This ensures a consistent color.
- Wipe Excess: Wipe off excess stain following the wood grain.
- Apply Topcoat: Once the stain is dry, apply two to three thin coats of clear polyurethane, allowing each coat to dry thoroughly and sanding lightly between coats with very fine sandpaper (320 or 400 grit).
Revitalizing Worn Edges and Corners
These areas see the most action.
H4: Restoring Edges with Stain and Wax
- Clean: Clean the edges thoroughly.
- Light Sanding: If the finish is dull, lightly sand the edges with fine-grit sandpaper.
- Stain Application: Use a cabinet stain touch-up marker or a fine brush dipped in stain to carefully apply color to the worn edges. Blend it out onto the surface slightly.
- Wax or Polish: Once dry, apply a good furniture wax or polish to the edges and the entire cabinet for protection and shine.
Dealing with Peeling or Damaged Finish
This is a more involved process, often leading to a full cabinet refinishing.
H4: Complete Cabinet Refinishing for Peeling Finishes
If the finish is peeling significantly, a simple touch-up won’t suffice.
- Remove Hardware: Take off all knobs, handles, and hinges.
- Strip the Old Finish:
- Chemical Stripper: Use a chemical stripper according to the product’s instructions. Wear gloves and eye protection. Scrape off the softened finish with a putty knife.
- Sanding: For less stubborn finishes, you can use an orbital sander with medium-grit sandpaper (100-150 grit) followed by fine-grit sandpaper.
- Clean and Sand: After stripping, clean the wood with mineral spirits or denatured alcohol. Once completely dry, sand the entire surface smooth with 220-grit sandpaper. Wipe with a tack cloth.
- Stain (Optional): If you’re changing the color or need to even out the wood tone, apply your chosen wood stain. Test it first. Apply evenly with a cloth or brush, wipe off excess, and let it dry completely.
- Apply Topcoat: Apply multiple thin coats of polyurethane or a durable cabinet-specific topcoat. Allow each coat to dry fully. Lightly sand between coats with very fine sandpaper (320-400 grit) for a smoother finish.
- Reassemble: Once the final coat is dry, reattach hardware.
Specialty Scenarios and Expert Tips
H3: What If My Cabinets Are Painted?
Painted cabinets have their own set of issues.
- Minor Scuffs: Clean with a damp cloth. For tougher scuffs, try a magic eraser very gently, then clean with a mild soap.
- Chips and Dents:
- Clean: Clean the area around the chip.
- Fill: Use a paintable cabinet wood filler or spackle to fill the chip. Let it dry.
- Sand: Sand the filler smooth, flush with the cabinet surface. Wipe away dust.
- Touch-Up Paint: Use a small artist’s brush to carefully apply matching paint to the filled area. You may need several thin coats.
- Seal (Optional): For durability, you can apply a clear acrylic sealer over the touch-up paint once it’s dry.
H3: Can I Refinish Just One Cabinet Door?
Yes, you can! It’s often called spot refinishing. The key is to blend the new finish with the old as seamlessly as possible.
- Match Colors Meticulously: This is crucial. Test stains on scrap wood until you get a perfect match.
- Feather Edges: When applying stain or topcoat to a small area, try to feather the edges outwards. This means applying less product as you move away from the repaired spot.
- Use the Same Products: If possible, use the same type of stain and topcoat that was originally used on the cabinets.
H3: How to Get a Professional Look for Your Cabinet Surface Damage Repair
- Work in Good Light: Natural daylight is best.
- Cleanliness is Key: Dust is the enemy of a smooth finish. Always use a tack cloth.
- Patience: Don’t rush drying times. This is especially important for stains and topcoats.
- Practice: If you’re unsure, practice your technique on a piece of scrap wood or an old shelf.
- Don’t Overdo It: Too much stain or filler can make the repair more noticeable. It’s easier to add more than to take away.
Frequently Asked Questions (FAQ)
Q1: How do I match the stain color of my existing cabinets?
A1: This is often the trickiest part of cabinet stain touch-up. Try to find the original manufacturer’s information if possible. If not, take a sample door or drawer to a paint or hardware store that mixes stains. They can often help you find a match. Always test your chosen stain on an inconspicuous area first.
Q2: What’s the best way to fix a deep scratch on a stained cabinet?
A2: For deep scratches that have removed the stain and some wood, you’ll likely need cabinet wood filler. Choose a stainable filler, fill the scratch, sand it smooth, and then apply a matching cabinet stain touch-up.
Q3: Can I use a furniture repair crayon for significant damage?
A3: Furniture repair crayons are best for very light scratches and scuffs. For deeper gouges or chips, cabinet wood filler is a more durable and effective solution.
Q4: How do I prevent future wear and tear on my kitchen cabinets?
A4: Regular cleaning with mild soap and water is important. Avoid harsh chemicals or abrasive cleaners. Use placemats or coasters to protect surfaces from heat and moisture. Be mindful of where sunlight hits your cabinets, as prolonged exposure can cause fading. A good quality cabinet polish or wax can offer a layer of protection.
Q5: Is DIY cabinet repair always cheaper than hiring a professional?
A5: Generally, yes, especially for minor repairs. If you have the time and patience, doing it yourself can save money. However, for significant damage or if you’re aiming for a perfect, factory-like finish, a professional cabinet refinishing service might be worth the investment.
By following these steps, you can effectively address cabinet surface damage and keep your kitchen looking its best. With the right approach and a little patience, you can successfully restore kitchen cabinets and enjoy them for years to come.