
Image Source: blog.1800lighting.com
How To Place Recessed Lighting In A Kitchen Perfectly
What is the best way to place recessed lighting in a kitchen? The best way to place recessed lighting in a kitchen is by following a strategic layout that considers task areas, ambient light needs, and overall room dimensions, ensuring even illumination without glare or dark spots.
Achieving perfect kitchen lighting design is more than just screwing in a few bulbs; it’s about creating a functional, inviting, and beautiful space. Recessed lighting, often called can lights, offers a sleek, modern look that can dramatically improve your kitchen’s ambiance and utility. But how do you get it just right? This in-depth guide will walk you through every step of recessed lighting installation to ensure your kitchen glows.
Planning Your Kitchen Lighting Layout
Before you grab a drill, careful planning is key. The wrong placement can lead to shadows where you need light most, or an overly harsh, sterile environment. A well-thought-out lighting layout for kitchen spaces balances several important factors.
Determining Lighting Needs
Every kitchen has different requirements. Think about how you use your kitchen:
- Cooking: You need bright, focused light over countertops and the stovetop for safe food preparation.
- Dining: If you have an eat-in kitchen or island, you might want softer, more ambient light in that area.
- General Ambiance: You need overall illumination to make the kitchen feel welcoming and functional.
Types of Recessed Lighting
- Remodel Cans: These are designed for existing ceilings, typically with clips to secure them to the drywall. They’re ideal for kitchen remodel lighting when you don’t have attic access above.
- New Construction Cans: These are used when the ceiling is open, allowing them to be attached directly to the joists.
- Shallow Cans: Good for ceilings with limited depth.
- Air-Tight Cans: These help prevent air from leaking into the attic, improving energy efficiency.
- Gimbal/Adjustable Cans: These allow you to direct light where needed, perfect for highlighting artwork or specific zones.
Understanding Light Spread and Beam Angle
The recessed light spacing depends heavily on the beam angle of your chosen bulbs and the height of your ceiling.
- Beam Angle: This refers to how wide the light spreads. Wider beams (e.g., 90-120 degrees) are good for general illumination. Narrower beams (e.g., 40-60 degrees) are better for task lighting, concentrating light on a specific area.
- Ceiling Height: Higher ceilings require wider beam angles or more fixtures to achieve adequate light coverage.
Strategic Placement Zones for Kitchen Recessed Lighting
Effective ceiling light placement focuses on key areas within the kitchen.
Task Lighting Zones
These are the areas where you perform specific activities.
-
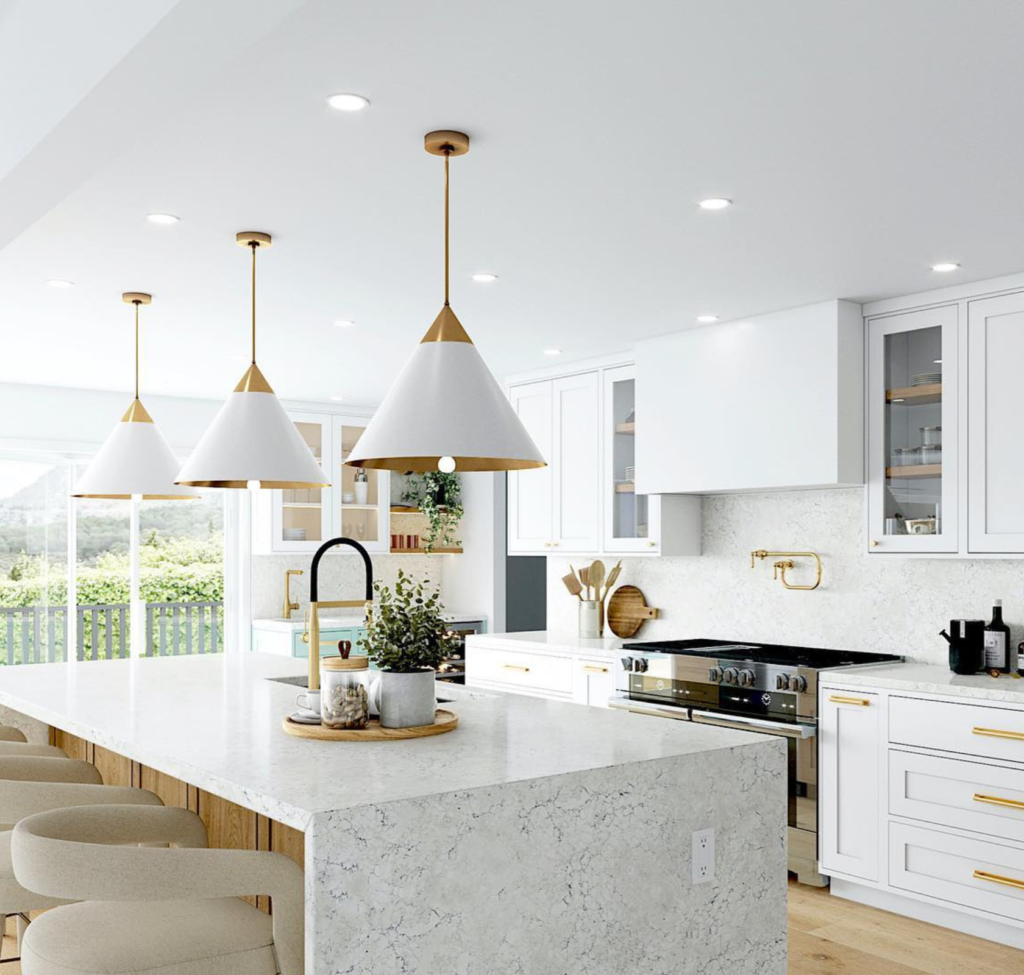
Countertops: This is the most crucial area. Aim to place lights to illuminate the entire length of your countertops. The general rule of thumb is to place them 6-12 inches away from the wall. This prevents shadows cast by your body while you work.
- Spacing Rule: For 6-inch recessed lights with a standard 9-foot ceiling and a 90-degree beam angle, a common spacing is about every 4-5 feet. However, this can vary. A good guideline is to place lights so the edges of their light beams meet or overlap slightly.
- Example: If you have a 10-foot counter run, and you’re using lights with a spread of approximately 5 feet, you might need two lights spaced about 4-5 feet apart, positioned 6-12 inches from the wall.
-
Sink Area: Bright light is essential for cleaning and washing dishes. Position a light directly over the sink, or as part of the countertop lighting run that covers the sink.
-
Stovetop/Cooktop: This area requires excellent illumination for safe cooking. Consider positioning lights to directly shine on the cooking surface. Often, a dedicated range hood with built-in lighting is used, but supplementary recessed lighting can ensure complete coverage.
Ambient Lighting Zones
These lights provide general illumination for the entire kitchen.
-
Room Center: Place a few lights in the main open areas of the kitchen to provide overall brightness. Spacing here can be more uniform, often in a grid pattern.
- Grid Layout Calculation: To determine spacing for a grid layout, measure the length and width of the room. Divide the length by the number of lights you want in that direction, and do the same for the width. For example, if your kitchen is 12 feet by 15 feet, and you want 3 lights along the 15-foot wall, you’d space them roughly every 5 feet. Then, position the rows based on the 12-foot dimension.
-
Walkways and Traffic Areas: Ensure pathways through the kitchen are well-lit to prevent tripping hazards.
Accent Lighting Zones (Optional)
These lights add depth and visual interest.
- Cabinet Interiors: Small recessed or puck lights can illuminate the inside of glass-front cabinets, showcasing dishware.
- Under Cabinet Lighting: While not strictly recessed, under-cabinet lighting is crucial for eliminating shadows on countertops. This is a vital component of a layered kitchen lighting design.
- Highlighting Features: Adjustable gimbal lights can be used to draw attention to artwork, architectural details, or a decorative backsplash.
Calculating Recessed Light Spacing
Precise recessed light spacing is critical. Here’s a practical approach:
The “2-Foot Rule” (Guideline, Not Strict Law)
A simple starting point for ceiling light placement in general areas is the “2-foot rule”:
- Measure the distance from the wall to the edge of the lighting area.
- Subtract 2 feet from this measurement.
- Divide the remaining distance by the number of lights you plan to install in that run.
Example:
* Room width: 12 feet.
* You want lights to be roughly 2 feet from each wall.
* Remaining distance for lights: 12 feet – 2 feet – 2 feet = 8 feet.
* If you want 2 lights in this run, you’d place them 8 feet / 2 = 4 feet apart. The first light would be 2 feet from one wall, and the second 2 feet from the other.
Using Light Manufacturer’s Recommendations
Always check the packaging or website of your chosen recessed light fixtures and bulbs. Manufacturers often provide recommended spacing charts based on ceiling height and beam angle.
Visualizing the Light Pattern
A helpful technique is to use painter’s tape on the ceiling to mark potential locations. Then, use a flashlight held at the same angle as the recessed lights to get a visual of the light spread and identify any dark gaps or overly bright spots.
Installation Steps for Recessed Lighting
Once your plan is solid, it’s time for recessed lighting installation. If you’re not comfortable with electrical work, hiring a licensed electrician is highly recommended for safety and to ensure compliance with building codes.
Safety First!
- Turn off Power: ALWAYS turn off the power to the circuit you’ll be working on at the breaker box. Double-check with a non-contact voltage tester before touching any wires.
- Wear Safety Gear: Use safety glasses and gloves.
Marking and Cutting Holes
- Transfer Layout: Carefully transfer your planned light locations from your measurements to the ceiling using a pencil.
- Use a Template: Most recessed light fixtures come with a cardboard template for cutting the hole. Trace this template accurately.
- Cut the Holes: Use a drywall saw or a RotoZip tool to cut the holes. Ensure your cuts are clean and precise.
Wiring the Fixtures
This is where professional help is often invaluable.
- Connecting Wires: Recessed lights typically have pigtail wires (black for hot, white for neutral, green or bare for ground). Connect these to the corresponding wires in the electrical box using wire nuts.
- Electrical Box: Many recessed lights have an integrated junction box. If not, you’ll need to install one.
- Low Voltage Lighting: If you are installing low voltage lighting, the wiring process will involve a transformer. Ensure it’s accessible and properly connected according to manufacturer instructions.
Installing the Fixtures
- Insert Fixture: Gently push the recessed light fixture into the hole in the ceiling.
- Secure Fixtures: Most remodel cans have spring-loaded clips or brackets that you push up, which then spring back to hold the fixture firmly against the drywall. New construction cans are secured to the joists.
- Install Bulbs: Screw in the appropriate LED bulbs. LEDs are highly recommended for recessed lighting due to their energy efficiency, long lifespan, and dimmable capabilities.
Connecting to Power Source
- Splice into Existing Circuit: This is often done by tapping into an existing ceiling fixture box or by running new wiring from the breaker panel.
- Dimmer Switch Installation: For the best kitchen lighting design, consider installing a dimmer switch. This allows you to control the intensity of the light, creating different moods and saving energy. Ensure your dimmer is compatible with your LED bulbs.
Choosing the Right Bulbs and Trims
The bulb and trim you select significantly impact the final look and function.
LED Bulbs: The Modern Standard
- Energy Efficiency: LEDs use significantly less energy than incandescent or halogen bulbs.
- Longevity: They last much longer, reducing the frequency of bulb changes.
- Color Temperature: Choose between:
- Warm White (2700K-3000K): Similar to incandescent light, creates a cozy, inviting atmosphere. Good for general ambient lighting.
- Cool White/Bright White (3500K-4000K): Brighter and more neutral, excellent for task lighting in kitchens.
- Daylight (5000K-6500K): Mimics natural daylight, can make colors appear more vibrant but can also be too harsh for some environments.
- Color Rendering Index (CRI): A higher CRI (90+) means colors will appear more natural and true, which is important in a kitchen for food presentation and overall visual appeal.
Trim Styles
The trim is the visible ring around the can opening.
- Baffle Trims: Feature a ribbed or textured surface that helps reduce glare.
- Reflector Trims: Have a smooth, shiny surface to reflect light downwards.
- Adjustable/Gimbal Trims: Allow you to tilt the bulb to direct light.
- Eyeball Trims: The entire trim rotates and tilts.
- Decorative Trims: Available in various finishes (brushed nickel, chrome, white, black) to match your kitchen decor.
Integrating Recessed Lighting into Your Kitchen Remodel
For those undertaking a kitchen remodel lighting project, integrating recessed lighting from the start offers the most flexibility.
New Construction Advantages
- Easier Access: With open joists, running wires and installing fixtures is simpler and cleaner.
- Optimal Placement: You can plan the exact layout without worrying about existing ceiling obstructions.
- Hidden Wiring: All wiring can be neatly concealed.
Remodeling Considerations
- Existing Obstructions: Be prepared for potential issues like pipes, ductwork, or electrical wiring in the ceiling. You may need to adjust your planned locations.
- Attic Access: If you have attic access above the kitchen, installation is easier. If not, remodel cans are essential.
- Drywall Repair: Cutting holes and installing fixtures will require some drywall patching and painting after the installation.
Advanced Kitchen Lighting Design Techniques
Beyond basic placement, consider these for a truly exceptional kitchen.
Layered Lighting Approach
The most effective kitchen lighting design uses multiple layers of light:
- Ambient Lighting: General illumination from recessed lights or ceiling fixtures.
- Task Lighting: Focused light for work areas (under-cabinet, over sink/stove).
- Accent Lighting: Highlights specific features (in-cabinet lights, spotlights).
Incorporating Dimmers
Dimmer switch installation is a game-changer. It allows you to adjust the mood from bright and functional for cooking to soft and intimate for dining. Ensure your dimmer is compatible with the total wattage of your bulbs and the type of bulbs (especially LEDs).
Smart Home Integration
Consider smart recessed lighting systems that can be controlled via a smartphone app or voice commands. This allows for scheduled lighting, scene setting, and even color temperature adjustments.
Common Mistakes to Avoid
Even with careful planning, some common pitfalls can derail your recessed lighting installation.
- Too Few Lights: Leads to dark corners and insufficient task lighting.
- Too Many Lights: Can create a “supermarket” effect, making the kitchen feel sterile and overly bright.
- Incorrect Spacing: Results in uneven light distribution, creating glare and shadows.
- Wrong Beam Angle: Using narrow beams for ambient light or wide beams for task lighting can be ineffective.
- Ignoring Glare: Placing lights directly over seating areas or in line with sightlines can cause discomfort.
- Not Considering Obstructions: Failing to check for ceiling joists, pipes, or HVAC ducts before cutting holes.
- Using Incompatible Dimmers: Leads to flickering or malfunctioning lights.
Frequently Asked Questions About Kitchen Recessed Lighting
Q1: How many recessed lights do I need in my kitchen?
A1: The number depends on the size of your kitchen, ceiling height, and the lumen output and beam angle of your chosen bulbs. A common guideline is one 6-inch recessed light per 4-6 feet of ceiling space for ambient lighting. For task lighting, focus on covering specific work areas.
Q2: Can I install recessed lighting myself?
A2: If you have experience with electrical wiring and are comfortable working with power tools, you can likely install them. However, for safety and to ensure proper installation according to codes, hiring a licensed electrician is often the best choice.
Q3: What is the ideal placement for recessed lights over kitchen countertops?
A3: Place them 6 to 12 inches away from the wall. This positioning ensures that light illuminates the countertop surface without your body casting shadows.
Q4: What type of bulbs are best for recessed kitchen lighting?
A4: LED bulbs are highly recommended due to their energy efficiency, long lifespan, and dimmable capabilities. Choose a color temperature (Kelvin) that suits your needs – typically 3000K to 4000K for kitchens, and ensure a high Color Rendering Index (CRI) for accurate color representation.
Q5: How far apart should recessed lights be placed?
A5: The spacing depends on the ceiling height and the beam angle of the bulbs. A common starting point for 6-inch lights with a wide beam angle is every 4-5 feet for ambient lighting, and closer together for task lighting. Always consult the manufacturer’s recommendations.
Q6: What is low voltage lighting in the context of recessed lights?
A6: Low voltage lighting systems operate at a lower voltage (typically 12V) than standard household voltage (120V). They require a transformer to step down the voltage. While less common for general recessed kitchen lighting, it’s sometimes used for specialized accent or track lighting systems.
By following these guidelines, you can create a perfectly illuminated kitchen that is both functional and beautiful. Remember, good kitchen lighting design is an investment that enhances your daily life and the value of your home.