
So, how many can lights do you need in a kitchen? The answer isn’t a single number; it depends on the size of your kitchen, the spacing between lights, and the type of light output you desire. For most standard kitchens, a good starting point is one can light for every 4 to 6 feet of ceiling space.
When planning your kitchen lighting, it’s crucial to create a thoughtful kitchen lighting layout. This isn’t just about placing lights randomly; it’s about ensuring both adequate general illumination and focused task lighting. A well-executed kitchen lighting design will make your kitchen more functional, inviting, and safe. This comprehensive guide will walk you through determining can light quantity and achieving optimal kitchen illumination.
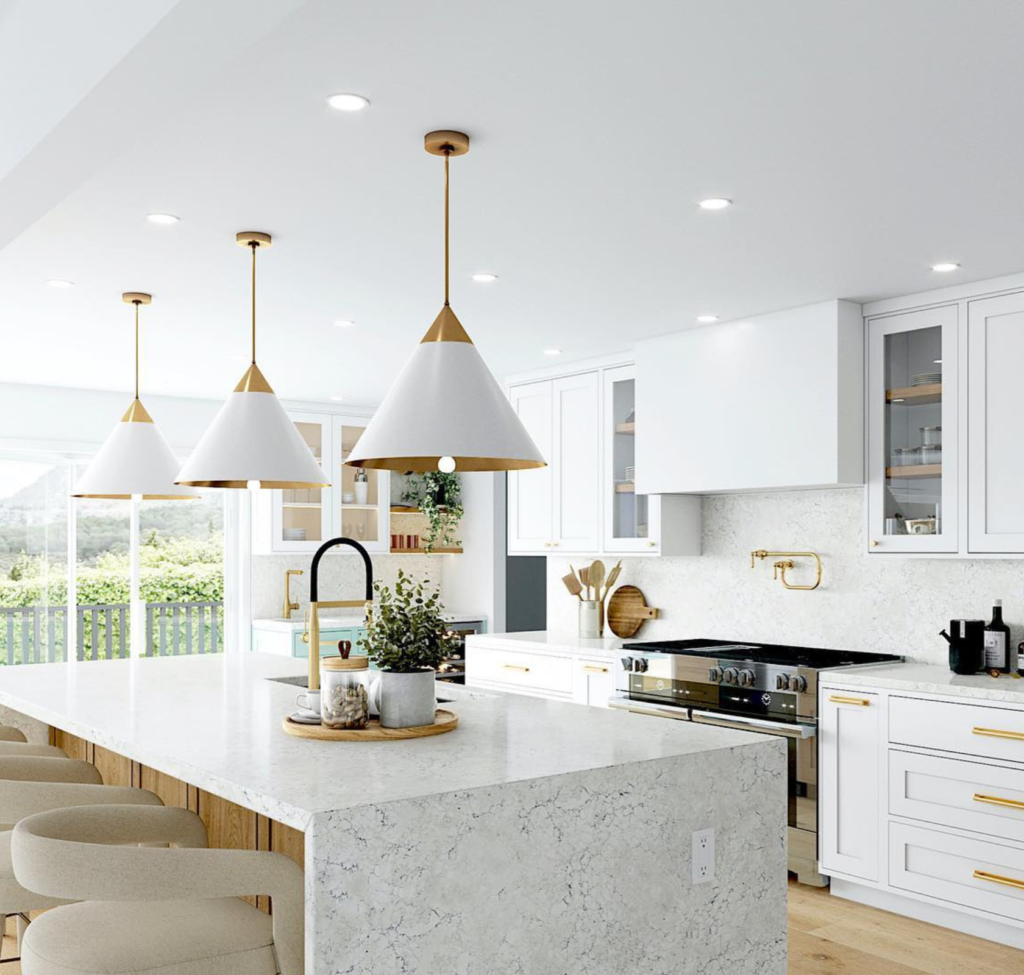
Image Source: blog.1800lighting.com
The Fundamentals of Kitchen Lighting
Recessed lighting kitchen setups have become a popular choice for modern homes, offering a clean, streamlined look that doesn’t clutter the ceiling. These fixtures, often called “can lights” or “downlights,” are installed flush with the ceiling, providing ambient light without drawing attention to themselves. They are excellent for general illumination, casting a soft, even glow across the entire room. However, to truly optimize your kitchen ceiling lights, a layered approach is best.
Layered Lighting: The Key to a Functional Kitchen
Effective kitchen lighting design relies on layering different types of light. Think of it like this:
- Ambient Lighting: This is the general, overall illumination of the kitchen. Can lights are the stars of this layer, providing the foundational light.
- Task Lighting: This is focused light directed at specific work areas like countertops, the stove, or the sink. Under-cabinet lighting, pendant lights over an island, or directional recessed lights are examples of task lighting.
- Accent Lighting: This type of lighting highlights specific features in the kitchen, such as artwork, a backsplash, or decorative shelving.
This guide will primarily focus on the ambient lighting provided by can lights, but remember that task and accent lighting are vital for a truly functional kitchen.
Why Choose Recessed Lighting?
Recessed lighting kitchen installations offer several advantages:
- Aesthetics: They provide a clean, uncluttered look, making smaller kitchens feel more spacious and modern kitchens feel sleeker.
- Even Illumination: When spaced correctly, they can provide consistent, widespread light throughout the room.
- Versatility: They can be used in various ceiling types and can accommodate different beam angles and wattages to suit specific needs.
- Durability: Most modern recessed fixtures are designed for longevity.
Determining the Number of Recessed Lights: The Science and the Art
Calculating the number of recessed lights for your kitchen isn’t an exact science, but there are established methods and guidelines to help you achieve the best results. The goal is to have enough light without making the space feel like an operating room.
The Foot-Candle Method: A Practical Approach
One of the most common ways to determine the number of recessed lights is by using the foot-candle method. A foot-candle is a unit of illuminance, measuring how much light falls on a surface. For general kitchen lighting, aim for approximately 10 to 20 foot-candles.
Here’s how to apply it:
- Measure Your Kitchen: Calculate the square footage of your kitchen (Length x Width).
- Determine Lumens Needed: Multiply the square footage by your target foot-candles (e.g., 150 sq ft x 15 foot-candles = 2250 lumens).
- Choose Your Bulbs: Select LED bulbs with a known lumen output. For example, if your chosen bulbs output 800 lumens each, you’d divide your total lumen need by the bulb’s lumen output (2250 lumens / 800 lumens/bulb ≈ 2.8 bulbs). Since you can’t have a fraction of a bulb, you’d round up.
However, this method provides a baseline for total light output. You still need to consider can light spacing and the spread of the light.
The Spacing Rule: Ensuring Even Coverage
Can light spacing is critical for preventing dark spots and overly bright areas. A good rule of thumb is to place can lights 4 to 6 feet apart.
Here’s a breakdown of how spacing impacts the number of recessed lights:
- Smaller Kitchens (e.g., 10×10 feet = 100 sq ft): You might consider a 2×2 grid, meaning 4 lights, spaced about 5 feet apart. Or, you could opt for a linear layout with 3 lights spaced 5 feet apart down the center.
- Medium Kitchens (e.g., 12×15 feet = 180 sq ft): A 3×3 grid (9 lights) or a 2×3 grid (6 lights) might be appropriate. Spacing would likely be around 4 to 5 feet.
- Larger Kitchens (e.g., 15×20 feet = 300 sq ft): You might need a 3×4 grid (12 lights) or a 4×4 grid (16 lights), with spacing closer to 4 to 5 feet.
Can Light Spacing Chart (Approximate Guidelines)
| Kitchen Dimension (Feet) | Approximate Grid Layout | Recommended Spacing (Feet) | Approximate Number of Lights |
|---|---|---|---|
| 10 x 10 | 2×2 or 1×3 (linear) | 4-5 | 4-6 |
| 12 x 15 | 2×3 or 3×3 | 4-5 | 6-9 |
| 15 x 18 | 3×3 or 3×4 | 4-5 | 9-12 |
| 15 x 20 | 3×4 or 4×4 | 4-5 | 12-16 |
Important Considerations for Spacing:
- Beam Spread: The angle of the light beam from your can lights is crucial. Wider beam spreads (e.g., 90-100 degrees) cover more area and can be spaced further apart. Narrower beams (e.g., 40-60 degrees) are more directional and require closer spacing for even coverage. Most general kitchen lighting uses wider beam spreads.
- Ceiling Height: In rooms with higher ceilings, you may need more lights or lights with narrower beam spreads to ensure adequate light reaches the work surfaces.
- Obstructions: Cabinets, soffits, and structural beams can affect recessed lighting placement. You’ll need to plan around these.
Planning Your Kitchen Lighting Layout: A Step-by-Step Approach
A successful kitchen lighting layout starts with careful planning. Don’t rush this process!
Step 1: Measure and Sketch Your Kitchen
- Measure the length and width of your kitchen.
- Draw a floor plan to scale. Include the location of cabinets, appliances, windows, doors, and any significant architectural features like islands or peninsulas.
- Mark the ceiling height.
Step 2: Identify Task Areas
- Where will you be chopping, cooking, and cleaning? These are your primary task areas.
- Consider areas like countertops, the sink, the stove, and any prep islands.
Step 3: Plan Ambient Lighting (Can Lights)
- Grid Pattern: For most kitchens, a grid pattern is ideal for ambient recessed lighting kitchen setups.
- Placement: Start by laying out a grid of lights evenly across the ceiling.
- Spacing Calculation: Use the 4-6 foot spacing rule as a starting point. If your kitchen is 12 feet wide, you might place lights at 3 feet, 6 feet, and 9 feet from each wall, giving you 5-foot spacing.
- Edge Spacing: Generally, keep can lights at least 2 to 3 feet away from walls to avoid creating harsh shadows or a “spotlight” effect on the walls.
- Mid-Point Check: Ensure that the mid-points between your lights are still adequately illuminated. If a large area between two lights feels dim, you may need to add another fixture or adjust spacing.
- Ceiling Obstructions: Factor in where joists, ductwork, or other ceiling elements might prevent installation.
Step 4: Incorporate Task Lighting
- Under-Cabinet Lighting: This is crucial for illuminating countertops. It reduces shadows cast by overhead lights and provides direct light where you need it most.
- Pendant Lights: If you have a kitchen island or peninsula, pendant lights are an excellent way to provide focused task lighting and add a decorative element. Space them so they are centered over the island and don’t obstruct movement.
- Sconce Lights: Wall-mounted sconces can add decorative light and supplement task lighting.
Step 5: Add Accent Lighting (Optional)
- In-Cabinet Lighting: For display cabinets, small LED strips can highlight glassware or decorative items.
- Uplighting: Pointing lights upwards at artwork or architectural features can add visual interest.
Step 6: Review and Refine
- Visualize: Imagine yourself in the kitchen. Are there any areas that seem too dark? Are the lights spaced in a way that looks balanced and appealing?
- Consult Professionals: If you’re unsure, consulting a lighting designer or electrician can be invaluable. They can help you optimize your kitchen lighting layout and ensure safe installation.
Key Factors Influencing Can Light Quantity
Beyond basic measurements, several other factors influence how many can lights you’ll need.
Ceiling Height and Beam Spread
- High Ceilings (8 feet and above): With higher ceilings, light needs to travel further, so you might require more fixtures or fixtures with a narrower beam spread (e.g., 60 degrees) to concentrate the light downwards. If you use wider beam spreads, you might need to increase the number of fixtures to achieve adequate illumination.
- Lower Ceilings (below 8 feet): Wider beam spread fixtures (e.g., 90-100 degrees) are often sufficient for lower ceilings, providing a more diffused and even light. You might need fewer fixtures compared to a room with higher ceilings.
Light Fixture Size and Type
- 4-inch vs. 6-inch Cans: Smaller 4-inch recessed lights are often favored in kitchens, especially in smaller spaces or when a more subtle look is desired. They can be spaced closer together for a more distributed light. Larger 6-inch cans provide more light output and can cover a larger area, potentially reducing the number of fixtures needed. However, they can appear more imposing on lower ceilings.
- Wattage/Lumens: As mentioned with the foot-candle method, the lumen output of your chosen bulbs is a primary driver of how many lights you need. Always check the bulb specifications.
Kitchen Layout and Usage
- Open Concept: In open-concept homes, the kitchen lighting should seamlessly transition with the adjoining living or dining areas. You might use a consistent grid pattern or integrate different types of lighting for zoning.
- Work Zones: If your kitchen has distinct work zones (e.g., a large island for prep, a dedicated baking corner), you’ll want to ensure each zone has sufficient task lighting, which may involve additional recessed lights or specific task fixtures.
- Cabinetry Placement: The arrangement of upper cabinets can impact recessed lighting placement. You’ll want to avoid casting shadows over your countertops from your overhead lights.
Desired Ambiance
- Bright and Airy: If you prefer a very bright, well-lit kitchen, you’ll likely lean towards more fixtures and higher lumen output.
- Cozy and Inviting: For a more subdued ambiance, you might use fewer fixtures, lower lumen bulbs, and incorporate dimmers extensively. This allows you to adjust the light levels throughout the day.
Advanced Considerations for Your Kitchen Illumination Guide
Dimmers are Your Friend
Installing dimmer switches on your kitchen ceiling lights is one of the best ways to increase the flexibility of your kitchen illumination guide. Dimmers allow you to:
- Adjust the brightness for different activities (e.g., bright for cooking, dim for dining).
- Save energy.
- Create different moods in the kitchen.
Smart Lighting Options
Consider smart bulbs or smart switches that allow you to control your kitchen lighting design via your smartphone or voice commands. This adds convenience and can even help with scheduling and energy management.
Beam Angle Matters
The beam angle of your recessed lights determines how wide the light cone is.
- Wide Beam Angle (90-100 degrees): Covers a larger area with less intense light. Good for general ambient lighting and lower ceilings.
- Medium Beam Angle (60-70 degrees): A good balance for general lighting in kitchens with average ceiling heights.
- Narrow Beam Angle (40-50 degrees): Concentrates light into a smaller, more intense area. Useful for highlighting specific features or in very high ceilings, but not ideal for general kitchen illumination on its own.
When planning your can light spacing, always consider the beam angle of the bulbs you intend to use.
LED Technology
When choosing bulbs for your recessed lighting kitchen setup, LEDs are the clear winner. They are energy-efficient, long-lasting, and come in a wide range of color temperatures and lumen outputs.
- Color Temperature (Kelvin):
- Warm White (2700K-3000K): Creates a cozy, inviting atmosphere.
- Neutral White (3500K-4000K): A good balance, often preferred for kitchens as it’s bright and accurate.
- Cool White/Daylight (5000K+): Mimics natural daylight, can feel stark in some kitchens.
- Color Rendering Index (CRI): A CRI of 80+ is generally recommended for kitchens to ensure colors of food and decor appear natural.
Special Kitchen Areas
- Sink Area: This is a critical task area. Consider a dedicated downlight directly above the sink, or ensure your general lighting grid adequately covers this space.
- Stove/Cooktop: Again, task lighting is key. Under-cabinet lights are excellent here, but a carefully placed recessed light can also help.
- Kitchen Island: If you have an island, it often requires its own lighting scheme, typically with pendant lights, but recessed lights can supplement the ambient light around it. Can light spacing around islands needs careful consideration to avoid glare for seated individuals.
Common Mistakes to Avoid
- Too Few Lights: Leading to a dim, uninviting kitchen.
- Too Many Lights: Creating a “bowling alley” effect or excessive glare.
- Incorrect Spacing: Resulting in uneven lighting with dark spots or overly bright areas.
- Ignoring Task Lighting: Relying solely on recessed lights, which can leave countertops in shadow.
- Wrong Beam Angle: Using too narrow a beam for general lighting, or too wide a beam for high ceilings.
- Forgetting Dimmers: Limiting the flexibility and mood-setting capabilities of the lighting.
- Placing Lights Directly Over Work Areas without Task Lighting: This is a common oversight that leads to shadows.
Frequently Asked Questions (FAQ)
Q1: How far apart should can lights be in a kitchen?
A1: A general guideline for can light spacing in a kitchen is 4 to 6 feet apart, depending on the ceiling height and the beam spread of the bulbs.
Q2: How many 6-inch can lights do I need for a 10×10 kitchen?
A2: For a 10×10 kitchen (100 sq ft), you might need 4 to 6 six-inch can lights, spaced roughly 4-5 feet apart, often arranged in a 2×2 grid or a linear fashion.
Q3: Can I use only can lights in my kitchen?
A3: While you can use only can lights, it’s highly recommended to incorporate task lighting (like under-cabinet lights) and potentially accent lighting for a more functional and aesthetically pleasing kitchen lighting design.
Q4: Should can lights be in the center of each ceiling section?
A4: Recessed lighting placement is best done with a grid pattern for even illumination. While some lights might fall in the center of a section, it’s more about achieving consistent spacing across the entire ceiling and over work areas.
Q5: What is the best type of bulb for kitchen recessed lighting?
A5: LED bulbs are the best choice for recessed lighting kitchen setups due to their energy efficiency, longevity, and wide variety of color temperatures and lumen outputs.
Q6: How do I calculate the number of recessed lights for my specific kitchen?
A6: To calculate the number of recessed lights, measure your kitchen’s square footage, decide on your desired foot-candle level, choose bulbs with a known lumen output, and then factor in can light spacing guidelines, considering your ceiling height and the beam spread of the lights.
By following these guidelines and carefully planning your kitchen lighting layout, you can ensure your kitchen is beautifully and functionally illuminated. This kitchen illumination guide should provide a solid foundation for achieving your ideal kitchen lighting.