
Can you fix a leaky mobile home kitchen faucet yourself? Yes, most common mobile home kitchen faucet problems, like leaks or low water pressure, can be repaired with basic tools and a bit of patience. This guide will walk you through how to repair a mobile home kitchen faucet, covering everything from simple fixes to more involved replacements.
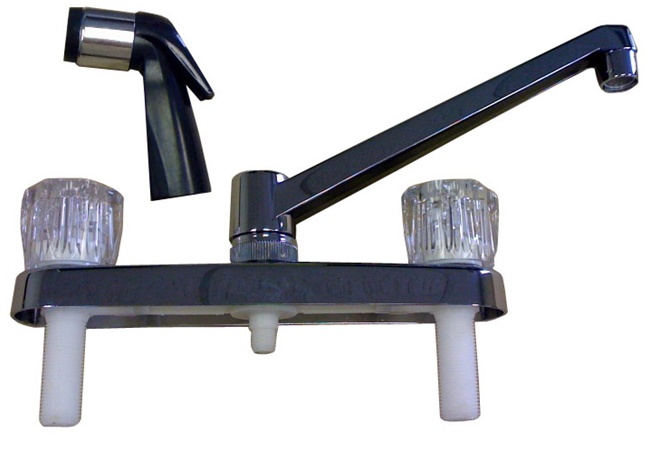
Image Source: www.completemobilehomesupply.com
Troubleshooting Common Mobile Home Kitchen Faucet Issues
Mobile home kitchens often feature unique plumbing setups. When your mobile home kitchen faucet acts up, don’t get discouraged. Many issues are straightforward to address. Here’s a look at common problems and how to tackle them.
Identifying the Root Cause of a Leaky Faucet
A drip, drip, drip from your mobile home kitchen sink is more than just annoying; it wastes water and can increase your bills. The most frequent culprit for a leaky mobile home kitchen faucet is a worn-out washer or O-ring inside the faucet’s handle mechanism.
Common Leak Locations:
- From the Spout: This usually means the internal valve seat or a worn washer needs replacement.
- Around the Handle: This often points to a faulty O-ring or cartridge seal.
- From the Base of the Spout: A loose mounting nut or a worn O-ring at the base can cause this.
Low Water Pressure Explained
If your mobile home kitchen faucet isn’t delivering water with the force it used to, several things could be wrong. It’s not always a major plumbing emergency.
Potential Causes:
- Clogged Aerator: This is the most common reason for reduced flow. The aerator is the small screen at the tip of the spout.
- Kinked Water Supply Line: The flexible hoses connecting the faucet to the water supply might be bent, restricting flow.
- Issues with the Shut-off Valves: The valves under the sink that control water flow to the faucet might not be fully open or could be partially blocked. This relates to mobile home kitchen sink valve repair.
- Worn Cartridge or Valve Stem: Internal parts within the faucet can wear down over time, impacting pressure.
Essential Tools and Materials for Mobile Home Kitchen Faucet Repair
Before you begin, gather your tools and supplies. Having everything ready makes the job much smoother. For most mobile home kitchen sink repair tasks, you’ll need common household tools.
Tool Kit Essentials:
- Adjustable wrench
- Phillips and flathead screwdrivers
- Plumber’s tape (Teflon tape)
- Bucket and old towels (to catch water)
- Penetrating oil (like WD-40)
- Safety glasses
- Replacement washers, O-rings, or cartridges (ensure you have the correct mobile home kitchen faucet parts)
- Basin wrench (for tight spaces under the sink)
- Utility knife or putty knife
- Vinegar and an old toothbrush for cleaning
Step-by-Step Guide to Repairing a Leaky Mobile Home Kitchen Faucet
Fixing a leaky faucet is a common DIY project. The process often involves accessing the internal components of the faucet.
Step 1: Shut Off the Water Supply
This is the absolute first step for any faucet repair.
1. Locate the shut-off valves under your mobile home kitchen sink. There should be one for hot water and one for cold.
2. Turn both valves clockwise until they are fully closed.
3. Turn the faucet on to drain any remaining water in the lines and confirm the water is off.
Step 2: Disassemble the Faucet Handle
The way you access the internal parts depends on your faucet type (single-handle or double-handle).
For Single-Handle Faucets:
1. Look for a small decorative cap on the handle. This usually covers a screw.
2. Carefully pry off the cap with a small flathead screwdriver or a utility knife.
3. Use a screwdriver to remove the screw holding the handle in place.
4. Pull the handle straight up and off. It might be stuck; a gentle wiggle or a bit of penetrating oil can help.
For Double-Handle Faucets:
1. Each handle will have a decorative cap on top or a screw on the side.
2. Pry off the cap or remove the visible screw.
3. Unscrew the packing nut or bonnet nut that secures the stem or cartridge. You might need an adjustable wrench.
4. Lift the handle off the stem.
Step 3: Identify and Replace Worn Parts
Once the handle is off, you’ll see the internal workings.
For Cartridge Faucets (Common in Newer Mobile Homes):
1. You’ll see a cartridge, which is a self-contained unit controlling water flow.
2. There might be a retaining clip holding the cartridge in place. Remove it carefully with pliers or a screwdriver.
3. Grip the cartridge with pliers and pull it straight out.
4. Take the old cartridge to a hardware store to find an exact match. You need specific mobile home kitchen faucet parts.
5. Insert the new cartridge, ensuring it’s oriented correctly. Reinstall the retaining clip.
For Compression Faucets (Older Style):
1. You’ll see a valve stem.
2. Unscrew the stem from the faucet body using a wrench.
3. At the bottom of the stem, you’ll find a small rubber washer held in place by a screw. This is the most common cause of drips.
4. Remove the screw and the old washer.
5. Replace it with a new washer of the same size and shape.
6. You may also find an O-ring around the stem; replace this if it looks worn.
7. Reassemble the stem, tightening the screw securely.
Step 4: Reassemble the Faucet
Carefully put everything back together in reverse order.
1. Reinstall the handle and its screw.
2. Replace the decorative cap.
3. Make sure all nuts are snug but not overtightened.
Step 5: Test for Leaks
- Slowly turn the water supply valves back on.
- Check carefully for any leaks around the handle or spout.
- Turn the faucet on and off a few times to ensure it’s working correctly.
Fixing Low Water Pressure in Your Mobile Home Kitchen Faucet
If low pressure is the issue, start with the simplest solutions.
Cleaning the Aerator
The aerator is a small, removable screen at the tip of your faucet spout. It filters debris but can get clogged over time.
- Remove the Aerator: Most aerators can be unscrewed by hand, counter-clockwise. If it’s tight, use an adjustable wrench with a cloth to protect the finish.
- Disassemble and Clean: Take the aerator apart. You’ll usually find a screen and possibly a small rubber washer. Rinse all parts under running water. Use an old toothbrush and a bit of vinegar to scrub away mineral deposits.
- Reassemble and Reinstall: Put the aerator back together and screw it back onto the faucet spout, clockwise.
- Test: Turn on the water and check the flow. This simple mobile home kitchen tap fix often resolves low pressure.
Checking Water Supply Lines and Valves
If the aerator is clean, investigate the supply lines.
- Inspect Supply Lines: Ensure the flexible hoses leading to the faucet aren’t kinked or twisted. Straighten them if necessary.
- Examine Shut-off Valves: Confirm that the shut-off valves under the sink are fully open. Sometimes they can vibrate loose or not be fully turned. If you suspect a valve is faulty or clogged, this might require a mobile home kitchen sink valve repair or replacement, which can be a bit more involved.
Replacing a Faucet in a Mobile Home Kitchen
When repairs aren’t enough, or you simply want an upgrade, replacing the entire faucet is the next step. Replacing faucet in mobile home kitchen involves similar steps to repair but requires disconnecting and reconnecting water lines.
Step 1: Shut Off Water and Drain Lines
As always, turn off the hot and cold water supply valves under the sink and open the faucet to release pressure.
Step 2: Disconnect Water Supply Lines
- Place a bucket under the connections to catch any residual water.
- Use an adjustable wrench to disconnect the flexible supply lines from the shut-off valves.
- Disconnect the other end of the supply lines from the faucet tails (the threaded pipes extending from the faucet base).
Step 3: Remove the Old Faucet
- Under the sink, locate the mounting nuts that hold the faucet to the sink or countertop.
- Use a basin wrench to loosen and remove these nuts. This can be tricky due to limited space.
- Once the nuts are removed, carefully lift the old faucet assembly straight up and out from the top of the sink.
Step 4: Prepare the New Faucet
- Unpack your new faucet and read the manufacturer’s instructions.
- Some new faucets come with attached supply lines. If not, attach new flexible supply lines to the faucet tails, wrapping plumber’s tape around the threads before tightening.
Step 5: Install the New Faucet
- Feed the faucet tails and supply lines through the holes in the sink or countertop.
- From underneath, install any included gaskets or sealing compound onto the faucet base.
- Thread on the mounting nuts and tighten them securely with the basin wrench, ensuring the faucet is straight. Don’t overtighten, as you could damage the sink.
Step 6: Connect Water Supply Lines
- Connect the new supply lines to the shut-off valves, using plumber’s tape on the valve threads.
- Tighten the connections with an adjustable wrench.
Step 7: Test for Leaks and Functionality
- Slowly turn the water supply valves back on.
- Check all connections under the sink for leaks.
- Turn on the new faucet and test both hot and cold water. Flush the lines for a minute or two to clear out any air or debris.
This completes your DIY mobile home kitchen faucet replacement.
Mobile Home Kitchen Faucet Maintenance Tips
Regular care can prevent many problems and extend the life of your faucet.
- Regular Cleaning: Wipe down your faucet regularly with a soft, damp cloth to prevent mineral buildup and maintain its shine. Avoid abrasive cleaners.
- Check for Leaks: Make it a habit to check for drips or leaks around the handle and spout. Addressing small leaks early prevents them from becoming bigger problems.
- Inspect O-rings and Washers: If your faucet is older or you start noticing minor drips, consider replacing the O-rings and washers as a preventative measure. This is a simple mobile home kitchen faucet maintenance task.
- Test Water Pressure: Periodically check your water pressure to catch any early signs of clogs or issues.
- Use the Right Mobile Home Kitchen Faucet Parts: When replacing parts, always ensure you are using compatible and good-quality mobile home kitchen faucet parts to avoid future issues.
When to Call a Professional
While many mobile home kitchen faucet repairs and replacements are manageable DIY projects, there are times when it’s best to call a plumber.
- Persistent Leaks: If you’ve tried replacing common parts and the leak persists, there might be a more complex issue with the faucet body or the water lines.
- Corroded or Damaged Pipes: If you notice significant corrosion or damage to the pipes or shut-off valves under your sink, it’s safer to let a professional handle it.
- Unfamiliarity with Plumbing: If you’re not comfortable working with plumbing or don’t have the necessary tools, hiring a professional ensures the job is done correctly and safely.
- Complex Faucet Types: Some modern faucets have intricate mechanisms that can be challenging for beginners.
Frequently Asked Questions (FAQ)
Q1: What type of faucet is common in mobile homes?
A1: Mobile homes commonly feature single-handle cartridge faucets or older-style double-handle compression faucets. The plumbing connections can sometimes be different from standard site-built homes, so it’s essential to identify your specific faucet type when seeking mobile home kitchen faucet parts.
Q2: How do I know if I need to replace my mobile home kitchen faucet or just repair it?
A2: If your faucet leaks from the spout or handle and replacing the internal washers, O-rings, or cartridge fixes the problem, a repair is sufficient. If the faucet body is cracked, heavily corroded, or if multiple repair attempts fail, replacement is usually the better option.
Q3: Can I use parts from a standard home faucet for my mobile home kitchen faucet?
A3: While some parts might be interchangeable, it’s best to use parts specifically designed for mobile home faucets or measure your existing parts precisely. Mobile home plumbing can sometimes have slightly different dimensions or materials. Always confirm compatibility of mobile home kitchen faucet parts before purchasing.
Q4: What is the lifespan of a mobile home kitchen faucet?
A4: With proper mobile home kitchen faucet maintenance, a faucet can last anywhere from 10 to 15 years or even longer. However, the lifespan can be shorter if exposed to hard water or if it’s not regularly maintained.
Q5: Is it difficult to do a DIY mobile home kitchen faucet replacement?
A5: Replacing a faucet is a moderately difficult DIY task. It requires basic mechanical skills and the right tools. If you are comfortable working under your sink and following instructions, it’s achievable. However, if you’re unsure, especially about connecting water lines, consider professional help for your mobile home kitchen faucet installation.
This comprehensive guide provides the steps and information needed for most mobile home kitchen sink repair and replacement tasks, empowering you to tackle common issues with confidence.