
Image Source: contentgrid.homedepot-static.com
DIY: How To Build A Kitchen Counter Frame
Can you build a kitchen counter frame yourself? Yes, you absolutely can! Building your own kitchen counter frame is a rewarding DIY project that can save you money and allow for complete customization of your kitchen space. Whether you’re aiming for a sleek modern look or a cozy farmhouse feel, the foundation of your dream countertop starts with a solid, well-built frame. This guide will walk you through the entire process, from planning to the final touches, ensuring you have the structural support kitchen needs for years to come.
This comprehensive guide will cover everything you need to know about constructing a durable and reliable kitchen counter base, whether it’s for a full kitchen renovation or a standalone kitchen island framing project. We’ll delve into material selection, essential tools, and step-by-step instructions for creating a robust wood frame kitchen. By the end, you’ll have the knowledge and confidence to tackle this project and bring your kitchen design vision to life.
Planning Your Kitchen Counter Frame
Before you grab your saw and screws, careful planning is crucial for a successful project. This phase involves assessing your space, determining the size and shape of your counter, and choosing the right materials. A well-thought-out plan will prevent costly mistakes and ensure your countertop support is exactly what you envision.
Measuring Your Space
Accurate measurements are the bedrock of any construction project. Take precise measurements of the area where your counter will be installed. Consider the overall length, width, and desired height. Don’t forget to account for existing cabinets, appliances, and doorways. Measure from the wall to the edge of any existing cabinets, and note the height of your existing countertops if you’re replacing them.
- Length: Measure the total length of the counter run.
- Width (Depth): Determine how far the counter will extend from the wall. Standard depths are around 24-25 inches, but this can be customized.
- Height: Standard countertop height is typically 36 inches from the finished floor. Measure from your subfloor to the desired finished height, accounting for the thickness of your countertop material and any existing flooring.
- Obstructions: Note the placement of electrical outlets, plumbing, windows, and doors. Ensure your frame design accommodates these elements.
Designing Your Frame
Your design will depend on the type of countertop you plan to install. Different materials have different weight requirements and may need specific types of countertop support.
- For Laminate or Butcher Block: A simpler frame with joists spaced appropriately can provide sufficient support.
- For Stone or Solid Surface (Granite, Quartz, Marble): These materials are significantly heavier and require a more robust frame with closer spacing of structural members and potentially thicker lumber. You might even consider adding plywood or MDF to the top of the frame for a smoother, more even surface.
Consider the layout of your kitchen cabinet frame if your counter will integrate with them. Will the frame butt up against the cabinets, or will it extend beyond them? Will there be any overhang for seating at a kitchen island?
Material Selection
The choice of lumber is critical for the strength and longevity of your counter structure.
-
Framing Lumber:
- Spruce, Fir, Pine (SPF): These are common and affordable choices for framing. Opt for straight, knot-free pieces.
- Dimensional Lumber: You’ll primarily be working with 2x4s and 2x6s. The choice between them depends on the required strength and span. For heavier countertops or longer spans, 2x6s will offer better structural support kitchen.
-
Plywood or MDF (Optional):
- For a smoother, more stable surface for certain countertop materials, a layer of 3/4-inch plywood or MDF can be added on top of the frame. This is especially recommended for granite, quartz, or tile countertops to prevent flexing and ensure an even surface.
-
Fasteners:
- Wood Screws: Use sturdy wood screws (e.g., #8 or #10 gauge) in various lengths (1.5-inch, 2.5-inch, 3-inch). For structural connections, consider lag screws or bolts.
- Construction Adhesive: This can add extra strength to joints.
Tool Checklist
Having the right tools will make the job significantly easier and safer.
- Measuring Tape: Essential for accurate measurements.
- Pencil: For marking cut lines.
- Safety Glasses: Always wear eye protection when cutting or drilling.
- Hearing Protection: Especially when using power saws.
- Circular Saw or Miter Saw: For cutting lumber to size. A miter saw will provide cleaner, more accurate cuts.
- Drill/Driver: For pre-drilling pilot holes and driving screws.
- Level: To ensure your frame is perfectly plumb and level.
- Speed Square or Combination Square: For marking precise 90-degree angles.
- Stud Finder: If attaching your frame to existing walls.
- Clamps: To hold pieces in place while assembling.
- Sander (Optional): To smooth rough edges.
Building the Kitchen Counter Frame: Step-by-Step
Now that you have a plan and your materials, it’s time to get building! This process involves constructing the main supporting members and then adding cross bracing for rigidity.
Step 1: Constructing the Base and Supports
The foundation of your frame will likely consist of vertical supports and horizontal top and bottom plates.
- Wall-Supported Counters: If your counter is against a wall, you’ll likely attach a ledger board directly to the wall studs. This board will carry the back edge of your countertop. For the front edge, you’ll build a series of vertical supports (legs) and horizontal members.
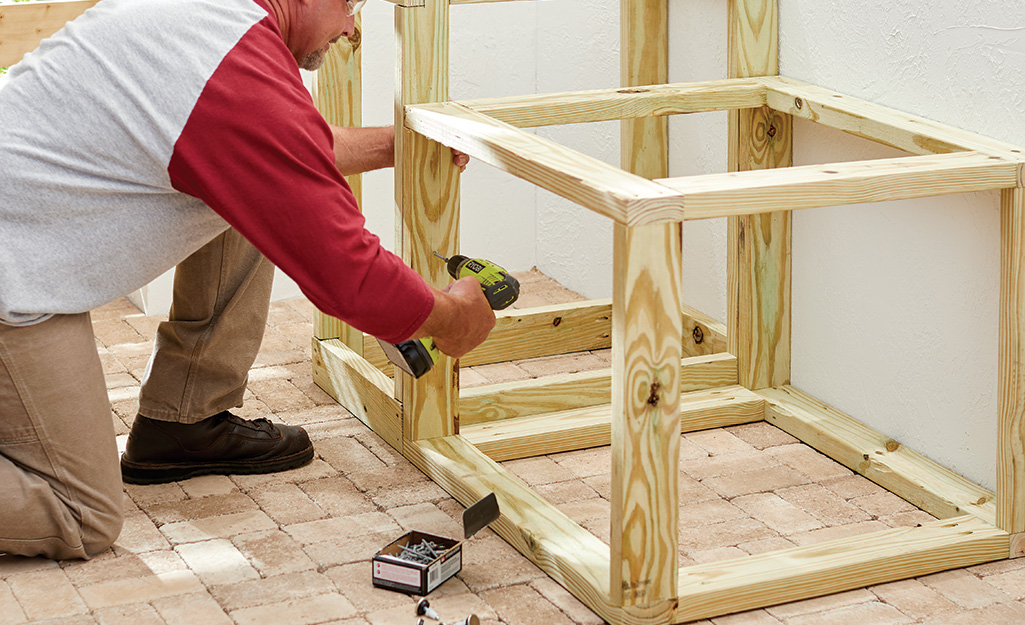
- Island Framing: For a freestanding kitchen island, you’ll build a complete box-like structure.
Let’s focus on building a typical freestanding frame, often used for a kitchen island framing project or a counter that doesn’t attach directly to a wall on all sides.
Creating the Base Structure (e.g., for a 6-foot counter)
-
Cut Your Lumber: Based on your measurements, cut your 2x4s.
- Longitudinal Members: You’ll need two long pieces for the front and back of your base. For a 6-foot counter (72 inches), these would be 72 inches long.
- Transverse Members (Cross Braces): You’ll need shorter pieces to connect the front and back members. The width of your counter will determine these lengths. If your counter is 25 inches deep, these pieces would be 25 inches minus the thickness of your front and back members (two 2x4s are actually 1.5 inches thick each, so 25 – 3 = 22 inches).
-
Assemble the Base Rectangle: Lay out your two long members parallel to each other. Position the transverse members between them at regular intervals. For a 6-foot counter, spacing these about 16-24 inches apart will provide good support.
-
Secure the Base: Pre-drill pilot holes to prevent splitting. Use 2.5-inch or 3-inch wood screws to attach the transverse members to the longitudinal members. Ensure all corners are square using your speed square. You can also add a layer of construction adhesive for extra strength before screwing.
Adding Vertical Supports
- Cut Vertical Studs: Determine the desired height of your frame (typically 34.5 inches to achieve a 36-inch finished counter height with a 1.5-inch countertop). Cut 2x4s to this length.
- Attach Vertical Supports: Position these vertical studs at each corner of your base rectangle and at each transverse member. They should be flush with the outside edges of the base.
- Secure Vertical Supports: Pre-drill and screw through the base’s longitudinal and transverse members into the bottom of the vertical studs using 3-inch screws.
Step 2: Building the Top Frame and Adding Cross Bracing
This is where you create the surface that will directly support your countertop.
Creating the Top Frame
- Cut Top Members: Similar to the base, cut two long pieces and several shorter transverse pieces for the top of your frame. These should match the dimensions of your base frame.
- Assemble the Top Rectangle: Lay out the long top members parallel to each other. Position the transverse top members between them at the same intervals as the base.
- Secure the Top Frame: Pre-drill and screw the transverse top members to the longitudinal top members.
Attaching the Top Frame to the Vertical Supports
- Position the Top Frame: Carefully place the assembled top frame onto the tops of the vertical studs. Ensure it’s flush and square.
- Secure the Top Frame: Pre-drill pilot holes and drive screws through the top frame members into the top of each vertical stud. Use 3-inch screws for a strong connection.
Step 3: Adding Internal Bracing for Enhanced Support
For heavier countertops or longer spans, adding internal bracing is crucial for countertop support and preventing any flexing or sagging. This is where the concept of building kitchen cabinets as a solid unit is relevant, as a robust frame is key.
Adding Stringers (Longitudinal Bracing)
- Placement: Add additional 2x4s (or 2x6s for extra strength) running longitudinally between the front and back top frame members. Place these in between your existing transverse members. The spacing will depend on your countertop material, but generally, placing them every 8-12 inches provides excellent support.
- Securing: Cut these stringers to fit snugly between the transverse members. Pre-drill and screw them into the top frame members at each end.
Adding Intermediate Cross Bracing
- Placement: For very long runs, you might consider adding diagonal bracing or additional short horizontal braces within the frame to further stiffen the structure.
Step 4: Reinforcing for Heavier Countertops
If you’re using granite, quartz, or a thick butcher block, you’ll want to add extra layers of support.
-
Plywood/MDF Overlay:
- Cut a piece of 3/4-inch plywood or MDF to the exact dimensions of your frame.
- Apply construction adhesive to the top of the frame.
- Lay the plywood/MDF onto the frame, ensuring it’s flush.
- Secure it with 1.5-inch screws, spaced every 6-8 inches along the perimeter and across the internal supports. This creates a very stable and smooth surface for your countertop.
-
Double-Up Supports:
- For critical support areas (like the front edge or corners), you can double up your 2x4s by screwing them together. This creates a more substantial support beam.
Step 5: Attaching to Walls (If Applicable)
If your counter frame is against a wall, you’ll need to secure it properly.
- Locate Wall Studs: Use a stud finder to locate the wall studs where your frame will meet the wall. Mark their centers.
- Drill Pilot Holes: Drill pilot holes through the back of your frame’s top and bottom plates (or ledger board) that will align with the wall studs.
- Secure the Frame: Use long lag screws (e.g., 3-inch or longer) or structural screws to securely attach the frame to the wall studs. Ensure the frame is level and plumb before fully tightening the screws.
Special Considerations for Kitchen Island Framing
Building a kitchen island framing often involves creating a more enclosed structure with potential for appliance integration or cabinet bases.
- Corner Posts: Ensure robust corner posts, potentially made from doubled-up 2x4s or even 4x4s for very large islands.
- Appliance Openings: If you’re incorporating a dishwasher, range, or sink, you’ll need to frame precise openings within your island structure. Measure the appliance dimensions carefully and build reinforced openings to accommodate them. This is a key aspect of building kitchen cabinets that are functional.
- Toe Kick: Consider adding a toe kick at the base of the island. This is a recessed area at the bottom of the cabinetry that allows you to stand closer to the counter without stubbing your toes. It’s typically achieved by building the base slightly further back or by adding a separate toe kick piece.
- Drawer and Cabinet Support: If your island will house drawers or cabinets, ensure the framing provides adequate support for the cabinet boxes and their contents. This is where the concept of the kitchen cabinet frame as a component of the overall structure becomes important.
Final Touches and Preparation for Countertop Installation
Once the frame is built, there are a few final steps to ensure it’s ready for your countertop.
- Check for Level and Square: Use your level to ensure the entire frame is perfectly level in all directions. Shim any low spots with thin pieces of wood if necessary. Double-check that all corners are square (90 degrees).
- Sand Rough Edges: Lightly sand any rough edges or splinters, especially on the top surface, to prevent injury and provide a cleaner surface for adhesive or caulk.
- Clean the Surface: Remove any sawdust or debris from the top of the frame. A vacuum cleaner works well for this.
- Apply Sealant (Optional): For wooden frames, especially in a kitchen environment where moisture can be a concern, applying a coat of wood sealant or primer can offer additional protection against spills and humidity.
Frequently Asked Questions (FAQ)
Here are some common questions people have when building a kitchen counter frame:
Q1: What is the standard height for a kitchen counter frame?
A1: The standard finished countertop height is 36 inches from the floor. Therefore, your frame’s top surface should be approximately 34.5 inches high to accommodate a 1.5-inch thick countertop.
Q2: Can I use 2x4s for all my kitchen counter framing?
A2: For laminate, butcher block, or lighter materials, 2x4s are usually sufficient. However, for heavier materials like granite or quartz, consider using 2x6s for the main support members and increasing the frequency of your cross bracing to ensure adequate structural support kitchen.
Q3: How far apart should the supports (joists) be in my kitchen counter frame?
A3: For general-purpose framing, spacing transverse members and stringers every 16-24 inches is typical. For heavier countertops, reducing this spacing to 8-12 inches is recommended for better countertop support.
Q4: Do I need to attach the frame to the wall studs?
A4: If your counter is against a wall, yes, securing the frame to wall studs is crucial for stability and safety. Use lag screws or structural screws for a strong connection.
Q5: What is the best material for a DIY kitchen counter frame?
A5: Standard dimensional lumber like SPF (Spruce, Fir, Pine) is a common and cost-effective choice. Opt for straight, knot-free pieces for the strongest frame.
Q6: How do I ensure my kitchen island framing is strong enough?
A6: Use doubled-up lumber for corner posts and critical support areas. Increase the frequency of your cross bracing and consider adding a plywood or MDF overlay to the top for added rigidity, especially for heavy countertops.
Q7: What is a ledger board?
A7: A ledger board is a horizontal piece of lumber securely attached to wall studs that supports the back edge of a countertop or shelf.
By following these detailed steps and considering the specific needs of your kitchen project, you can confidently build a robust and reliable kitchen counter frame. This foundational element will ensure your beautiful new countertop is supported safely and effectively for years to come, enhancing both the functionality and aesthetic of your kitchen. Remember, careful planning and precise execution are key to a successful DIY build. Enjoy your newly framed countertops!