
Can you paint kitchen cupboards without sanding? Yes, you absolutely can! With the right paints and a few simple techniques, you can achieve a beautiful, durable finish on your kitchen cabinets without the mess and hard work of sanding. This guide will walk you through everything you need to know for a successful cabinet painting without sanding project. Get ready for an amazing DIY kitchen cupboard makeover no sanding!
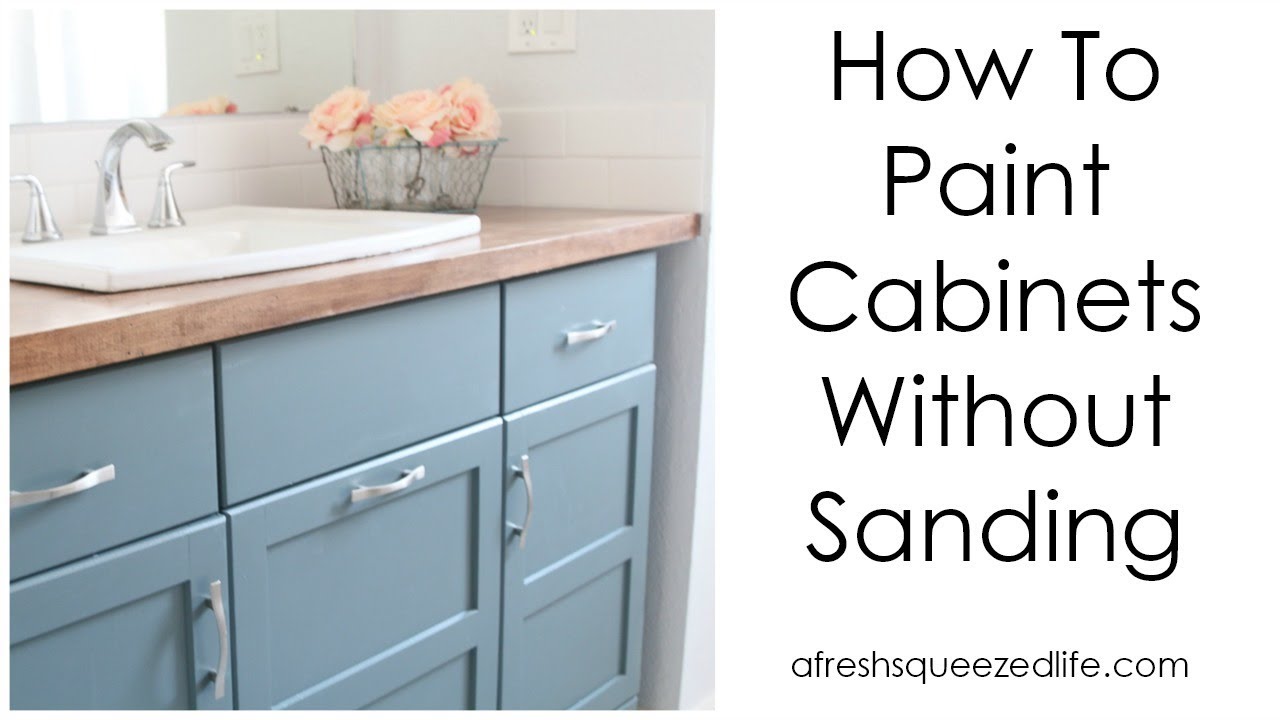
Image Source: i.ytimg.com
Why Skip the Sanding?
Sanding kitchen cabinets is often seen as a necessary evil for a good paint job. It’s typically done to create a surface that paint can adhere to. However, modern advancements in paint technology have introduced products specifically designed for kitchen cabinet refinishing no prep. These paints offer excellent adhesion to various surfaces, including laminate, melamine, and already-finished wood, making the sanding step largely optional for a flawless outcome.
The Magic of No-Sand Cupboard Paint
The secret to paint cabinets without stripping and without sanding lies in specialized paints. These are not your average wall paints. They are formulated with superior bonding agents that can grip directly onto slick surfaces.
Types of No-Sand Paints:
- Bonding Primers: These are crucial. A high-quality bonding primer acts as the foundation, creating an exceptional surface for your topcoat to adhere to. They are designed to stick to surfaces that paint normally wouldn’t, like glossy finishes.
- All-in-One Paints: Some paints combine primer and paint in a single can. These are incredibly convenient and effective for easy kitchen cabinet painting no sanding. They often have a built-in bonding agent.
- Mineral Paints/Chalk Paints: While not always explicitly marketed as “no-sand,” many chalk paint kitchen cupboards no sanding enthusiasts find success. Chalk paint inherently adheres well to many surfaces, and a good topcoat (like polycrylic or wax) provides durability.
Prepping Your Kitchen Cupboards: The “No-Sand” Way
Even without sanding, proper preparation is key. This is where you’ll spend most of your time, and it’s critical for a long-lasting finish. Think of this as the essential “prep” in kitchen cabinet refinishing no prep.
What You’ll Need:
- Screwdriver or drill with appropriate bits
- Cleaning supplies:
- Degreaser (TSP substitute or a good degreasing cleaner)
- Clean rags or microfiber cloths
- Bucket
- Water
- Painter’s tape
- Drop cloths
- Sanding sponge (optional, for minor touch-ups or smoothing)
- Gloves and eye protection
- No-sand cupboard paint or bonding primer and topcoat
- High-quality paint brushes (angled sash brush for corners, flat brush for large areas)
- Foam rollers (for smooth finishes)
- Paint tray
- Optional: Respirator for fumes, paint sprayer for spray painting kitchen cabinets no sanding.
Step-by-Step Preparation:
Step 1: Empty and Remove Cabinet Doors and Drawers
- Take everything out of your cabinets and drawers.
- Use your screwdriver or drill to remove all doors and drawer fronts. It’s helpful to label them with masking tape and a marker as you remove them (e.g., “Upper Left,” “Drawer 2”). This ensures they go back in the correct place.
- Remove all hardware (hinges, knobs, pulls). Store them in a safe place, perhaps in labeled baggies.
Step 2: Thorough Cleaning is Crucial
This is the most important step when cabinet painting without sanding. Kitchen cabinets are notorious for collecting grease, grime, and cooking residue. If you don’t clean them thoroughly, your paint won’t adhere properly, leading to peeling or chipping.
- Degrease: Use a strong degreaser. A TSP substitute is excellent for this. Mix it with warm water according to the product instructions.
- Wipe Down: Dip your rag into the cleaning solution, wring it out well, and wipe down every surface of the doors, drawer fronts, and the cabinet frames. Work in sections.
- Rinse: After degreasing, you need to rinse off the cleaner residue. Use a clean rag dampened with plain water. Again, work in sections and wring out the rag frequently.
- Dry: Use clean, dry microfiber cloths to dry all surfaces completely. Any lingering moisture can affect paint adhesion.
Step 3: Lightly Buff (Optional but Recommended)
While we’re skipping sanding, a very light buff can help create a slightly more receptive surface.
- Use a fine-grit sanding sponge (around 220-grit) or a very fine-grit sandpaper.
- Gently scuff the surfaces. You’re not trying to remove the old finish, just to create a microscopic roughness. This is not a heavy sanding; think of it as a light “keying” of the surface.
- Wipe down the cabinets again with a tack cloth or a microfiber cloth to remove any dust.
Step 4: Tape Off and Protect
- Use good quality painter’s tape to mask off any areas you don’t want to paint. This includes the inside edges of cabinet frames, countertops, appliances, and walls. Press the tape down firmly to prevent paint from bleeding underneath.
- Lay down drop cloths to protect your floors and any surrounding furniture from drips and spills.
Applying Your No-Sand Paint: The Painting Process
Now comes the exciting part – applying the paint! The technique will vary slightly depending on whether you’re using a bonding primer and topcoat or an all-in-one paint.
Method 1: Bonding Primer + Topcoat (Recommended for Durability)
This is a tried-and-true method that provides excellent adhesion and a durable finish, perfect for updating kitchen cabinets no sanding.
Step 1: Apply Bonding Primer
- Choose Wisely: Select a high-quality bonding primer designed for slick surfaces. Brands like Kilz Adhesion, Zinsser B-I-N Shellac-Based Primer, or Sherwin-Williams Extreme Cover are excellent choices.
- Application:
- Stir the primer thoroughly.
- Using a high-quality brush or a foam roller, apply a thin, even coat of primer. Avoid applying it too thickly, as this can lead to drips and an uneven finish.
- For spray painting kitchen cabinets no sanding, use a fine-tune setting on your sprayer for a smooth, even coat.
- Pay attention to corners and edges with your brush.
- Drying Time: Allow the primer to dry completely according to the manufacturer’s instructions. This is crucial for proper bonding. Most bonding primers require at least a few hours, but some recommend overnight drying.
Step 2: Lightly Scuff (Optional, but enhances adhesion)
- Once the primer is fully dry, you can optionally do a very light scuff sand with a 220-grit or finer sanding sponge. This will further enhance adhesion for the topcoat.
- Wipe away all dust with a tack cloth.
Step 3: Apply the Topcoat
- Paint Choice: You can use a durable enamel paint, cabinet-specific paint, or even a high-quality latex paint.
- Application:
- Stir your topcoat paint thoroughly.
- Apply thin, even coats. This is key to a smooth, professional-looking finish. Two to three thin coats are better than one thick coat.
- Use your brush for corners and edges, and a foam roller for the flat surfaces of the doors and drawer fronts.
- If spray painting kitchen cabinets no sanding, ensure you maintain a consistent distance and speed for an even spray.
- Allow each coat to dry completely before applying the next. Check the paint can for recommended drying times between coats.
Step 4: Reapply Topcoat as Needed
- Most cabinet painting projects will require at least two to three coats of your chosen topcoat for full coverage and durability.
Method 2: All-in-One Paint
These paints simplify the process by combining priming and painting in one. Many brands offer formulations specifically for cabinets.
Step 1: Apply the Paint
- Choose Your Paint: Look for paints marketed as “all-in-one,” “cabinet paint,” or “direct-to-surface” formulas. These often have excellent adhesion.
- Application:
- Stir the paint well.
- Apply thin, even coats using a brush or foam roller.
- For spray painting kitchen cabinets no sanding, use appropriate settings and maintain consistent technique.
- Avoid overloading your brush or roller, which can lead to drips and uneven coverage.
- Drying Time: Allow each coat to dry thoroughly according to the manufacturer’s instructions before applying the next. This is vital for the paint to cure properly.
Step 2: Apply Additional Coats
- Most all-in-one paints will require two to three coats for optimal coverage and durability.
Method 3: Chalk Paint Kitchen Cupboards No Sanding
Chalk paint offers a lovely matte finish and adheres well to many surfaces with minimal prep.
Step 1: Apply Chalk Paint
- Clean Thoroughly: As always, a thorough cleaning is essential.
- Apply Chalk Paint:
- Stir the chalk paint well.
- Apply thin, even coats using a good quality brush. Chalk paint is known for its brushstroke texture, which can be desirable. If you want a smoother finish, use a foam roller or spray.
- Allow each coat to dry completely. Chalk paint dries quickly.
- Multiple Coats: You’ll likely need 2-3 coats for full coverage.
Step 2: Seal the Finish
- Chalk paint is porous and requires a protective topcoat to be durable, especially in a high-traffic area like a kitchen.
- Sealing Options:
- Polyurethane/Polycrylic: A water-based polycrylic is a good choice for durability and is less likely to yellow than oil-based polyurethane. Apply 2-3 thin coats.
- Wax: Furniture wax can also be used, offering a lovely soft sheen. However, it’s less durable than polycrylic and may need reapplication over time. Apply in thin layers with a wax brush or lint-free cloth, buffing between coats.
Painting Cabinet Frames
Don’t forget the cabinet frames that are attached to your walls!
- Prep: Clean them thoroughly just as you did the doors and drawer fronts.
- Tape: Carefully tape off the surrounding walls, countertops, and appliances.
- Paint: Use your brush and roller to paint the frames. You might find it easier to paint the frames after the doors and drawers are dry and reattached, but you can also do them first. If painting first, be extra careful not to scuff the freshly painted frames when you reattach the doors.
Reassembly and Finishing Touches
Once all your painted parts are completely dry and cured (this can take several days to a week, depending on the paint), it’s time to put everything back together.
- Reattach Hardware: Install your cabinet knobs and pulls. You might consider updating your hardware for a fresh look.
- Rehang Doors and Drawers: Carefully rehang the doors and reinsert the drawers.
- Clean Up: Remove all painter’s tape and drop cloths. Clean your brushes and rollers.
Tips for a Flawless Finish
Here are some extra kitchen cupboard painting tips no sanding to help you achieve professional results:
- Work in a Well-Ventilated Area: Even if you’re not sanding, paint fumes can be strong. Open windows or use fans. Consider wearing a respirator, especially when spray painting.
- Lighting is Key: Ensure you have good lighting so you can see your work clearly and avoid missed spots or drips.
- Thin Coats are Your Friend: This cannot be stressed enough. Thin, even coats are the secret to avoiding drips, brush marks, and an uneven finish.
- Use the Right Tools: Invest in good quality brushes and rollers. They make a huge difference in the final appearance. For a very smooth finish, a high-quality foam roller or a paint sprayer is ideal for spray painting kitchen cabinets no sanding.
- Patience with Drying Times: Resist the urge to rush. Allow each coat to dry completely. This ensures proper adhesion and a durable finish.
- Test a Small Area: If you’re unsure about a specific paint or surface, test it on the back of a cabinet door or an inconspicuous area first.
- Consider Paint Finish: A satin or semi-gloss finish is generally recommended for kitchen cabinets as it’s more durable and easier to clean than a matte finish. However, chalk paint kitchen cupboards no sanding can be sealed with durable polycrylics for better performance.
Comparing Painting Methods Without Sanding
| Feature | Bonding Primer + Topcoat | All-in-One Paint | Chalk Paint + Sealant |
|---|---|---|---|
| Adhesion | Excellent | Very Good | Good (requires sealant) |
| Durability | Excellent | Very Good | Good (depends on sealant) |
| Finish Options | Wide variety of colors and sheens | Limited, but growing | Matte (with sealant options for sheen) |
| Application | Two steps (primer, then paint) | One step | Two steps (paint, then sealant) |
| Prep Required | Thorough cleaning, optional light scuff | Thorough cleaning, optional light scuff | Thorough cleaning |
| Ideal For | High-traffic kitchens, maximum durability | Quick updates, good durability | Unique finishes, DIY enthusiasts |
| Cost | Can be more expensive (primer + paint) | Mid-range | Mid-range to higher (depending on brands) |
| DIY Level | Intermediate | Easy | Easy to Intermediate (sealing can be tricky) |
Frequently Asked Questions (FAQ)
Q1: What is the best paint for kitchen cabinets without sanding?
The best paints are those specifically formulated for high adhesion to slick surfaces. This includes specialized bonding primers followed by a durable topcoat (like acrylic enamel or cabinet-specific paint), or high-quality all-in-one cabinet paints. For chalk paint kitchen cupboards no sanding, ensure you use a robust sealant like polycrylic for durability.
Q2: Can I paint over laminate or melamine cabinets without sanding?
Yes, you absolutely can paint over laminate and melamine cabinets without sanding, provided you use a high-quality bonding primer or an all-in-one paint designed for these surfaces. Thorough cleaning is the most critical step.
Q3: How long does it take for painted cabinets to cure?
While cabinets might feel dry to the touch within a few hours, they typically need 7-30 days to fully cure. During this curing period, the paint hardens and reaches its maximum durability. Avoid aggressive cleaning or bumping the cabinets during this time.
Q4: What’s the best way to get a smooth finish when painting cabinets without sanding?
To achieve a smooth finish, use high-quality foam rollers and apply multiple thin coats of paint. If you’re spray painting kitchen cabinets no sanding, practice on a piece of cardboard first to get the technique right, ensuring consistent distance and pressure. Avoid overloading your brush or roller with paint.
Q5: Do I need to use a primer if I’m not sanding?
Yes, using a high-quality bonding primer is highly recommended, especially if you’re using a standard topcoat. The primer creates the necessary adhesion to surfaces that paint normally wouldn’t stick to. If you’re using an “all-in-one” paint, it typically has primer built in.
Q6: What are the benefits of cabinet painting without sanding?
The main benefits are saving time and effort, reducing the mess associated with sanding (dust everywhere!), and making the project more accessible for DIYers. It’s a great way to update kitchen cabinets no sanding quickly and efficiently.
Conclusion
Painting your kitchen cabinets without sanding is a totally achievable and rewarding DIY project. By focusing on meticulous cleaning and using the right paints and techniques, you can give your kitchen a beautiful, updated look without the arduous task of sanding. Whether you opt for a multi-step process with bonding primer or a convenient all-in-one paint, the result will be a fresh, transformed kitchen that you can be proud of. Happy painting!