
Can you kasher a kitchen for Passover? Yes, a kitchen can be kashered for Passover, provided it is done according to specific Jewish laws and customs. This guide will walk you through the process of kashering your kitchen, ensuring it meets the requirements for this important holiday. Kashering involves thorough cleaning and a special process for making kitchenware and utensils suitable for kosher observance, especially during Passover.
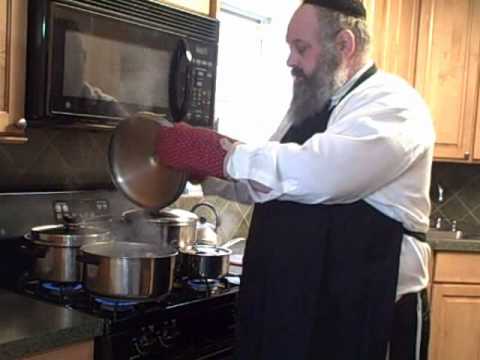
Image Source: crckosher.org
Preparing for Kashering: What You Need to Know
Kashering your kitchen for Passover is a significant undertaking. It’s not just about a deep cleaning; it’s about transforming your everyday cooking space into one that adheres to the strict dietary laws observed during this time. This process ensures that no leavened products (chametz) are present and that all equipment is deemed kosher for Passover use.
The Importance of Kashering
Passover commemorates the exodus of the Israelites from Egypt. A central theme of Passover is the prohibition of consuming chametz, which refers to any food made from wheat, barley, rye, oats, or spelt that has come into contact with water and has begun to rise. Kashering your kitchen is the physical manifestation of this religious observance. It’s a way to spiritually purify your space and ensure you are fulfilling the mitzvah (commandment) of removing chametz.
When to Begin Kashering
Ideally, kashering should begin well in advance of Passover. This allows ample time for thorough cleaning, proper disinfection, and addressing any specific concerns with your kitchenware and appliances. Starting early reduces stress and ensures you don’t miss any crucial steps.
The Kashering Process: A Detailed Walkthrough
Kashering involves several key stages, from initial cleaning to the specific methods of making different items kosher.
Step 1: Deep Cleaning Your Kitchen
Before any actual kashering can take place, a rigorous cleaning is essential. This is the foundation of the entire process. Every surface, appliance, and item that will be used during Passover needs to be meticulously cleaned of any food particles, grease, or residue.
Removing All Chametz
- Go through your pantry, refrigerator, and freezer, and remove all chametz items. These should be stored away, disposed of, or sold (a process called “mechiras chametz”).
- Wipe down all shelves, drawers, and containers to remove any crumbs or spills.
Tackling Surfaces
- Countertops: Scrub countertops thoroughly with soap and water. For laminate or stone, use appropriate cleaners. Ensure no food residue remains.
- Cabinets and Drawers: Empty and wipe down all interior and exterior surfaces of cabinets and drawers where food is stored.
- Floors: Mop and scrub the kitchen floor, paying attention to corners and edges.
Appliance Cleaning
- Refrigerator: Empty and clean all shelves, drawers, and door compartments. Wipe down the interior and exterior.
- Dishwasher: Run a cycle with a kosher for Passover cleaner or white vinegar to disinfection and remove any residual food particles. Clean the filter.
- Washing Machine: If you use it for Passover items, run a cycle with a kosher cleaner.
Step 2: Kashering Specific Items and Appliances
Once the general cleaning is complete, you move on to the more specific kashering processes for various kitchenware, utensils, and appliances. The method of kashering often depends on the material and how the item is used.
Kashering Sinks
What is the best way to kasher sinks?
Sinks are typically kashered through a process called “libun gamur” (complete heating) or by using boiling water.
-
Method 1: Boiling Water (for non-porous sinks)
- Ensure the sink is thoroughly cleaning.
- Block the drain.
- Pour boiling water directly onto the entire inner surface of the sink, ensuring all parts are covered. Do this in sections if needed.
- Rinse thoroughly with hot water.
- If you have a double sink, kasher one side at a time.
-
Method 2: Scrubbing and Disinfection (for sinks with porous surfaces or complex designs)
- Thoroughly scrub the sink with a stiff brush and a degreaser.
- Rinse well.
- You may need to use a special kashering sponge or brush dipped in boiling water or a designated kashering solution.
Kashering Stovetops
How do you kasher a stovetop?
Kashering a stovetop depends on its type. The principle is to heat the surfaces to a high temperature, similar to how they are used during normal cooking.
-
Gas Stovetops:
- Cleaning: Remove all grates and burner covers. Thoroughly cleaning the stovetop surface, including around the burners, to remove all food residue and grease.
- Grates and Burner Covers: These can often be kashered by placing them in a very hot oven (around 500°F or 260°C) for at least 30 minutes, or by using a blowtorch. Alternatively, some people choose to replace them.
- Surface: Turn on each burner to its highest setting for at least 20 minutes. This process, known as “libun,” heats the metal.
- Drip Pans: If they cannot be thoroughly cleaning and heated, they should be replaced.
-
Electric Stovetops:
- Cleaning: Remove coils and drip pans. Cleaning the surface thoroughly.
- Coils: If the coils are removable and can be heated to a high temperature without damage, they can be kashered by turning them to their highest setting until they glow red. If they cannot be heated sufficiently or are too soiled, they should be replaced.
- Drip Pans: These are generally replaced.
- Surface: Wipe down the entire surface and then turn the burners to their highest setting for an extended period (around 20-30 minutes).
Kashering Ovens
What is the correct way to kasher an oven?
Kashering an oven relies on achieving a high heat, mimicking the oven’s normal cooking temperature, to burn off any residual chametz.
-
Self-Cleaning Ovens:
- Cleaning: Perform a thorough cleaning of the oven, removing any loose debris.
- Self-Cleaning Cycle: Run the self-cleaning cycle for its full duration. Ensure the oven is well-ventilated during this process.
- Cool Down: Allow the oven to cool completely. Wipe down any ash residue.
-
Conventional Ovens (without self-cleaning):
- Cleaning: Perform a very thorough cleaning of the entire oven, including racks, walls, and door.
- Heating: Turn the oven to its highest setting (typically 500-550°F or 260-290°C) and leave it on for at least 30-60 minutes. Do this for each rack as well, if possible.
- Racks: If racks cannot be heated sufficiently in the oven, they can be kashered by immersion in boiling water or by using a blowtorch.
Kashering Dishes and Utensils
How do you kasher dishes and utensils?
The method for kashering dishes and utensils depends on their material and how they are used.
-
Ceramic, Glass, and Metal (Non-Porous):
- Cleaning: Thoroughly cleaning each item.
- Boiling Water (Hagalah): This is the most common method.
- Fill a large pot with water and bring it to a rolling boil.
- Using tongs, submerge each utensil or dish completely in the boiling water for a few seconds.
- Remove with tongs and place on a clean surface (like a kosher for Passover towel).
- Ensure you do not touch anything that has not been kashered with these items after kashering.
- Dishwasher: Some authorities permit kashering dishes via a dishwasher cycle if specific conditions are met: the dishwasher must be thoroughly cleaning beforehand, and run with a kosher for Passover detergent at the highest possible temperature, followed by a hot rinse. However, the boiling water method is often preferred for its certainty.
-
Wood and Plastic:
- Wood and plastic are generally considered porous and difficult to kasher thoroughly. It is often recommended to cleaning them extremely well and using them only for cold foods, or to purchase new kosher for Passover utensils. If attempting to kasher, extensive cleaning and scrubbing are required, and sometimes soaking in boiling water is suggested, though its effectiveness is debated for these materials. Many opt to buy new plastic or wooden items.
-
Silverware:
- Silverware can be kashered by boiling water (hagalah) or by polishing them thoroughly and then immersing them in boiling water.
-
Cutting Boards:
- Plastic: Cleaning thoroughly and soaking in boiling water. If deeply scratched or stained, it’s better to replace.
- Wood: Cleaning thoroughly. If the board is deeply grooved, it’s often recommended to plane the surface and then soak in boiling water, or simply replace it.
-
Microwave:
- Cleaning: Thoroughly cleaning the interior and exterior.
- Kashering: Place a cup of water inside and heat it until steam fills the microwave for at least 15-20 minutes. Some also recommend placing a cup of vinegar inside and running it for a few minutes.
Kashering Specific Kitchenware
- Toasters and Toaster Ovens: These are notoriously difficult to kasher. Due to the intricate heating elements and crumb trays, it is generally recommended to replace them or dedicate them to non-Passover use. If attempting to kasher, a very thorough cleaning is required, followed by running them at the highest setting for an extended period to burn off any residue. The crumb tray needs special attention.
- Blenders and Food Processors: The blades and containers should be thoroughly cleaning. The containers can be kashered by boiling water. The blades themselves are difficult to kasher by boiling due to their shape and material; it’s often best to use separate utensils or purchase new ones.
- Graters: These are very difficult to kasher due to their many sharp edges. It is highly recommended to purchase new ones for Passover.
- Colanders: If metal, they can be kashered by pouring boiling water over them, ensuring all parts are covered.
Step 3: Setting Up for Passover
Once all your kitchenware, utensils, and appliances are kashered, you need to set up your kitchen specifically for Passover.
Dedicated Passover Items
- Many households have a separate set of dishes, utensils, pots, and pans specifically for Passover. This avoids any potential issues with items not being properly kashered or cross-contamination.
- Consider having separate cutting boards, mixing bowls, and serving platters.
Passover Food Storage
- Ensure all food items brought into the kitchen are kosher for Passover.
- Use designated kosher for Passover containers or wrap items to prevent chametz contamination.
Passover Cleaning Schedule
- Maintain a high standard of cleaning throughout Passover. Keep surfaces wiped down and immediate cleaning of spills to prevent any chametz from accumulating.
Important Considerations and Common Questions
Kashering can bring up many specific questions. Here are some common concerns.
What if an item is porous or has cracks?
Porous materials like some woods, plastics, and items with deep scratches or crevices are challenging to kasher thoroughly. The principle of kashering is to transfer the “taste” of chametz out of the item. If a material absorbs tastes easily and cannot be fully cleaning and heated, it’s often recommended to replace it for Passover.
What about koshering glass dishes?
Glass dishes are generally considered non-porous and can be kashered by immersing them in boiling water. However, there is a debate among some rabbinic authorities regarding the kashering of glass, particularly for certain types of glass that might have been produced with glazes containing lead. Many communities follow the practice of using separate glass dishes for Passover.
Can I use my regular dishwasher for Passover?
While some rely on a thoroughly cleaning dishwasher and running a kosher for Passover detergent cycle, the preferred method is often to use a separate dishwasher or to kasher the existing one by ensuring it’s meticulously cleaning and then running a very hot cycle with vinegar or a special kosher for Passover cleaner. However, due to the potential for residual food particles and the inability to ensure complete disinfection and kashering of all internal parts, many choose to use separate dishes.
What is chametz?
Chametz refers to any food made from wheat, barley, rye, oats, or spelt that has come into contact with water and has begun to rise. During Passover, consuming or owning chametz is strictly forbidden.
Who decides which method of kashering is correct?
The methods of kashering are derived from Jewish law (Halakha) and have been interpreted by rabbinic authorities throughout history. Different communities and rabbinical bodies may have slightly varying customs or rulings. It’s advisable to consult with a local rabbi or a reputable halachic authority for specific guidance.
Do I need to kasher my refrigerator?
Yes, the refrigerator must be thoroughly cleaning and wiped down to remove any potential chametz residue. While it doesn’t typically require a special heating process like an oven or stovetop, a deep cleaning ensures it is free from any forbidden substances.
What about my wooden spoons?
Wooden spoons are difficult to kasher because wood is porous. It is best to cleaning them thoroughly. If they are not deeply grooved or stained, some might kasher them by soaking them in boiling water. However, many prefer to purchase new wooden utensils for Passover.
What if I accidentally use a non-kosher for Passover item during Passover?
If you realize a mistake was made, you should immediately cease using the item, clean it thoroughly, and consider if kashering is possible according to the halachic guidelines. In some cases, the item might need to be set aside for use after Passover.
Frequently Asked Questions (FAQ)
-
Q1: How long does the kashering process take?
A1: The time required varies greatly depending on the size of your kitchen and the number of items you need to kasher. It can take anywhere from a day to several days for a thorough job. -
Q2: Can I reuse my regular dishes after Passover?
A2: Yes, once Passover is over, your regular dishes and utensils can be used again after they have been thoroughly cleaning. -
Q3: What if my oven doesn’t have a self-cleaning function?
A3: For ovens without a self-cleaning cycle, you will need to manually cleaning the oven thoroughly and then heat it to its highest temperature for an extended period, as detailed in the oven kashering section. -
Q4: Do I need to kasher my microwave?
A4: Yes, the microwave should be cleaning thoroughly. Kashering can be done by heating a cup of water inside until it steams up the interior. -
Q5: What is the general principle behind kashering?
A5: The general principle is to remove any “taste” of chametz that has been absorbed by the kitchenware or appliances. This is typically done through intense heat or boiling water, methods that are believed to neutralize or burn off any residual forbidden substances. -
Q6: Is it better to buy new Passover items or kasher existing ones?
A6: This is a personal decision. For many, buying new items simplifies the process and provides greater certainty that everything is kosher for Passover. Others find satisfaction in kashering their existing kitchenware, provided it can be done properly according to halachic standards.
Kashering your kitchen is a meaningful ritual that prepares your home for the observance of Passover. By following these detailed steps, you can ensure your kitchen is a sanctuary of kosher observance throughout the holiday. Remember to consult with your local rabbinical authority for any specific questions or local customs.