
What is the best way to clean grease from kitchen walls? The best way to clean grease from kitchen walls is to use a gentle, yet effective, cleaning solution tailored to the wall’s material. Mild dish soap, a mixture of vinegar and water, or a specialized kitchen cleaner often do the trick.
Grease splatters are a common, yet frustrating, problem in any kitchen. After a cooking session, especially frying or sautéing, you might find a thin film of grease coating your walls, particularly around the stove and backsplash area. This sticky residue can attract dust and dirt, making your kitchen look dull and unclean. But don’t worry! Removing grease from kitchen walls is a manageable task with the right approach and cleaning agents. This guide will walk you through effective methods to tackle those stubborn grease stains, making your kitchen walls sparkle again.
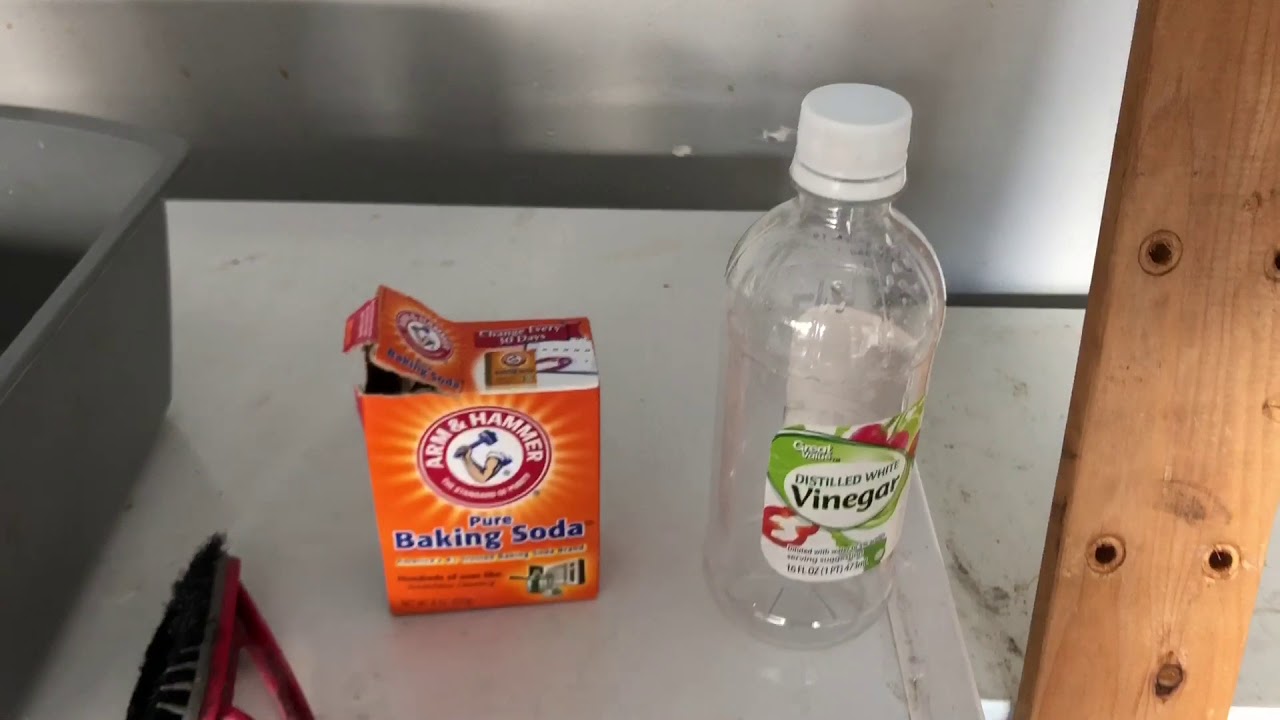
Image Source: i.ytimg.com
Identifying the Type of Kitchen Wall
Before you grab any cleaning product, it’s important to know what kind of walls you have. Different materials require different cleaning methods to avoid damage.
Common Kitchen Wall Materials
- Painted Drywall: Most common in kitchens. It can be finished with flat, eggshell, satin, or semi-gloss paint. Glossier finishes are generally more durable and easier to clean.
- Tile (Ceramic, Porcelain): Found on kitchen backsplashes and sometimes entire walls. Grout lines can be more challenging to clean.
- Stainless Steel: Often used for backsplashes or decorative panels. It can be prone to scratching.
- Wallpaper: Less common in high-grease areas due to its porosity and potential for damage.
- Wood Paneling: Can be found in older kitchens or for specific design elements. Requires gentle cleaning to protect the finish.
Knowing your wall material will help you choose the right cleaning solution and tool to avoid discoloration, peeling, or scratching.
Essential Cleaning Supplies for Removing Grease Stains
Gathering the right supplies upfront will make your wall cleaning process much smoother. You don’t need a lot of fancy items; common household products often work best.
The Core Arsenal
- Mild Dish Soap: A fantastic grease-cutting agent.
- White Vinegar: A natural disinfectant and degreaser.
- Baking Soda: A mild abrasive that can help lift tough grime.
- All-Purpose Kitchen Cleaner: Many commercial cleaners are formulated to tackle kitchen grease. Look for one labeled as a degreaser.
- Warm Water: Helps to loosen grease.
- Microfiber Cloths: Soft, absorbent, and won’t scratch surfaces. Essential for wiping and drying.
- Soft Sponges or Scrubbing Sponges: For more stubborn spots. Be cautious with abrasive sponges on delicate surfaces.
- Buckets: One for your cleaning solution and one for rinsing.
- Gloves: To protect your hands from cleaning solutions.
- Spray Bottles: For creating diluted cleaning solutions.
- Old Toothbrush: Perfect for cleaning grout lines or tight corners.
Step-by-Step Guide to Cleaning Grease From Kitchen Walls
Now that you have your supplies, let’s get to the actual cleaning. We’ll cover different approaches, starting with the gentlest.
Method 1: The Gentle Approach with Dish Soap
This is your first line of defense for everyday grease buildup. It’s safe for most wall surfaces.
- Prepare Your Solution: Mix a few drops of mild dish soap with a bucket of warm water. You want enough soap to create suds, but not so much that it’s difficult to rinse off.
- Test in an Inconspicuous Area: Before applying to a large area, dab a bit of the solution onto a small, hidden spot of your wall. Wait a few minutes, then wipe and check for any adverse reactions like paint peeling or discoloration.
- Dip and Wring Your Microfiber Cloth: Dip a clean microfiber cloth into the soapy water. Wring it out thoroughly so it’s damp, not dripping wet. Too much water can damage drywall or paint.
- Wipe Down the Walls: Gently wipe the greased areas in a circular motion or from top to bottom. For the kitchen backsplash, you can be a bit more vigorous.
- Rinse the Cloth Frequently: As the cloth picks up grease, rinse it thoroughly in the clean water bucket (or use a second bucket with plain water) and wring it out before dipping it back into the solution. This prevents spreading the grease.
- Rinse the Walls: Once you’ve removed the visible grease, take a fresh microfiber cloth dipped in plain warm water. Wring it out and wipe down the walls to remove any soap residue.
- Dry the Walls: Use a clean, dry microfiber cloth to gently dry the walls. This prevents water spots and streaks.
Method 2: The Vinegar Powerhouse for Tougher Grease
Vinegar is a natural degreaser and disinfectant that can tackle more stubborn buildup.
- Create the Vinegar Solution: Mix equal parts white vinegar and warm water in a spray bottle.
- Spray and Let Sit: Lightly spray the solution onto the greasy areas. Let it sit for about 5-10 minutes to allow the vinegar to break down the grease. Avoid saturating painted walls.
- Wipe Clean: Use a damp microfiber cloth to wipe away the loosened grease. You might need to use a bit more pressure or go over the area a couple of times.
- Rinse Thoroughly: Vinegar has a strong smell. To remove it and any remaining residue, wipe the walls with a microfiber cloth dampened with plain water.
- Dry: Pat the walls dry with a clean, dry microfiber cloth.
Caution: Vinegar can be harsh on some finishes and grout. Always test first.
Method 3: Baking Soda Paste for Stubborn Stains
For those really caked-on grease spots, a baking soda paste can offer a bit more scrubbing power without being too abrasive.
- Make the Paste: Mix baking soda with a small amount of water to create a thick paste. It should be thick enough to cling to the wall.
- Apply the Paste: Gently apply the paste directly to the grease stains using your fingers or a soft cloth.
- Let it Work: Allow the paste to sit on the stain for about 10-15 minutes.
- Gently Scrub: Use a damp, soft cloth or a soft-bristled brush (like an old toothbrush) to gently scrub the paste and grease away. For painted walls, be very gentle. For tiles, you can use a slightly firmer scrub, especially on grout.
- Wipe and Rinse: Wipe away the paste and loosened grease with a damp microfiber cloth. Rinse the cloth frequently.
- Final Rinse: Use a clean, damp cloth with plain water to remove any baking soda residue.
- Dry: Dry the walls completely with a clean, dry microfiber cloth.
Method 4: Commercial Kitchen Degreasers
When DIY solutions aren’t cutting it, a commercial degreaser or kitchen cleaner specifically designed for grease removal can be your best bet.
- Choose the Right Product: Select a degreaser formulated for kitchen surfaces. Read the label carefully to ensure it’s suitable for your wall type.
- Ventilate the Area: Open windows or turn on exhaust fans. Many degreasers have strong fumes.
- Follow Product Instructions: Apply the cleaner according to the manufacturer’s instructions. Some require spraying and wiping, while others might need to sit for a short period.
- Use Appropriate Tools: You might need a scrubbing sponge for tougher areas, but always check the product label to avoid damaging your walls.
- Wipe and Rinse: Wipe the cleaned area with a damp cloth. Most degreasers require rinsing to remove chemical residue.
- Dry: Dry the walls thoroughly with a clean microfiber cloth.
Important Note on Commercial Cleaners: Always test in an inconspicuous area first. Some powerful degreasers can damage paint, finishes, or certain types of tile grout.
Tackling Specific Kitchen Wall Areas
Certain areas of your kitchen walls tend to accumulate more grease than others and might require slightly different approaches.
Cleaning the Kitchen Backsplash
The kitchen backsplash is often the primary target for grease splatters.
- Tile Backsplashes:
- For general cleaning, the dish soap or vinegar solution works well.
- For grout lines that have accumulated grease and grime, a baking soda paste applied with an old toothbrush and gently scrubbed can be very effective. Rinse thoroughly.
- Commercial tile cleaners can also be used, ensuring they are safe for grout.
- Stainless Steel Backsplashes:
- Use a mild dish soap and water solution.
- Wipe in the direction of the grain of the stainless steel to avoid scratches.
- Vinegar solution can also be used, but rinse it off very well to prevent dulling the finish.
- Avoid abrasive scrubbers or cleaners. Specialized stainless steel cleaners are also available.
Cleaning Painted Walls Near the Stove
Painted walls, especially those with a satin or semi-gloss finish, can be cleaned effectively.
- Mild Solutions are Key: Start with dish soap and water or a diluted vinegar solution.
- Gentle Wiping: Use soft microfiber cloths and avoid excessive scrubbing, which can remove paint.
- Test First: Always test your cleaning solution in an inconspicuous area to ensure it doesn’t lift or damage the paint.
- Flat Paint: Walls with flat paint are the most delicate and can be easily damaged by scrubbing or harsh chemicals. For flat paint, a gentle wipe with a slightly damp cloth (minimal water) and mild soap might be all that’s recommended. Blotting is better than wiping.
Cleaning Other Wall Coverings
- Wallpaper: Grease on wallpaper is tricky. If it’s washable vinyl wallpaper, you might be able to use a very mild dish soap and water solution applied sparingly with a damp cloth, followed by immediate drying. For other types of wallpaper, professional cleaning or specialized wallpaper cleaners might be necessary, and even then, results can vary. Avoid saturating wallpaper.
- Wood Paneling: Use a cleaner specifically designed for wood, or a very mild solution of dish soap and water, applied to a barely damp cloth. Wipe gently and dry immediately to prevent water damage to the wood. Always wipe with the grain.
Dealing with Stubborn, Old Grease Stains
Sometimes, grease can sit on walls for so long that it becomes baked on and incredibly difficult to remove. For these situations, patience and a multi-step approach are crucial.
The Multi-Step Attack
- Start Mild: Begin with the dish soap and water method. If that doesn’t work, move to the vinegar solution.
- Apply Heat (Carefully): For very stubborn spots on tile or stainless steel, a hairdryer on a medium setting can sometimes help soften old grease, making it easier to wipe away with a degreaser. Hold the hairdryer a few inches away and don’t overheat the surface.
- Baking Soda Paste with Time: Apply the baking soda paste and let it sit for longer – perhaps 30 minutes or even an hour. Gently scrub with a soft brush.
- Specialized Degreasers: A heavy-duty commercial degreaser might be necessary. Ensure it’s safe for your wall material and follow instructions precisely. You might need to apply, let it sit for a bit longer than usual (but not so long it damages the surface), and then scrub.
- Repeat if Necessary: For incredibly tough stains, you may need to repeat a cleaning method multiple times over a few days.
Table: Choosing the Right Cleaning Solution
| Wall Material | Mild Grease | Moderate Grease | Stubborn Grease |
|---|---|---|---|
| Painted Drywall | Dish soap & water | Diluted vinegar (test first) | Gentle baking soda paste (test first), specialized wall cleaner (mild) |
| Ceramic/Porcelain Tile | Dish soap & water | Diluted vinegar, baking soda paste | Commercial tile degreaser, baking soda paste with longer dwell time |
| Stainless Steel | Dish soap & water | Diluted vinegar (rinse well), baking soda paste | Specialized stainless steel cleaner, mild degreaser (test first) |
| Wallpaper (Washable) | Slightly damp cloth, very mild soap (blot) | Minimal vinegar solution (blot & dry immediately) | Specialized wallpaper cleaner (test first, professional may be needed) |
| Wood Paneling | Wood cleaner, very diluted dish soap & water | Gentle wipe with damp cloth (no pooling water) | Clean as per wood finish manufacturer, avoid harsh chemicals |
Preventing Future Grease Buildup
The best way to deal with grease on your kitchen walls is to prevent it from building up in the first place.
Smart Cooking Habits
- Use Your Range Hood: Always turn on your range hood fan when cooking, especially when frying or using high heat. This vent system draws grease and steam away from your kitchen air and walls. Make sure to clean the hood’s filter regularly.
- Cover Pots and Pans: Using lids on pots and pans significantly reduces splattering.
- Contain Splatters: Consider using a splatter screen when frying.
- Wipe Up Spills Immediately: Don’t let grease splatters or spills sit on your walls. Wipe them up as soon as the kitchen cools down.
Regular Maintenance Cleaning
- Weekly Wipes: A quick wipe-down of the walls near the stove with a damp microfiber cloth once a week can prevent grease from hardening.
- Monthly Deep Clean: Aim for a more thorough cleaning of your kitchen walls monthly, or as needed, to stay ahead of stubborn buildup.
Frequently Asked Questions (FAQ)
Q1: Can I use oven cleaner on my kitchen walls?
A1: It is generally not recommended to use oven cleaner on kitchen walls, especially painted ones. Oven cleaners are very harsh and can strip paint, damage finishes, or discolor surfaces. Stick to milder degreasers designed for everyday cleaning.
Q2: What is the best way to clean greasy grout lines?
A2: For greasy grout lines on tile backsplashes, a paste made of baking soda and water is excellent. Apply it with an old toothbrush, let it sit for a bit, then scrub gently. Rinse thoroughly with water.
Q3: Will vinegar damage my paint?
A3: Vinegar is acidic and can potentially damage certain types of paint, especially matte or flat finishes, or if left on for too long. Always test diluted vinegar in an inconspicuous area first. For painted walls, it’s often best to use it sparingly and rinse well.
Q4: How often should I clean my kitchen walls for grease?
A4: This depends on your cooking habits. For busy kitchens, a weekly quick wipe-down of areas prone to splattering and a monthly deeper clean is ideal. If you cook infrequently or avoid greasy foods, you might get away with cleaning less often.
Q5: My kitchen backsplash is covered in very old, hardened grease. What can I do?
A5: For old, hardened grease, you’ll likely need a strong commercial degreaser specifically designed for kitchens. Follow the product’s instructions carefully, and be prepared to let the degreaser sit for a longer period (while monitoring the surface for any adverse reactions) and use a scrubbing sponge. Repeat applications might be necessary.
By following these methods and tips, you can effectively clean grease from your kitchen walls, ensuring a cleaner, more inviting cooking space. Remember to always choose the gentlest effective method for your specific wall material and test any new cleaner in a hidden spot first. Happy cleaning!