
Can you clean painted kitchen cabinets without damaging the finish? Yes, absolutely! With the right approach and gentle cleaning solutions, you can keep your painted kitchen cabinets looking fresh and beautiful without stripping away their protective coating. This guide will walk you through the best methods for painted cabinet maintenance and DIY cabinet cleaning.
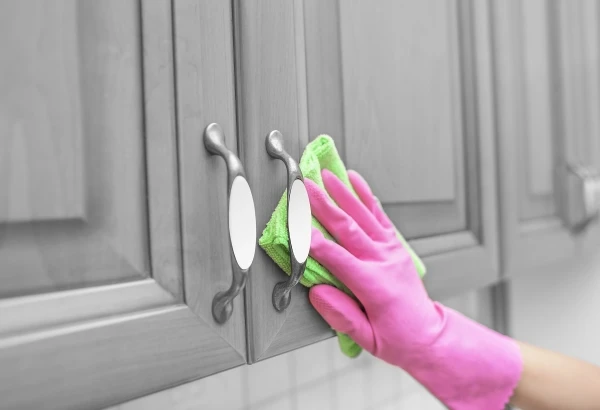
Image Source: www.fivestarpainting.com
Preserving the Beauty of Your Painted Cabinets
Your kitchen cabinets are a significant feature of your home. Keeping them clean not only improves the look of your kitchen but also contributes to the longevity of the paint. Over time, kitchen cabinets are exposed to grease, food splatters, fingerprints, and general grime. Knowing how to tackle these messes effectively is key to kitchen cabinet care. The goal is always safe cabinet cleaning that maintains the integrity of the paint.
The Importance of Gentle Cleaning
Painted surfaces, especially those in a busy environment like a kitchen, require a delicate touch. Harsh chemicals or abrasive scrubbing can easily scratch, dull, or even remove the paint. This is why choosing the right cleaning products and techniques is paramount to preserve painted cabinets.
What to Avoid When Cleaning Painted Cabinets
Before we dive into what to do, let’s cover what not to do. Avoiding these common mistakes will save you from costly repairs and repaint jobs.
- Abrasive Cleaners: Anything with grit or a scouring action is a definite no-go. This includes steel wool, abrasive sponges, or powders.
- Harsh Chemicals: Bleach, ammonia, and strong degreasers can break down paint and even damage the wood underneath.
- Excessive Water: Soaking painted cabinets can lead to swelling of the wood, peeling paint, and mold growth. Always use damp, not wet, cloths.
- Scraping or Scrubbing Vigorously: Patience is key. Gentle wiping is far more effective and safer for the paint finish.
Your Go-To Guide for Cleaning Painted Wood Cabinets
When it comes to cleaning painted wood cabinets, a simple, effective approach is usually best. The primary objective is to lift away dirt and grease without disturbing the paint.
Choosing the Right Cleaning Solutions
The foundation of successful painted cabinet cleaning lies in selecting the right gentle cabinet cleaner. You don’t need a specialty cabinet cleaner for most everyday messes. Often, common household items work wonders.
1. Mild Dish Soap and Water
This is often the safest and most effective option for everyday cleaning.
- How to Use:
- Mix a few drops of mild dish soap (like Dawn) into a bowl of warm water.
- Dip a soft microfiber cloth into the soapy water.
- Wring out the cloth thoroughly so it’s just damp, not dripping.
- Gently wipe down the cabinet surfaces, paying attention to areas with visible grime or fingerprints.
- Use a second clean, damp microfiber cloth (rinsed in plain water and wrung out well) to wipe away any soap residue.
- Immediately dry the cabinets with a third, dry microfiber cloth.
2. Baking Soda Paste for Tougher Stains
For slightly more stubborn grease or marks, a baking soda paste can be a lifesaver. Baking soda is a mild abrasive that can lift dirt without being overly harsh.
- How to Use:
- Mix baking soda with a little water to create a paste. Aim for a consistency like toothpaste.
- Apply the paste directly to the stain or greasy spot with a soft cloth or your finger.
- Let it sit for a few minutes.
- Gently rub the area in a circular motion with a soft cloth.
- Wipe away the residue with a clean, damp cloth.
- Dry the area thoroughly with a soft, dry cloth.
3. Vinegar Solution for Grease
White vinegar is a natural degreaser. However, it’s acidic, so it should be used with caution and diluted properly.
- How to Use:
- Mix equal parts white vinegar and water in a spray bottle.
- Lightly mist a soft cloth with the solution, or mist directly onto a stubborn spot. Avoid spraying directly onto the cabinets, especially for prolonged periods.
- Wipe the area gently.
- Follow up with a clean, damp cloth to remove any vinegar scent or residue.
- Dry the cabinets immediately with a soft, dry cloth.
4. Specialized Cabinet Cleaners
If you’re hesitant about DIY solutions or have a particularly sensitive paint finish, a non-abrasive cabinet cleaner specifically designed for painted surfaces is a good option. Always read the product label and test it in an inconspicuous area first. Look for products labeled as “mild,” “gentle,” or “safe for painted surfaces.”
The Art of Wiping Down Cabinets
Knowing how to wipe down cabinets is more than just applying cleaner. It’s about technique and frequency.
Regular Wiping vs. Deep Cleaning
- Daily/Weekly Wiping: For everyday maintenance, a quick wipe-down with a dry microfiber cloth can remove dust and prevent grime buildup. For fingerprints or minor splatters, use a slightly damp cloth followed by drying. This is the simplest form of kitchen cabinet care.
- Monthly Cleaning: A more thorough cleaning using mild dish soap and water or your chosen gentle cabinet cleaner should be done monthly or as needed.
- Occasional Deep Cleaning: For stubborn grease or stuck-on food, you might need to use the baking soda paste or a diluted vinegar solution.
Cleaning Techniques for Different Surfaces
- Smooth Painted Surfaces: These are generally the easiest to clean. A damp cloth is usually sufficient.
- Textured or Routed Surfaces: These areas can trap dirt and grease. Use a soft-bristled brush (like an old, clean toothbrush) dipped in your cleaning solution to gently agitate grime in crevices, then wipe with a damp cloth.
Step-by-Step Cleaning Process for Painted Kitchen Cabinets
Follow these steps for a safe and effective clean that will help preserve painted cabinets.
Step 1: Gather Your Supplies
Before you begin, make sure you have everything you need:
- Soft microfiber cloths (at least 3-4)
- Mild dish soap
- Warm water
- Baking soda (optional, for tough spots)
- White vinegar (optional, for grease)
- Small bowl
- Spray bottle (optional, for vinegar solution)
- Soft-bristled brush (e.g., old toothbrush, optional)
- Dry, soft towel
Step 2: Prepare Your Cleaning Solution
Choose your preferred cleaning solution based on the level of grime. The most common and safest is the mild dish soap and water mixture.
Step 3: Test in an Inconspicuous Area
This is a crucial step. Before cleaning the entire cabinet, test your chosen cleaner on a small, hidden spot (like the inside of a door or a corner). This ensures that the cleaner doesn’t damage or discolor the paint.
Step 4: The Wiping Process
- Dip a microfiber cloth into your cleaning solution.
- Wring it out thoroughly. The cloth should be damp, not wet.
- Start wiping the cabinets. Work in sections.
- For everyday dirt and fingerprints, gentle, circular motions are effective.
- For stubborn spots, you might need to apply a little more pressure or use the baking soda paste or vinegar solution (after testing).
- If using a brush for crevices, dip the brush in the solution and gently scrub.
Step 5: Rinse and Remove Residue
- Use a second clean microfiber cloth, dampened with plain water.
- Wring it out well.
- Wipe down the cleaned sections to remove any soap or cleaning solution residue. This is important to prevent streaks and buildup.
Step 6: Dry Thoroughly
- Immediately follow up with a clean, dry microfiber cloth.
- Buff the cabinets dry to prevent water spots and streaks. This is a critical step in kitchen cabinet care to avoid moisture damage.
Step 7: Address Stubborn Stains (If Necessary)
If some stains remain after the initial wipe-down:
- Grease: Apply a small amount of the vinegar solution (1:1 vinegar and water) directly to a cloth, then gently rub the greasy spot. Rinse with a damp cloth and dry.
- Scuff Marks: Sometimes, a pencil eraser can gently remove scuff marks without harming the paint. Test first.
- Food Stains: The baking soda paste is often effective here. Apply, let sit briefly, gently rub, rinse, and dry.
Maintaining Your Painted Cabinets for Longevity
Consistent painted cabinet maintenance is key to keeping them looking their best for years.
Prevention is Key
- Wipe Spills Immediately: Don’t let spills sit on your cabinets. A quick wipe-down as soon as they happen can prevent stains.
- Use a Backsplash: A good backsplash behind your stovetop and sink will protect your cabinets from grease splatters and water splashes.
- Ventilation: Ensure good ventilation when cooking. Use your range hood to draw away grease fumes.
Seasonal Deep Cleans
While daily or weekly wipes are important, schedule a more thorough cleaning at least twice a year. This allows you to address any buildup that might have occurred and inspect your cabinets for any minor issues.
What About Different Paint Finishes?
The type of paint finish on your cabinets can influence how you clean them.
- Satin and Semi-Gloss: These finishes are generally more durable and easier to clean. They resist staining better than matte finishes.
- Matte or Chalk Paint: These finishes are more delicate. They often require extra care and might be more prone to absorbing stains or showing scuff marks. For these, always opt for the mildest cleaning methods and avoid scrubbing altogether. A very gentle wipe with a damp cloth and maybe a tiny bit of mild soap is usually all that’s needed.
| Paint Finish | Recommended Cleaning Method | What to Avoid |
|---|---|---|
| Satin | Mild dish soap and water, damp cloth, dry immediately. | Abrasive cleaners, harsh chemicals, excessive water |
| Semi-Gloss | Mild dish soap and water, damp cloth, dry immediately. | Abrasive cleaners, harsh chemicals, excessive water |
| Matte | Very gentle wipe with a slightly damp cloth, dry promptly. | Scrubbing, harsh chemicals, acidic cleaners |
| Chalk Paint | Soft brush for dust, very lightly damp cloth, dry immediately. | Water, soap, any cleaners that aren’t specifically for chalk paint |
Dealing with Specific Issues
- Grease Buildup: The kitchen is a prime spot for grease. Regular wiping with a mild soap solution is the best defense. For tough grease, the diluted vinegar solution can be effective, but always rinse and dry thoroughly.
- Water Stains: If you notice water spots, try gently buffing them with a soft cloth. For more stubborn marks, a paste of baking soda and water, applied gently, might help lift them.
- Scratches: Minor scratches are often hard to remove without touching up the paint. However, very light scuffs might be buffed out with a clean, dry microfiber cloth.
Frequently Asked Questions (FAQ)
Here are some common questions people have about cleaning painted kitchen cabinets:
Q1: Can I use Windex on painted cabinets?
A1: While Windex is a popular glass cleaner, it’s generally not recommended for painted cabinets. It contains ammonia, which can dull or damage some paint finishes over time. Stick to milder solutions like dish soap and water for safe cabinet cleaning.
Q2: How often should I clean my painted kitchen cabinets?
A2: For daily upkeep, wipe down with a dry cloth to remove dust. For general cleaning, a good wipe-down with a damp cloth and mild soap solution should be done monthly, or as needed when you see grime or splatters.
Q3: My cabinets have a glossy finish. Can I use a stronger cleaner?
A3: Even with a glossy finish, it’s best to stick to mild cleaners. Harsh chemicals can degrade the gloss over time. A non-abrasive cabinet cleaner or the dish soap method is still your safest bet.
Q4: What’s the best way to clean painted cabinet doors with grooves?
A4: For grooves and crevices, dip a soft-bristled brush (like an old toothbrush) into your mild cleaning solution. Gently work the brush into the grooves to loosen dirt, then wipe the entire door with a damp, well-wrung-out cloth. Follow up with a dry cloth. This is part of good DIY cabinet cleaning.
Q5: My painted cabinets feel sticky. What can I do?
A5: A sticky feeling often indicates a buildup of grease. The diluted white vinegar solution (1:1 vinegar and water) is excellent for cutting through grease. Spray it onto a cloth, wipe the cabinets, then rinse with a damp cloth and dry thoroughly.
Q6: Can I use magic erasers on painted cabinets?
A6: Magic Erasers are abrasive, even though they don’t feel like it. They work by essentially sanding away the surface. While they might remove a tough stain, they can also dull or remove the paint finish. It’s best to avoid them for painted cabinet maintenance if you want to preserve painted cabinets.
Q7: My cabinets were painted professionally. Do I need a special cleaner?
A7: While professional paint jobs are often more durable, it’s still best practice to use gentle cleaning methods. Always check with the painter or manufacturer for specific recommendations. If unsure, start with the mildest cleaning agents.
By following these guidelines, you can confidently clean and maintain your painted kitchen cabinets, ensuring they remain a beautiful and functional part of your home for years to come. Remember, gentle care and consistent attention are the secrets to long-lasting beauty.