
Can you paint kitchen cabinets with a sprayer? Yes, absolutely! Painting kitchen cabinets with a sprayer is an excellent way to achieve a smooth, professional-looking finish that is difficult to replicate with brushes or rollers. This method is particularly effective for achieving a factory-like spray paint cabinet finish. This guide will walk you through the entire process, from choosing the right equipment to applying the final coat, ensuring a stunning transformation for your kitchen.
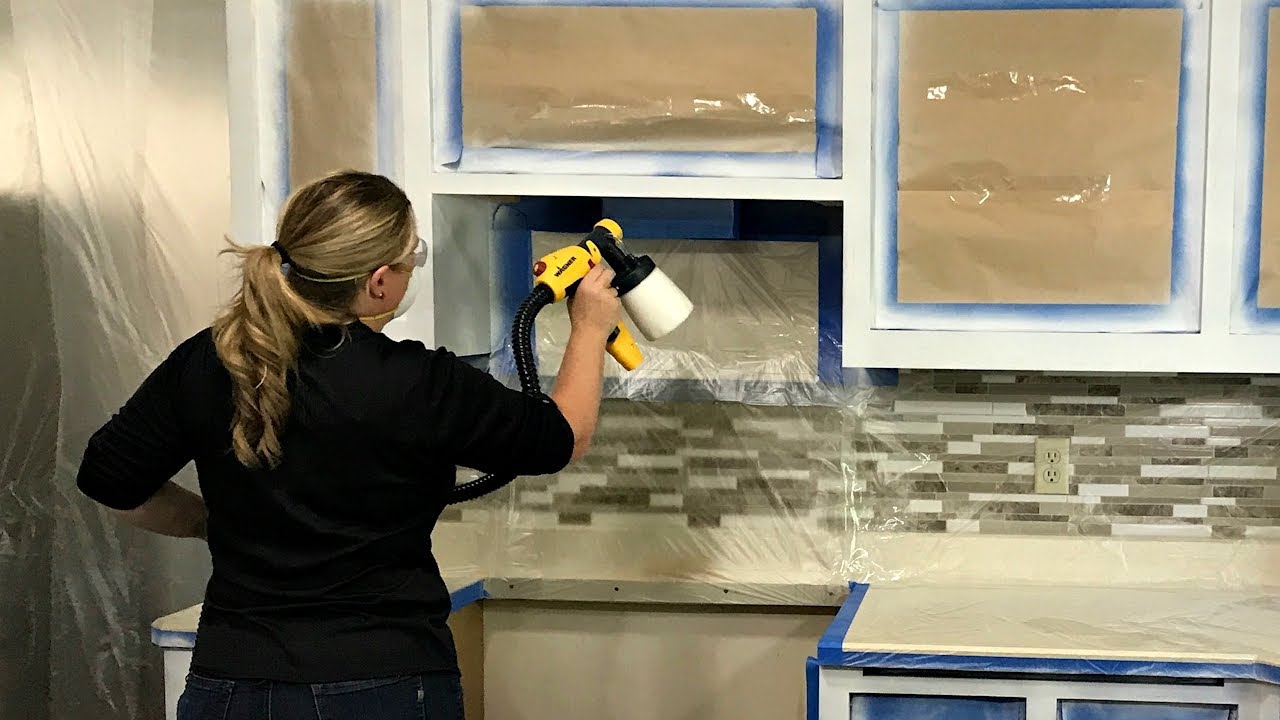
Image Source: i.ytimg.com
Why Use a Sprayer for Cabinet Painting?
Using a cabinet sprayer painting system offers several advantages over traditional methods. The primary benefit is the quality of the finish. Sprayers atomize paint into a fine mist, creating a seamless, even coating with no brush marks or roller stippling. This results in a sleek, modern look that instantly updates your kitchen.
Beyond aesthetics, sprayers also offer efficiency. While the setup and cleanup can take time, the actual painting process is significantly faster. You can cover large surface areas, like cabinet doors and drawer fronts, in a fraction of the time it would take with a brush. This makes spray painting kitchen cabinets a more efficient choice for busy homeowners.
Another key advantage is durability. When done correctly, a sprayed finish can be incredibly durable, resisting chipping and wear better than a brushed or rolled finish. This is especially true when using high-quality paints and primers designed for cabinetry.
Choosing the Right Sprayer for Your Project
The type of sprayer you choose will significantly impact the ease of use and the final finish. For DIY kitchen cabinet spraying, an HVLP cabinet sprayer is generally the best option.
HVLP vs. Airless Sprayers
- HVLP (High Volume, Low Pressure) Sprayers: These sprayers use a large volume of air at low pressure to atomize the paint. This results in less overspray, better control, and a finer finish, making them ideal for furniture and cabinets. They are generally easier to control for beginners.
- Airless Sprayers: These use high pressure to force paint through a small tip, atomizing it. They are faster for large projects but produce more overspray and can be harder to control for fine detail work like cabinets.
Recommendation: For achieving that sought-after spray paint cabinet finish on kitchen cabinets, an HVLP sprayer is highly recommended. They offer the precision needed for clean lines and a smooth surface.
What is the Best Sprayer for Kitchen Cabinets?
The best sprayer for kitchen cabinets is typically a high-quality HVLP sprayer. Look for models that offer adjustable pressure and flow control, allowing you to fine-tune the paint delivery for different paint types and desired finishes. Brands like Wagner, Graco, and Fuji offer excellent HVLP options suitable for cabinet painting. Consider:
- Power/Motor Size: A more powerful motor will handle thicker paints more easily.
- Cup Size: Larger cups mean fewer refills, but also a heavier sprayer.
- Nozzle Size: Different nozzle sizes are best for different paint viscosities. Many HVLP sprayers come with multiple nozzle options.
- Ease of Cleaning: This is crucial for sprayers. Look for models that are easy to disassemble and clean.
Essential Supplies for Spray Painting Kitchen Cabinets
Beyond the sprayer itself, you’ll need a range of supplies to ensure a successful project:
- Paint: Use high-quality cabinet paint. Alkyd enamels or water-based acrylic enamels specifically formulated for cabinets are excellent choices.
- Primer: A good quality primer is essential for adhesion and a smooth finish. Look for oil-based or shellac-based primers for best results, especially on wood.
- Sanding Supplies:
- Sanding sponges (various grits: 100-150 for initial prep, 220-320 for between coats)
- Orbital sander (optional, for initial sanding)
- Cleaning Supplies:
- Degreaser or TSP (Trisodium Phosphate) substitute
- Clean cloths or tack cloths
- Bucket
- Water
- Masking Supplies:
- Painter’s tape (high-quality, 1-inch or 1.5-inch)
- Plastic sheeting or drop cloths
- Paper sheeting or cardboard for overspray protection
- Safety Gear:
- Respirator mask (specifically for paint fumes)
- Safety glasses
- Gloves
- Other:
- Paint tray or bucket for the sprayer
- Paint strainer
- Small screwdriver or putty knife (for removing hardware)
- Paint can opener
- Rags
Step-by-Step Guide to Spray Painting Kitchen Cabinets
Phase 1: Prepping Cabinets for Spraying – The Foundation of Success
This is arguably the most critical phase. Skipping or rushing any of these steps will compromise the final finish. Proper prepping cabinets for spraying is key to achieving a durable and beautiful result.
1. Remove Cabinet Doors and Drawer Fronts
- Carefully remove all cabinet doors and drawer fronts.
- Label each piece with masking tape and a marker (e.g., “Upper Left,” “Drawer 2”) to ensure they go back in the correct place.
- Lay out all hardware (hinges, knobs, pulls) in a plastic baggie, labeling it as well.
2. Clean the Cabinets Thoroughly
- Cabinets accumulate grease and grime, especially in the kitchen. This must be removed for paint to adhere properly.
- Use a degreaser or a TSP substitute mixed with warm water.
- Wipe down all surfaces, inside and out, using a clean cloth or sponge.
- Rinse thoroughly with clean water and allow the cabinets to dry completely.
3. Repair Any Imperfections
- Inspect all cabinet surfaces for dents, scratches, or holes.
- Fill any imperfections with wood filler.
- Allow the wood filler to dry completely according to the manufacturer’s instructions.
4. Sand Everything Smooth
- This step is crucial for paint adhesion and a smooth finish.
- Initial Sanding: Use a sanding sponge or orbital sander with 100-150 grit sandpaper to scuff up the existing finish. You don’t need to remove the old finish, just create a surface for the new paint to adhere to.
- Detail Sanding: For any areas filled with wood filler, sand them smooth and flush with the surrounding surface.
- Between Coats Sanding: After priming and between paint coats, you will lightly sand with 220-320 grit sandpaper.
5. Clean Again and Remove Dust
- After sanding, a fine layer of dust will cover everything.
- Use a vacuum cleaner with a brush attachment to remove as much dust as possible.
- Follow up with a tack cloth to pick up any remaining fine dust particles. This is essential for a flawless finish.
6. Mask Off the Surrounding Areas
- This is where you protect everything you don’t want painted.
- Use high-quality painter’s tape to mask off the cabinet frames (the part that stays attached to the wall), appliances, countertops, backsplashes, and floors.
- Cover larger areas like countertops and floors with plastic sheeting or drop cloths.
- Consider using paper sheeting or cardboard to protect the walls behind the cabinets from overspray. The finer the mist from your sprayer, the further it can travel.
Phase 2: Priming for a Superior Surface
Primer acts as a bonding agent and ensures your paint adheres well and the color is true.
1. Choose the Right Primer
- For wood cabinets, an oil-based or shellac-based primer is often recommended for its excellent adhesion and stain-blocking properties.
- Water-based primers can also work well, especially if you’re using a water-based paint.
2. Apply the Primer
- Strain the Primer: Always strain your primer before pouring it into the sprayer cup. This removes any dried clumps that could clog the sprayer.
- Thinning (If Necessary): Check your sprayer and paint manufacturer’s recommendations for thinning. Some HVLP sprayers may require thinning of certain primers or paints to achieve the correct viscosity. Use the recommended thinner sparingly.
- Spraying Technique:
- Hold the sprayer perpendicular to the surface, about 10-12 inches away.
- Maintain a consistent speed and distance as you move.
- Overlap each pass by about 50%.
- Start and stop the trigger outside the edge of the cabinet door to avoid paint buildup.
- Spray in long, even strokes.
- Coats: Apply one to two thin, even coats of primer, allowing each coat to dry thoroughly according to the manufacturer’s instructions.
3. Lightly Sand and Clean After Priming
- Once the primer is completely dry, lightly sand all surfaces with 220-grit sandpaper or a fine-grit sanding sponge.
- This step smooths out any minor imperfections and creates a better surface for the paint.
- Wipe down the surfaces again with a tack cloth to remove all dust.
Phase 3: Spray Painting Kitchen Cabinets – The Transformation
Now comes the exciting part – applying the color! This is where spray painting cabinet doors and frames truly shine.
1. Prepare Your Paint
- Strain the Paint: Just like the primer, strain your paint before filling the sprayer cup.
- Thinning: This is critical for a good spray finish. Refer to your sprayer and paint manufacturer’s guidelines for the correct thinning ratio. Common thinning agents include water (for latex/acrylics) or mineral spirits (for oil-based paints). Thin in small batches, stirring thoroughly. You want the paint to flow smoothly but not be watery.
2. Set Up Your Spraying Area
- Ensure your spray area is well-ventilated and free of dust.
- Cover all masked areas again with fresh plastic sheeting or drop cloths to protect them from paint overspray.
3. Master Your Spraying Technique
This is where you learn how to use a paint sprayer for cabinets effectively.
- Test Spray: Before spraying your actual cabinets, test your spray pattern on a piece of cardboard or scrap wood. Adjust the pressure and flow settings until you achieve a fine, even mist with no splattering or heavy lines. The goal is a uniform fan pattern.
- Spraying Order: It’s often best to spray the inside of cabinet doors and frames first, followed by the outside. You can also spray drawer fronts separately from the cabinet frames.
- Consistent Motion:
- Hold the sprayer at a consistent distance (10-12 inches) and perpendicular to the surface.
- Use smooth, overlapping strokes. Overlap each pass by about 50% to ensure complete coverage and avoid holidays (missed spots).
- Start and stop the trigger before and after the cabinet surface to prevent heavy paint build-up at the edges.
- Move your arm, not just your wrist, for straighter, more consistent lines.
- Apply Thin Coats: Multiple thin coats are always better than one thick coat. Thin coats dry faster, reduce the risk of runs and sags, and create a smoother finish.
4. Apply the First Coat of Paint
- Apply the first coat evenly across all surfaces.
- Work systematically, moving from one cabinet to the next.
- Pay attention to edges and corners.
5. Allow for Drying Time
- Let the first coat dry completely according to the paint manufacturer’s instructions. This is crucial before applying subsequent coats.
6. Lightly Sand and Clean Between Coats
- Once the first coat is dry to the touch (or as recommended by the manufacturer), lightly sand all surfaces with 220-320 grit sandpaper or a fine-grit sanding sponge.
- This step is essential for achieving that flawless spray paint cabinet finish. It knocks down any dust nibs or slight imperfections from the first coat, ensuring a smooth surface for the next layer.
- Thoroughly wipe down all surfaces with a tack cloth to remove all dust.
7. Apply Subsequent Coats
- Repeat steps 4-6 for each subsequent coat. Most cabinet painting projects require at least two to three thin coats for full coverage and durability.
- Lacquering Kitchen Cabinets: If you are using lacquer, follow similar principles, but be aware that lacquers dry much faster and can be more prone to runs if applied too thickly.
Phase 4: Reassembly and Final Touches
1. Allow Paint to Cure
- While the paint may be dry to the touch after a few hours, it needs time to cure and harden completely. This can take several days to a couple of weeks, depending on the paint type and humidity.
- Avoid using the cabinets heavily during the curing period.
2. Reattach Hardware
- Once the paint is fully cured, carefully reattach all hinges, knobs, and drawer pulls.
- If you are installing new hardware, now is the time to do it. You may need to drill pilot holes if the new hardware is in a different position.
3. Rehang Doors and Reinsert Drawers
- Carefully rehang the cabinet doors and reinsert the drawers.
- Adjust hinges as needed to ensure doors hang straight and close properly.
Tips for a Professional-Looking Finish
- Practice Makes Perfect: If you’re new to cabinet sprayer painting, practice on scrap wood or the inside of cabinet doors first.
- Maintain a Wet Edge: Overlap your spray passes by about 50% and maintain a consistent speed to ensure a wet edge, preventing lap marks.
- Work in a Dust-Free Environment: Dust is the enemy of a smooth finish. Ensure your workspace is clean and well-ventilated.
- Don’t Rush: Patience is key. Allow adequate drying time between coats and before reassembling.
- Clean Your Sprayer Immediately: After each painting session, clean your HVLP cabinet sprayer thoroughly according to the manufacturer’s instructions. Dried paint can ruin your equipment.
- Consider Professional Sprayers: For very large projects or if you desire an ultra-high-end finish, consider renting or purchasing a professional-grade sprayer.
Common Issues and How to Fix Them
| Problem | Cause | Solution |
|---|---|---|
| Runs/Sags | Paint applied too thickly; Sprayer too close; Sprayer too slow | Apply thinner coats; Maintain correct distance and speed; Allow proper drying time between coats. |
| Splattering | Paint not thinned enough; Clogged tip; Low pressure | Thin paint as recommended; Clean sprayer tip; Increase sprayer pressure. |
| Orange Peel | Paint too thick; Sprayer too far; Too much air pressure | Thin paint; Decrease distance; Decrease air pressure; Use a different nozzle. |
| Poor Adhesion | Insufficient prep; Not enough sanding; Incompatible primer | Thoroughly clean and degrease; Sand properly; Use the correct primer for your paint type. |
| Dust Nibs | Dust in the air; Insufficient cleaning after sanding | Work in a dust-free environment; Use tack cloths diligently after every sanding step; Lightly sand between coats. |
| Uneven Coverage | Inconsistent spraying; Not enough overlap | Maintain consistent distance and speed; Overlap passes by 50%; Start and stop spray outside the surface. |
Frequently Asked Questions (FAQ)
How many coats of paint do I need for kitchen cabinets?
Typically, two to three thin coats of paint are sufficient for cabinets after priming. Some darker colors might require an extra coat for complete opacity. Always apply thin, even coats rather than one thick one.
Can I spray paint kitchen cabinets with an airless sprayer?
While possible, it’s generally not recommended for DIYers aiming for a professional finish. Airless sprayers produce more overspray and can be harder to control for the fine detail required on cabinets. An HVLP sprayer is the preferred choice for spray painting kitchen cabinets.
What is the best paint to use for spray painting kitchen cabinets?
High-quality acrylic or alkyd enamel paints specifically formulated for cabinets are best. These paints offer good durability, adhesion, and a smooth finish when sprayed. Water-based acrylics are easier to clean up, while oil-based alkyds can offer a harder, more durable finish.
How long should I wait between coats when spraying cabinets?
Always follow the paint manufacturer’s recommendations. Generally, allow at least 4-8 hours between coats, and ensure the surface is dry to the touch. Lightly sanding and cleaning between coats is crucial for a smooth finish.
Do I need to remove cabinet doors to spray paint them?
Yes, it is highly recommended to remove cabinet doors and drawer fronts. This allows you to spray them flat, which prevents runs and sags, and ensures you can paint all edges and sides thoroughly. It also makes it easier to achieve a consistent finish on all surfaces.
Can I spray lacquer on kitchen cabinets?
Yes, lacquering kitchen cabinets is a popular choice for a very durable and high-gloss finish. Lacquers dry very quickly, so you need to work efficiently and maintain a consistent technique. Ensure you use a sprayer and paint appropriate for lacquer.
How do I prevent runs when spraying cabinets?
Apply paint in thin, even coats. Maintain a consistent distance (10-12 inches) and speed. Overlap your spray passes by 50%. Start and stop the spray trigger off the cabinet surface. If a run does occur, stop spraying immediately, gently smooth the run with a brush if possible while the paint is still wet, and let it dry before lightly sanding and reapplying.
How to use a paint sprayer for cabinets?
To effectively use a paint sprayer for cabinets: prepare your surfaces meticulously, strain and thin your paint correctly, adjust your sprayer settings for a fine mist, hold the sprayer perpendicular to the surface at a consistent distance, use smooth, overlapping strokes, and apply multiple thin coats rather than one thick one. Practice on scrap material first to dial in your technique.
By following these detailed steps and tips, you can confidently tackle your kitchen cabinet painting project and achieve a beautiful, professional-quality spray paint cabinet finish that will revitalize your kitchen.