
Can you fix a leaky Moen kitchen faucet yourself? Yes, you can fix a leaky Moen kitchen faucet yourself by following these steps. Often, a persistent drip or a faulty handle on your Moen kitchen faucet can be resolved with a few simple tools and readily available Moen faucet parts. This guide will walk you through the common issues and provide a clear, step-by-step approach to get your faucet working like new again. Whether you’re dealing with a Moen faucet dripping or a problem with the Moen faucet sprayer hose, you’ll find the solutions here.
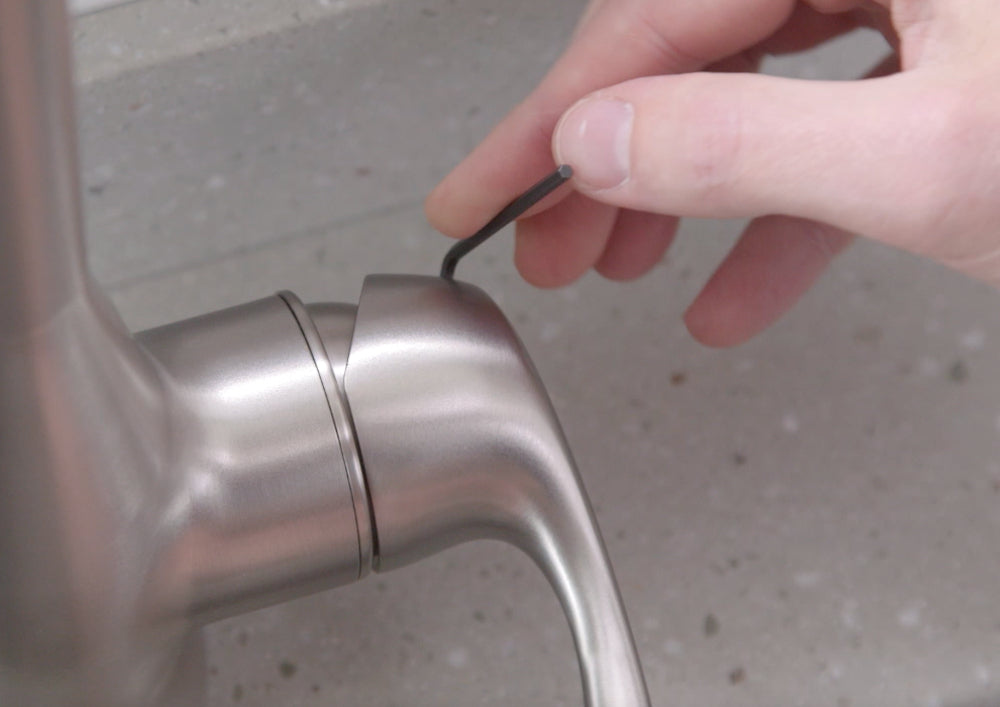
Image Source: shop.moen.com
Common Moen Kitchen Faucet Problems and Their Causes
Moen kitchen faucets are known for their durability and quality. However, like any fixture, they can experience wear and tear. The most common complaints include:
- Leaking: This is the most frequent issue, often caused by worn-out seals, faulty cartridges, or sediment buildup. A Moen kitchen faucet leak can waste a lot of water and be annoying.
- Low Water Pressure: This can stem from a clogged aerator, a problem with the faucet cartridge, or issues further up the water line.
- Stiff or Loose Handle: A stiff handle might indicate a need for lubrication or a new cartridge. A loose handle often points to a loosened set screw or a damaged handle mechanism.
- Sprayer Issues: A malfunctioning sprayer could be due to a leaky hose, a clogged nozzle, or a faulty diverter valve.
Essential Tools and Materials You’ll Need
Before you start, gather these items. Having them ready will make the repair process smoother.
- Adjustable Wrench: For loosening and tightening nuts.
- Phillips and Flathead Screwdrivers: For various screws.
- Pliers: Slip-joint or channel-lock pliers can be helpful.
- Rag or Towel: To catch drips and protect surfaces.
- Bucket: To place under the faucet to catch water.
- Penetrating Oil (e.g., WD-40): To loosen stubborn parts.
- Plumber’s Grease or Silicone Lubricant: For lubricating O-rings and cartridges.
- Replacement Moen Faucet Parts: This is crucial. You might need a new Moen faucet cartridge, O-rings, valve seats, or even a Moen faucet handle replacement. Identifying the correct parts is key to a successful repair.
Identifying Your Moen Faucet Model
Before purchasing any Moen faucet parts, it’s vital to know your faucet’s model number. This ensures you get the exact replacements needed.
How to Find Your Faucet’s Model Number
- Check the Faucet Itself: Look for a small label or etching on the underside of the spout, near the base, or on the back of the faucet body.
- Original Packaging or Manual: If you still have them, the model number will be listed there.
- Moen Website: Moen offers a helpful online tool where you can identify your faucet by visual cues or by entering known information. You can also find an extensive Moen faucet installation guide on their site for reference.
- Water Bill or Home Renovation Records: Sometimes, you might find this information in old paperwork.
Knowing your model number allows you to search for specific Moen faucet parts, like the correct Moen faucet cartridge, ensuring compatibility.
Troubleshooting a Moen Kitchen Faucet Leak
A Moen kitchen faucet leak is a common problem. The most frequent culprit is the Moen faucet cartridge, which controls water flow and temperature.
Step 1: Turn Off the Water Supply
This is the most important first step.
- Look for shut-off valves located directly beneath the sink. There should be one for hot water and one for cold water.
- Turn the handles clockwise until they are tight.
- Turn on the faucet to release any remaining water pressure and confirm the water is indeed off.
Step 2: Remove the Faucet Handle
The method for removing the handle varies slightly by model, but here’s the general process for a common Moen single handle faucet repair.
For Single-Handle Faucets:
- Locate the Set Screw: Most Moen single-handle faucets have a small set screw on the back or side of the handle base. It’s often hidden under a decorative cap or plug.
- Remove the Decorative Cap: Gently pry off the cap with a small flathead screwdriver or a putty knife. Be careful not to scratch the finish.
- Loosen the Set Screw: Use an Allen wrench (hex key) of the appropriate size to loosen the set screw. You don’t need to remove it completely, just loosen it enough to release the handle.
- Remove the Handle: Once the set screw is loose, the handle should lift straight up and off. If it’s stuck, a gentle wiggle or a bit of penetrating oil might help. You can also use a handle puller tool if it’s extremely stubborn. This might be part of your Moen faucet handle replacement process.
For Two-Handle Faucets:
- Remove the Decorative Cap: These often have a small decorative cap on the top of the handle, usually indicating “H” for hot and “C” for cold. Pry this off gently.
- Remove the Handle Screw: Underneath the cap, you’ll find a screw. Unscrew it.
- Lift Off the Handle: The handle should now lift straight up.
Step 3: Access and Replace the Moen Faucet Cartridge
This is where you’ll often resolve a Moen faucet dripping issue.
- Remove the Escutcheon or Bonnet Nut: After the handle is off, you’ll see a decorative cover (escutcheon) or a large nut (bonnet nut) holding the cartridge in place.
- Some models have a retaining clip instead of a nut. Look for a small metal clip holding the cartridge. You’ll need needle-nose pliers to remove it.
- For bonnet nuts, use an adjustable wrench to turn it counter-clockwise. You may need to hold the faucet body steady with another tool or a helper.
- Pull Out the Old Cartridge: Once the retaining mechanism is removed, the Moen faucet cartridge should pull straight out. It might be stiff.
- Moen often provides a special tool (cartridge puller) with new cartridges or as a separate purchase. This tool fits into the cartridge and helps you extract it by providing leverage.
- If you don’t have the puller, you can try gripping the stem of the cartridge with pliers and wiggling it while pulling upward. Be careful not to damage the faucet body.
- Inspect and Replace O-Rings and Seats: While the cartridge is out, examine the O-rings and valve seats located in the faucet body where the cartridge sits.
- These rubber parts can wear out and cause leaks. If they look cracked, hardened, or damaged, they should be replaced along with the cartridge.
- The Moen faucet valve seat is a small brass or plastic piece that the cartridge seals against. You might need a valve seat wrench to remove and replace them.
- Install the New Moen Faucet Cartridge:
- Lubricate the O-rings on the new cartridge with plumber’s grease or silicone lubricant. This helps it slide in easily and creates a good seal.
- Align the new cartridge with the faucet body. Most cartridges have specific notches or tabs that must align with corresponding slots in the faucet body for proper installation. Refer to your faucet’s specific instructions or diagrams.
- Gently push the new cartridge into place.
- Reassemble the Faucet:
- Replace the retaining clip, bonnet nut, or any other components you removed in reverse order. Tighten the bonnet nut snugly but don’t overtighten.
- Place the handle back onto the stem, ensuring it’s in the correct position.
- Tighten the set screw securely.
- Replace the decorative cap.
Step 4: Test the Faucet
- Turn the water supply valves back on slowly.
- Check for leaks around the handle and spout.
- Operate the faucet to check water flow and temperature control.
Addressing Low Water Pressure
If your Moen kitchen faucet has low water pressure, it’s often an easy fix related to the aerator.
Moen Faucet Aerator Cleaning
The aerator is the small screen at the tip of the spout where water exits. It can get clogged with mineral deposits and debris.
Steps for Aerator Cleaning:
- Unscrew the Aerator: Use pliers or an adjustable wrench to carefully unscrew the aerator from the spout. You might want to wrap the pliers with a rag to prevent scratching the faucet finish.
- Disassemble the Aerator: The aerator usually consists of a casing, a screen, and possibly a flow restrictor or aerating element. Gently take it apart.
- Clean the Parts:
- Rinse all the parts under running water to remove loose debris.
- For stubborn mineral buildup, soak the parts in a solution of equal parts white vinegar and water for a few hours or overnight.
- You can use an old toothbrush to scrub away any remaining deposits.
- Clean the Faucet Spout Outlet: While the aerator is off, clean the opening of the spout as well.
- Reassemble and Reinstall: Put the aerator back together and screw it firmly onto the spout.
- Test: Turn on the water and check the flow.
If cleaning the aerator doesn’t resolve the low pressure, the issue might be with the Moen faucet cartridge or something further back in your plumbing.
Fixing a Moen Faucet Sprayer Hose Problem
A common issue with sprayers is a leak from the Moen faucet sprayer hose or a sprayer that doesn’t retract properly.
Replacing the Moen Faucet Sprayer Hose
- Turn Off Water Supply: As always, shut off the hot and cold water valves under the sink.
- Access the Sprayer Hose Connection:
- Look under the sink where the sprayer hose connects to the faucet body or diverter.
- There’s usually a quick-connect fitting or a threaded nut holding the hose in place.
- Disconnect the Old Hose:
- Quick-Connect: Most modern Moen faucets use a quick-connect fitting. Look for a tab or button that you need to press to release the hose. Sometimes you need to pull the collar back.
- Threaded Nut: If it’s a nut, use an adjustable wrench to unscrew it.
- Remove the Sprayer Head: Unscrew the sprayer head from the hose. You might need pliers for this.
- Install the New Hose:
- Attach the new Moen faucet sprayer hose to the sprayer head, screwing it on tightly.
- Connect the other end of the hose to the faucet body or diverter. Ensure the connection is secure, whether it’s a quick-connect or threaded fitting.
- Test: Turn the water supply back on slowly and check for leaks at the connection points. Test the sprayer function and retraction.
Moen Faucet Handle Replacement
If your faucet handle is broken, loose, or you simply want to update its look, replacing it is straightforward.
Steps for Moen Faucet Handle Replacement:
- Turn Off Water Supply: Shut off the hot and cold water valves.
- Remove the Old Handle: Follow the steps outlined earlier in the “Remove the Faucet Handle” section for your specific faucet type (single or two-handle). This typically involves removing a decorative cap and loosening a set screw.
- Check the Cartridge Stem: Before installing a new handle, ensure the cartridge stem is in good condition. If the stem is damaged or stripped, you’ll need to replace the Moen faucet cartridge first.
- Install the New Handle:
- Align the new Moen faucet handle replacement with the cartridge stem or spindle.
- Slide it into place.
- Secure it with the set screw, tightening it firmly.
- Replace the Decorative Cap: Snap the decorative cap back into place.
- Test: Turn the water back on and test the handle’s operation.
Replacing Moen Faucet Valve Seats
For older faucets, worn-out Moen faucet valve seats can be the cause of drips, especially if replacing the cartridge alone doesn’t fix the leak.
Steps for Replacing Valve Seats:
- Turn Off Water Supply: Shut off the water valves under the sink.
- Disassemble the Faucet: Remove the handle and bonnet nut (or retaining clip) as described earlier to access the cartridge.
- Remove the Cartridge: Pull out the old Moen faucet cartridge.
- Locate and Remove Valve Seats:
- The valve seats are usually located at the bottom of the faucet body where the cartridge sits. They are often small metal or plastic pieces.
- You’ll need a special tool called a valve seat wrench to grip and unscrew the old seats.
- Clean the Valve Seat Area: Clean out any debris or mineral deposits from the seat opening.
- Install New Valve Seats:
- Place the new Moen faucet valve seats into their respective openings.
- Use the valve seat wrench to screw them in tightly.
- Reassemble Faucet: Reinstall the Moen faucet cartridge, bonnet nut, and handle.
- Test: Turn on the water and check for leaks.
General Maintenance Tips for Your Moen Kitchen Faucet
Regular maintenance can prevent many common issues.
- Clean the Aerator Regularly: Make it a monthly or quarterly task to clean your aerator to maintain good water pressure.
- Lubricate Moving Parts: Occasionally, apply plumber’s grease to the cartridge stem and moving parts of the handle to ensure smooth operation and prevent seizing.
- Address Small Leaks Promptly: Don’t ignore minor drips. They can worsen over time and waste significant amounts of water.
- Wipe Down Surfaces: Clean your faucet regularly with a mild soap and water solution to prevent mineral buildup and maintain its shine. Avoid abrasive cleaners that can damage the finish.
- Refer to Your Moen Faucet Installation Guide: Keep your faucet’s manual handy. It provides specific diagrams and instructions for your model, which can be invaluable during repairs.
Common Moen Faucet Parts You Might Need
Knowing the names of the parts can help when you’re shopping for replacements.
| Part Name | Description | Common Issue Addressed |
|---|---|---|
| Moen Faucet Cartridge | The internal mechanism that controls water flow and temperature. | Leaks, dripping, temperature control issues. |
| O-Rings | Rubber seals that prevent water from leaking around the cartridge or spout. | Dripping, leaks from base or spout. |
| Valve Seats | Small parts that the cartridge seals against, controlling water flow. | Dripping, poor seal. |
| Handle Assembly | The visible handle and its internal components. | Loose handle, broken handle. |
| Sprayer Hose | The flexible hose connecting the faucet to the sprayer head. | Leaks, kinks, poor sprayer function. |
| Aerator | The screen at the tip of the spout that mixes air with water for a smooth flow. | Low water pressure, sputtering. |
| Retaining Clip/Nut | Holds the cartridge in place within the faucet body. | Loose cartridge, water leaks. |
| Escutcheon/Bonnet Nut | Decorative cover or large nut that secures the cartridge and internal components. | Leaks around the base, loose parts. |
Frequently Asked Questions (FAQ)
How often should I replace my Moen faucet cartridge?
Moen faucet cartridges are designed to last for many years. However, they are a wear-and-tear item. You typically only need to replace a Moen faucet cartridge when you experience leaks or a failure in temperature or flow control. There isn’t a set schedule for replacement.
My Moen faucet is leaking from the base. What should I do?
A leak from the base of a Moen single-handle faucet often indicates worn O-rings or a loose bonnet nut. Turn off the water, remove the handle and bonnet nut, inspect and replace the O-rings, and then reassemble. Ensure the bonnet nut is tightened properly.
Can I use generic parts instead of genuine Moen faucet parts?
While some generic parts might fit, it’s highly recommended to use genuine Moen faucet parts. They are specifically designed for Moen faucets and will ensure a proper fit, optimal performance, and longevity. Using generic parts could lead to further issues or damage.
My Moen kitchen faucet handle is loose. How do I fix it?
A loose handle is usually due to the set screw becoming loose over time. Locate the set screw (often hidden under a decorative cap), tighten it with the appropriate Allen wrench, and then replace the cap. If the set screw hole or the cartridge stem is stripped, you might need a new cartridge or handle.
What is the difference between a Moen cartridge and a valve seat?
The Moen faucet cartridge is the main internal component that you typically replace to fix leaks or control issues. It houses seals and diverter mechanisms. The Moen faucet valve seat is a smaller, often metal or plastic, part that sits at the base of the faucet body where the cartridge seals against. Both can wear out and cause leaks, but the cartridge is the more common culprit.
Is it difficult to perform a Moen single handle faucet repair?
For most common issues like a dripping faucet or a stiff handle, a Moen single handle faucet repair is considered a manageable DIY project. The most challenging part is often removing a stubborn cartridge. Having the right tools and following the steps carefully, as outlined in this guide, will greatly increase your chances of success.
My Moen faucet sprayer hose keeps retracting slowly or not at all. What’s the problem?
This is usually due to an issue with the weight that attaches to the sprayer hose under the sink, or the hose itself might be kinked or obstructed. Check that the weight is properly attached and that the hose has a clear path to travel. If the hose is damaged or kinked, you may need to replace the Moen faucet sprayer hose.
Where can I find a Moen faucet installation guide for my specific model?
The best place to find a Moen faucet installation guide is the official Moen website. They have a comprehensive support section where you can search for your faucet model and download installation manuals, parts diagrams, and troubleshooting guides.
By following this comprehensive guide, you should be well-equipped to tackle most common Moen kitchen faucet repairs. Remember to always prioritize safety by turning off the water supply and working carefully to avoid damaging your faucet or plumbing.