
Changing a kitchen faucet can be a rewarding DIY project for homeowners. Generally, it’s considered a moderate-difficulty task, achievable for most people with basic tools and a willingness to learn. While it’s not as simple as replacing a lightbulb, it’s certainly within the realm of DIY plumbing for many. You won’t need to be a master plumber, but a little patience and the right approach will make the faucet replacement difficulty much more manageable.
This guide will walk you through the process, from assessing the job to the final touches, helping you decide if a kitchen faucet installation is a project you’re ready to tackle yourself. We’ll cover the tool requirements for faucet change, common pitfalls, and when it might be better to call a professional.
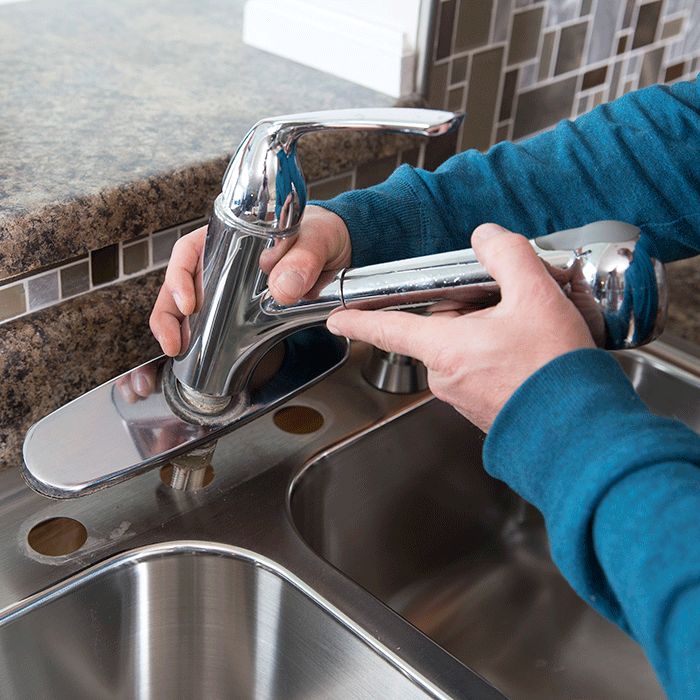
Image Source: mobileimages.lowes.com
Why Change Your Kitchen Faucet?
Kitchen faucets are workhorses. They’re used multiple times a day for everything from washing dishes to filling water bottles. Over time, even the best faucets can develop issues. Here are some common reasons homeowners opt for a replacement:
- Leaks: A dripping faucet isn’t just annoying; it wastes water and can lead to higher utility bills. Leak repair skills are a part of faucet maintenance, but if the leak is persistent or coming from the faucet body itself, replacement is often the best solution.
- Worn-out Parts: Internal components like cartridges, O-rings, and seals can degrade over time, leading to poor performance, stiff handles, or inconsistent water flow.
- Outdated Style: As kitchen design trends evolve, an old faucet can make the entire space look dated. A new faucet can instantly refresh the look of your kitchen.
- Improved Functionality: Modern faucets offer features like pull-down sprayers, touchless operation, or built-in water filters that can significantly enhance convenience.
- Damage: Accidental damage, like a cracked handle or spout, necessitates a replacement.
- Mineral Buildup: In areas with hard water, mineral deposits can clog aerators and cartridges, reducing water pressure and flow.
Considering these points, tackling a faucet replacement difficulty can save you money compared to hiring a professional.
Assessing the Faucet Replacement Difficulty
The difficulty of changing a kitchen faucet can vary based on several factors. Let’s break them down:
1. Your Current Faucet Type
The most common types of kitchen faucets are:
- Compression Faucets: These are older but still found in some homes. They use rubber washers to stop water flow. Replacing these can sometimes involve more fiddly parts.
- Ball Faucets: These have a single handle that moves over a rounded cap. They are relatively simple to repair but can have more parts to manage during replacement.
- Cartridge Faucets: These are very common and use a movable stem (cartridge) to control water flow. Replacing the cartridge is often a simpler fix, and replacing the whole faucet is also fairly straightforward.
- Ceramic Disc Faucets: These are the most durable and use two ceramic discs to control water. They are less prone to leaks and wear but if they do fail, replacing the entire faucet or the disc cartridge is usually necessary.
The type of faucet you have will influence the complexity of the removal and installation process.
2. Accessibility Under the Sink
This is often the biggest challenge. The space under a kitchen sink is usually cramped, filled with pipes, disposal units, and cleaning supplies. You’ll need to be comfortable working in a tight, awkward space, often contorting yourself to reach the mounting nuts and supply lines.
3. Condition of Existing Fixtures
- Corrosion: If your current faucet has been in place for many years, especially in areas with hard water, the nuts and connections might be corroded and difficult to loosen. This can require extra effort and possibly specialized tools.
- Type of Connections: Older plumbing might have threaded connections that are more prone to seizing than modern compression fittings.
4. Your DIY Comfort Level and Experience
If you’ve never tackled DIY plumbing before, this might feel like a significant undertaking. However, if you have some experience with basic home repairs and are comfortable using tools, you’ll likely find this manageable. Having good leak repair skills isn’t strictly necessary for replacement, but being comfortable troubleshooting minor leaks is helpful.
5. The New Faucet Design
Some new faucets, especially those with advanced features like filtered water lines or touchless sensors, might have slightly more complex installation requirements due to additional connections or electronic components.
Tool Requirements for Faucet Change
Having the right tools makes a huge difference. Here’s a list of what you’ll likely need for a typical kitchen faucet installation:
- Adjustable Wrenches (Two): Essential for loosening and tightening nuts and fittings. Having two allows you to hold one part steady while turning another.
- Basin Wrench: This specialized tool is designed specifically for reaching those difficult-to-access nuts that hold the faucet to the sink from underneath. It’s a lifesaver in tight spaces.
- Pipe Wrench: Useful for gripping pipes, especially if any corrosion is present.
- Pliers (Slip-joint and Channel-lock): For various gripping and turning tasks.
- Screwdrivers (Phillips and Flathead): For any screws that might be present on the old faucet or escutcheon.
- Bucket or Towels: To catch any residual water when disconnecting the supply lines. Old towels are also great for protecting your cabinet floor.
- Flashlight or Work Light: Essential for seeing clearly in the dark space under the sink.
- Safety Glasses: Protect your eyes from debris or drips.
- Plumber’s Putty or Silicone Caulk: Used to create a watertight seal between the faucet base and the sink or countertop.
- New Supply Lines: It’s often recommended to replace old supply lines when installing a new faucet. Make sure to get the correct length and connection types.
- Penetrating Oil (e.g., WD-40): Helpful for loosening stubborn, corroded nuts.
- Rags: For cleaning up any spills or residue.
- Hacksaw or Pipe Cutter (Optional): In rare cases, if supply lines are severely corroded or fused, you might need to cut them.
Specialty Tools to Consider
- Faucet Seat Wrench: For some older faucets with separate valve seats.
- Thread Seal Tape (Teflon Tape): For threaded pipe connections, though many modern faucet connections use rubber seals and don’t require tape.
Having these tool requirements for faucet change ready will make the process much smoother.
Step-by-Step Guide to Changing Your Kitchen Faucet
Let’s get started with the actual process. Remember to read the installation instructions that come with your new faucet, as they may have specific requirements.
Step 1: Preparation and Safety First
- Clear the Area: Remove everything from under the sink. This will give you ample space to work.
- Turn Off the Water Supply: Locate the hot and cold water shut-off valves, usually found under the sink. Turn them clockwise until they are completely closed. If you don’t have shut-off valves under the sink, you’ll need to turn off the main water supply to your house.
- Relieve Water Pressure: Turn on the old faucet to drain any remaining water in the lines. Let it run until no more water comes out.
- Protect Your Workspace: Place towels or a bucket under the pipes to catch any residual water.
Step 2: Disconnect the Old Faucet
- Disconnect Supply Lines: Use an adjustable wrench to loosen the nuts connecting the hot and cold water supply lines to the shut-off valves. Be prepared for a small amount of water to drip out.
- Disconnect Sprayer Hose (if applicable): If your old faucet has a separate sprayer, disconnect its hose from the faucet body. This connection is usually a threaded fitting.
- Loosen Faucet Mounting Nuts: Get under the sink and locate the nuts that secure the faucet to the sink or countertop. This is where the basin wrench shines. It allows you to grip and turn these nuts even in tight spaces. You might need to remove a backup flange or mounting plate as well.
- Remove the Old Faucet: Once the nuts are off, you should be able to lift the old faucet straight up from the top of the sink. If it’s stuck, gently try to wiggle it. Sometimes a bit of penetrating oil can help loosen it. If it’s really stubborn, you might need to carefully cut the mounting studs with a hacksaw, being very careful not to damage the sink.
Step 3: Clean the Sink Surface
Before installing the new faucet, clean the area where the old one was. Remove any old plumber’s putty, caulk, or mineral deposits. A putty knife or scraper can be helpful here. A clean surface ensures a good seal for the new faucet.
Step 4: Install the New Faucet
- Read the Instructions: Seriously, read them! Each faucet is a little different.
- Apply Sealant: Most new faucets come with a gasket or rubber seal for the base. If yours doesn’t, or the instructions suggest it, apply a bead of plumber’s putty or silicone caulk around the underside of the faucet base or escutcheon.
- Position the New Faucet: Carefully insert the new faucet through the holes in the sink or countertop. Ensure it’s properly aligned.
- Secure from Underneath: From under the sink, attach the mounting hardware (washers, nuts, etc.) that came with your new faucet. Tighten them snugly by hand first, ensuring the faucet is straight. Then, use your adjustable wrench or basin wrench to tighten them firmly. Be careful not to overtighten, which could crack a porcelain sink.
- Connect Supply Lines: Attach the new supply lines to the faucet shanks. Hand-tighten first, then give them a quarter to half turn with a wrench. Do not overtighten, as this can damage the rubber seals.
- Connect Sprayer Hose (if applicable): Connect the sprayer hose to the designated port on the faucet body.
- Connect Other Components: If your faucet has additional features (e.g., water filter connections), connect them according to the manufacturer’s instructions.
Step 5: Test for Leaks
- Turn on Water Supply: Slowly turn the hot and cold water shut-off valves back on.
- Check Connections: Inspect all the connections you made under the sink for any drips or leaks. Tighten them slightly if you see any.
- Test the Faucet: Turn on the new faucet and let the water run for a minute. Check for leaks around the base of the faucet on the sink. Also, check all the supply line connections again. Operate the handle, sprayer, and any other features to ensure everything is working correctly.
Step 6: Final Touches
Clean up any excess plumber’s putty or caulk that may have squeezed out. Put your items back under the sink.
Common Faucet Problems and Troubleshooting
Even with a new faucet, you might encounter minor issues. Here are some common problems and simple fixes, which can be considered basic leak repair skills:
| Problem | Possible Cause | Solution |
|---|---|---|
| Faucet Drips | Loose handle, worn-out cartridge, debris in valve seat. | Tighten handle screws. If it persists, you might need to replace the cartridge or valve seat. For new faucets, check that connections are tight. |
| Low Water Pressure | Clogged aerator, kinks in supply lines, issue with shut-off valves. | Unscrew and clean the aerator. Check supply lines for kinks. Ensure shut-off valves are fully open. |
| Leaking Base | Improper sealing, loose mounting nuts. | Tighten mounting nuts. Reapply plumber’s putty or silicone caulk if the seal is compromised. |
| Sprayer Not Working | Kinked hose, clogged sprayer head, faulty diverter. | Straighten hose. Clean sprayer head. Check diverter mechanism. |
| No Hot/Cold Water | Shut-off valves not fully open, internal valve issue, problem with water heater. | Ensure shut-off valves are fully open. If it’s a new faucet, check its internal valves. If it’s an old faucet, the cartridge might be the culprit. |
If you encounter issues you can’t resolve, it’s time to consider calling a professional.
When to Call a Plumber
While many kitchen renovation tasks can be done by homeowners, some situations warrant professional help.
- Uncertainty or Lack of Confidence: If you’re not comfortable working with plumbing or in tight spaces, a plumber can do the job quickly and correctly.
- Corroded or Damaged Pipes: If your existing plumbing is heavily corroded, leaking, or damaged, a plumber has the expertise and tools to repair or replace it safely. Forcing corroded fittings can cause more significant damage.
- No Shut-Off Valves: If you don’t have shut-off valves under your sink and aren’t comfortable turning off the main water supply, it’s best to let a professional handle it.
- Complex Faucet Installations: Faucets with electronic components, instant hot water dispensers, or integrated water filtration systems can be more complex and might require specialized knowledge.
- Persistent Leaks or Problems: If you follow the steps and still have leaks or other issues, a plumber can diagnose and fix the problem efficiently.
- Older Home Plumbing: Homes with very old plumbing systems may have unique challenges that experienced plumbers are best equipped to handle.
The plumber cost vs DIY approach depends on your budget, skill level, and the complexity of the job. While a plumber will cost more upfront, they can save you time, prevent further damage, and ensure the job is done correctly.
The Cost Factor: DIY vs. Hiring a Plumber
The financial aspect is a significant consideration for many homeowners.
DIY Faucet Replacement Costs:
- New Faucet: \$50 – \$500+ (depending on brand, features, and style)
- Supply Lines: \$10 – \$30
- Plumber’s Putty/Caulk: \$5 – \$10
- Tools (if you don’t have them): \$30 – \$100+ for a basic set including a basin wrench.
Total DIY Cost: \$95 – \$640+ (This assumes you have some basic tools already).
Hiring a Plumber:
- Labor Costs: \$75 – \$200+ per hour, depending on your location and the complexity of the job.
- Faucet Cost: You might purchase the faucet yourself or have the plumber supply it (often at a markup).
- Total Plumber Cost: \$150 – \$400+ for a straightforward replacement, potentially more if there are unexpected plumbing issues.
Comparing the Costs:
- DIY Savings: You can save a significant amount of money by doing it yourself, especially if you already own the necessary tools.
- Risk Factor: The risk with DIY is making a mistake that leads to water damage, which can be far more expensive to repair than the cost of hiring a plumber.
- Time Investment: DIY requires your time. A professional plumber can typically complete the job in 1-3 hours.
For those comfortable with basic residential plumbing tasks and willing to invest the time, the plumber cost vs DIY clearly favors the DIY approach for cost savings. However, peace of mind and avoiding potential water damage are valuable aspects that a professional can provide.
Conclusion: Is Changing a Kitchen Faucet Right for You?
The faucet replacement difficulty is generally moderate. It’s a task that many homeowners can successfully complete with patience, the right tools, and by following a clear guide. It’s a fantastic way to gain leak repair skills and confidence in your ability to handle plumbing fixture replacement.
If you’re looking to update your kitchen, save money, and enjoy the satisfaction of a job well done, giving a faucet change a try might be an excellent addition to your kitchen renovation tasks. Just remember to assess your comfort level, ensure you have the proper tool requirements for faucet change, and don’t hesitate to call a professional if you encounter any significant obstacles or feel out of your depth.
Frequently Asked Questions (FAQ)
Q1: How long does it typically take to change a kitchen faucet?
A: For someone with some DIY experience, a basic kitchen faucet replacement usually takes 1 to 3 hours. This includes the time spent removing the old faucet, cleaning, and installing the new one. If you encounter unexpected problems, it could take longer.
Q2: Do I need a special tool to remove an old faucet?
A: While you can sometimes get by with adjustable wrenches, a basin wrench is highly recommended. It’s specifically designed to reach the nuts holding the faucet in place from underneath the sink, making the process significantly easier and less frustrating.
Q3: What if the old faucet won’t come off?
A: If the mounting nuts are corroded and won’t budge, try applying a penetrating oil (like WD-40) and letting it sit for 15-30 minutes. You may need to reapply it. If it’s still stuck, you might have to carefully cut the mounting studs with a hacksaw. Be extremely cautious not to damage the sink or countertop when cutting.
Q4: Should I replace the water supply lines when changing the faucet?
A: It’s generally a good idea to replace old supply lines when installing a new faucet. Over time, rubber hoses can degrade and become brittle, potentially leading to leaks. New, flexible braided stainless steel supply lines are inexpensive and provide greater reliability.
Q5: What kind of sealant should I use?
A: Most new faucets come with a rubber gasket or seal that goes between the faucet base and the sink. If yours doesn’t, or the instructions recommend it, use plumber’s putty for a watertight seal on most sink materials. For granite, quartz, or other natural stone countertops, silicone caulk is often recommended to avoid staining. Always check the faucet manufacturer’s instructions.
Q6: Can I leave the water on while I work?
A: Absolutely not. You must turn off the water supply to the faucet at the shut-off valves under the sink (or the main water supply to your house if no valves are present) before starting any work. Failure to do so will result in a flood.
Q7: What are the risks of DIY faucet replacement?
A: The primary risks include water damage from leaks if connections are not made properly, damaging the sink or countertop during removal or installation, and stripping threads on pipes or fittings. Having the right tools and taking your time can mitigate these risks.