
Can you add trim to kitchen cabinets? Absolutely! Adding trim to kitchen cabinets is a fantastic way to update their look, giving them a more custom and high-end appearance. This guide will walk you through how to add trim to kitchen cabinets, transforming your kitchen into a modern and stylish space. We’ll cover everything from choosing the right cabinet moulding to the final installation, making this a rewarding DIY cabinet molding project.
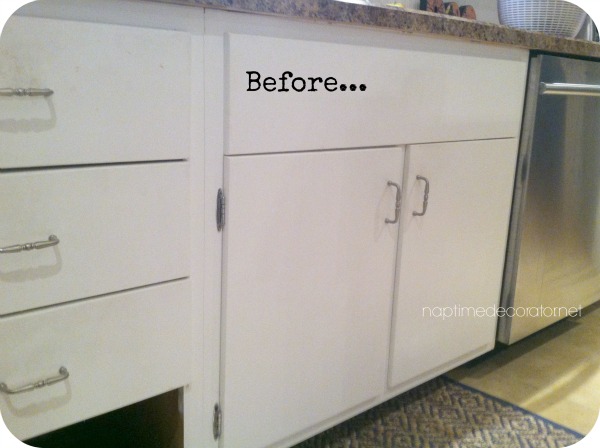
Image Source: www.naptimedecorator.net
Why Add Trim to Kitchen Cabinets?
Adding trim to your kitchen cabinets, often referred to as cabinet door trim or adding decorative trim, is more than just an aesthetic choice. It’s a smart investment in your home. Here’s why it’s a great idea:
- Elevated Style: Plain cabinet doors can look basic. Trim adds character, depth, and visual interest, instantly making your kitchen feel more sophisticated.
- Customization: You can tailor the look to your specific taste, whether you’re aiming for a classic farmhouse cabinet trim or a sleek shaker style cabinet trim.
- Increased Home Value: A well-done kitchen renovation, even something as simple as adding trim, can boost your home’s resale value.
- Cost-Effective Upgrade: Compared to replacing entire cabinets, adding trim is a budget-friendly way to achieve a significant visual upgrade. It’s a key part of kitchen cabinet customization.
Planning Your Cabinet Trim Project
Before you grab any tools, a little planning goes a long way. This ensures your project runs smoothly and the results are exactly what you envision.
Choosing Your Cabinet Trim Style
The style of cabinet moulding you select is crucial. It should complement your kitchen’s overall design. Here are some popular options:
Shaker Style Cabinet Trim
This is a very popular choice for a clean, modern look. Shaker doors typically have a flat center panel and a simple, squared frame. Adding trim can enhance this by creating a more defined border or adding a subtle decorative element within the existing frame.
- Characteristics: Simple, clean lines, flat panels.
- Trim Ideas: A simple quarter-round trim around the outside edge of the door, or a smaller flat trim piece inset within the existing frame.
Farmhouse Cabinet Trim
For that cozy, rustic feel, farmhouse style is ideal. This often involves raised panels or beadboard, but even flat-front cabinets can get a farmhouse touch with the right trim.
- Characteristics: Warm, inviting, often with distressed finishes or beadboard.
- Trim Ideas: Consider adding beadboard to the center panel of flat doors, or using a slightly chunkier, decorative cabinet trim profile to create a more substantial look.
Modern and Contemporary Trim
If your kitchen leans towards sleek and minimalist, your trim choices should reflect that.
- Characteristics: Minimalist, geometric, often with clean lines and smooth finishes.
- Trim Ideas: Thin, flat trim pieces, geometric patterns, or even inset metal accents can work well.
Traditional and Ornate Trim
For a more classic or formal kitchen, ornate trim can add a touch of elegance.
- Characteristics: Detailed, often with curves and embellishments.
- Trim Ideas: Ogee profiles, dentil molding, or multi-layered cabinet moulding can create a grand effect.
Selecting Cabinet Trim Profiles
Cabinet trim profiles come in countless shapes and sizes. Think about the depth and width you want.
- Quarter Round: A simple, rounded edge.
- Bead Molding: Features a series of small beads.
- Ogee: An elegant, S-shaped curve.
- Flat Stock: Simple, flat pieces of wood.
- Applied Molding: Often a combination of smaller moldings layered together for a more complex look.
Table 1: Common Cabinet Trim Profiles
| Profile Type | Description | Best For |
|---|---|---|
| Quarter Round | A quarter circle cross-section | Adding a subtle edge detail, modern farmhouse |
| Bead Molding | A series of small rounded beads | Traditional, farmhouse, country styles |
| Ogee | An S-shaped curve | Traditional, elegant, formal kitchens |
| Flat Stock | Simple, flat pieces of wood | Modern, minimalist, shaker styles |
| Applied Molding | Layered moldings to create depth and detail | Traditional, custom looks, enhancing existing trim |
Measuring Your Cabinets
Accurate measurements are key to installing cabinet edging correctly.
- Measure Each Door and Drawer Front: Measure the height and width of each cabinet door and drawer front.
- Consider the Design: Decide where you want the trim to go. Will it frame the entire door, just the edges, or create a pattern on the door?
- Account for Overlap: If you’re framing a door, you’ll need to cut your trim pieces to fit around the perimeter. Measure the outer dimensions where the trim will sit.
- Add for Corners: If you’re creating a frame, each corner will likely require a miter cut. Account for this when calculating your material needs. It’s always wise to buy a little extra material for mistakes or future repairs.
Material Choices for Cabinet Trim
The material of your trim will affect its look, durability, and how easy it is to work with.
- Wood:
- Pine: Affordable and easy to work with, but can be softer and prone to dents. Good for painted finishes.
- Poplar: A good balance of affordability and workability. Takes paint well.
- Maple: Harder and more durable than pine, with a fine grain that’s excellent for stained or painted finishes.
- Oak: Durable with a prominent grain, great for stained finishes, but can be more challenging to cut.
- Hardwoods (Cherry, Walnut): More expensive but offer beautiful grain patterns and excellent durability for stained finishes.
- MDF (Medium-Density Fiberboard):
- Pros: Very affordable, smooth surface ideal for painting, stable (doesn’t warp easily).
- Cons: Not as durable as wood, can be damaged by moisture, edges can chip if not handled carefully.
- Polyurethane/Polymer:
- Pros: Lightweight, waterproof, resistant to rot and insects, can be pre-primed and painted, often intricately detailed.
- Cons: Can be more expensive, not as easy to cut or modify as wood.
Table 2: Material Comparison for Cabinet Trim
| Material | Cost (Relative) | Workability | Durability | Finish Options | Moisture Resistance |
|---|---|---|---|---|---|
| Pine | $ | Easy | Moderate | Paint/Stain | Low |
| Poplar | $$ | Easy | Moderate | Paint/Stain | Low |
| Maple | $$$ | Moderate | High | Paint/Stain | Moderate |
| Oak | $$$ | Moderate | High | Stain | Moderate |
| MDF | $ | Easy | Moderate | Paint | Low |
| Polyurethane | $$$$ | Moderate | High | Paint | High |
Tools and Supplies You’ll Need
Gathering your tools before you start makes the process much smoother.
- Measuring Tape: For accurate measurements.
- Pencil: For marking cut lines.
- Miter Saw (Compound Miter Saw is best): Essential for precise angled cuts on trim. A hand saw with a miter box can work for simpler cuts but is less precise.
- Jigsaw (optional): For creating custom shapes or intricate cuts if your design calls for it.
- Clamps: To hold trim pieces in place while glue dries or while you nail them.
- Wood Glue: For a strong bond between trim and cabinet.
- Brad Nailer and Brad Nails: The easiest way to attach trim securely. Ensure your nails are the right length – they should go through the trim and into the cabinet door/frame without poking through the other side.
- Hammer (if not using a nail gun): For tapping in nails.
- Nail Set (or punch): To sink nail heads slightly below the surface for easier filling.
- Sandpaper (various grits: 120, 180, 220): For smoothing edges and preparing for finishing.
- Wood Filler or Putty: To fill nail holes and any imperfections.
- Primer and Paint/Stain and Sealer: To finish your trim.
- Paintbrushes or Foam Rollers: For applying finish.
- Safety Glasses: Always protect your eyes!
- Dust Mask: Especially when sanding.
Step-by-Step Guide to Adding Trim to Kitchen Cabinets
This is where the magic happens! Follow these steps carefully for a professional-looking finish.
Step 1: Prepare Your Cabinet Doors
If you’re adding trim to existing doors that are still on the cabinets, it’s often easier to remove them.
- Remove Cabinet Doors: Unscrew each door from the cabinet frame. It’s a good idea to label them (e.g., “Upper Left”) so you know where they go back.
- Clean the Surface: Wipe down the doors with a mild cleaner to remove grease and dust.
- Lightly Sand (Optional but Recommended): If your doors are already finished, a light sanding with 180-grit sandpaper will help the new glue and finish adhere better. Wipe away dust with a tack cloth.
Step 2: Cut Your Trim Pieces
Precision is key here. Measure twice, cut once!
- Miter Cuts for Frames: For a classic frame around a door, you’ll need to make 45-degree miter cuts on each end of your trim pieces. This creates a neat, seamless corner.
- Measure the desired length for one side of the frame.
- Set your miter saw to 45 degrees.
- Cut one end of the trim piece at 45 degrees.
- Measure the desired length from the long point of the first cut.
- Set your saw to the opposite 45-degree angle and make the second cut.
- Repeat for all pieces, ensuring you have four pieces that form a rectangle or square.
- Test Fit: Lay out your cut pieces on a flat surface to ensure they fit together perfectly, forming clean 90-degree corners. Adjust angles if necessary.
- Consider Insets: If you’re adding trim within a door frame (like on a shaker style), you’ll measure the inside dimensions and make straight cuts, or potentially miter cuts if you want a more decorative internal frame.
Step 3: Attach the Trim
This is the core of installing cabinet edging.
- Dry Fit First: Before applying glue or nails, position your trim pieces on the cabinet door to ensure they fit perfectly.
- Apply Wood Glue: Apply a thin, even bead of wood glue along the back of the trim piece where it will contact the cabinet door.
- Position and Clamp (Optional): Place the glued trim onto the cabinet door in its final position. If you have small clamps, you can use them to hold the trim firmly while you nail it. If not, proceed carefully to the next step.
- Nail the Trim:
- Using a Brad Nailer: Position the nailer so the nail goes through the trim and into the cabinet door. Fire one or two nails near the ends and one or two in the middle for good hold.
- Using a Hammer: Carefully hammer small finishing nails through the trim into the cabinet door. Start with one nail at each end.
- Sink the Nails: Use a nail set or punch to carefully sink the heads of the nails slightly below the surface of the trim. This makes them easier to hide later.
- Repeat for All Pieces: Continue this process for all trim pieces on all cabinet doors and drawer fronts.
- Wipe Away Excess Glue: Immediately wipe away any glue that squeezes out with a damp cloth. Dried glue can be difficult to remove and will interfere with finishing.
Step 4: Sanding and Filling
This step is crucial for a smooth, professional finish.
- Let Glue Dry: Allow the wood glue to dry completely according to the manufacturer’s instructions (usually a few hours).
- Fill Nail Holes: Use wood filler or putty to fill all the nail holes. Overfill slightly, as the filler may shrink a bit as it dries.
- Sand Smooth: Once the filler is dry, sand the entire door.
- Start with a medium-grit sandpaper (like 120-grit) to smooth out any rough spots and level the filler.
- Follow up with a finer grit (180 or 220-grit) for a super smooth finish.
- Sand the edges of the trim and the cabinet door surface, ensuring everything is flush and seamless.
- Use a sanding block to keep surfaces flat.
- Clean Dust: Wipe away all sanding dust with a tack cloth or a slightly damp cloth.
Step 5: Finishing Your Trim and Cabinets
The final touch that really makes your kitchen cabinet customization shine.
- Prime: Apply a coat of high-quality primer. This helps the paint adhere well and provides an even base color. Allow the primer to dry completely.
- Sand Lightly: After priming, give the door a light sanding with 220-grit sandpaper. This smooths out any imperfections from the primer and creates an even better surface for paint. Wipe away dust.
- Paint or Stain:
- For Painted Finishes: Apply thin, even coats of your chosen paint. Two to three coats are usually needed for full coverage. Allow each coat to dry thoroughly before applying the next. Use a high-quality cabinet paint for durability.
- For Stained Finishes: Apply your stain according to the product directions. Wipe off excess stain to achieve the desired depth of color. Once the stain is dry, apply several coats of a durable clear sealer (like polyurethane or polycrylic) for protection.
- Crown Molding for Cabinets (Optional): If you’re adding crown molding for cabinets, this is the time to install and finish it. Measure, cut (typically with more complex miter angles), and attach it to the top of your cabinets using glue and finishing nails. Then, fill nail holes, sand, prime, and paint or stain to match.
Step 6: Reinstall Cabinet Doors
- Reattach Doors: Once the finish is completely dry and cured, reattach the cabinet doors to the cabinet frames.
- Adjust Hinges: Make any necessary adjustments to the hinges so the doors hang straight and close properly.
Frequently Asked Questions (FAQ)
Q: Can I add trim to laminate cabinets?
A: Yes, you can, but it requires a bit more care. Laminate surfaces can be slippery, making it harder for glue and nails to adhere. You’ll need to lightly sand the laminate to create some “tooth” for the adhesive. Using a strong construction adhesive specifically designed for laminate, along with brad nails, is recommended. Be sure to fill nail holes and finish appropriately.
Q: What’s the difference between cabinet trim and cabinet moulding?
A: These terms are often used interchangeably. “Trim” generally refers to any decorative molding applied to the surface. “Moulding” is the broader term for shaped pieces of wood or other material used for decoration or finishing. So, cabinet moulding is a type of cabinet trim.
Q: How do I choose the right size trim?
A: Consider the scale of your kitchen and cabinets. For smaller cabinets or a more minimalist look, thinner trim pieces are best. For larger cabinets or a more traditional or farmhouse feel, you might opt for wider or thicker trim. Always consider how much the trim will protrude from the door surface.
Q: Can I add trim to existing cabinet doors without removing them?
A: Yes, you can, but it’s more challenging to get precise cuts and a clean finish. It’s much easier to remove the doors, work on them horizontally on a stable surface, and then rehang them. If you must work with them installed, be very careful with your measurements and cuts, and use painter’s tape to protect the surrounding cabinet surfaces.
Q: How do I ensure my miter cuts are perfect?
A: A compound miter saw is your best friend here. Ensure the blade is sharp and that the saw is calibrated correctly. Practice on scrap pieces of trim until you can consistently make clean 45-degree cuts. For very detailed cabinet trim profiles, you might need to make compound miter cuts, which involve both an angle and a bevel.
Q: What is the best way to attach trim to cabinet doors?
A: The combination of wood glue and brad nails (ideally from a brad nailer) is generally considered the most effective and easiest method. The glue provides a strong bond, and the nails hold the trim in place while the glue dries, preventing gaps.
Q: How do I achieve a seamless look with trim?
A: Careful measuring and precise miter cuts are essential. After attaching the trim, filling all nail holes with wood filler and then sanding everything smooth before painting or staining will help create a seamless, integrated look. Using trim that matches the cabinet’s thickness also contributes to a flush finish.
Conclusion
Adding trim to your kitchen cabinets is a surprisingly accessible DIY project that can yield dramatic results. Whether you’re aiming for a chic shaker style cabinet trim, a cozy farmhouse cabinet trim, or simply want to elevate your existing cabinetry with adding decorative trim, this process offers a path to kitchen cabinet customization that transforms your space. By carefully planning, selecting the right materials, and executing each step with precision, you can achieve a high-end look that enhances both the beauty and value of your home. This detailed approach to DIY cabinet molding will leave you with updated cabinets and a renewed sense of pride in your kitchen. Remember, the beauty is in the details, and with a bit of effort, you can install exquisite cabinet edging that truly modernizes your space.