
Can you refinish a kitchen sink yourself? Yes, you can! Refinishing a kitchen sink is a fantastic DIY project that can dramatically update your kitchen’s look without the expense of a full replacement. What is sink refinishing? It’s a process of restoring the surface of an existing sink to a like-new condition, often by applying a new coating. This guide will walk you through how to tackle this rewarding task, whether you’re dealing with a chipped porcelain sink repair, a dull cast iron sink refinishing, or a scratched stainless steel sink refinishing. We’ll cover everything from choosing the right kitchen sink refinishing kit to the final polishing touches for your kitchen sink restoration.
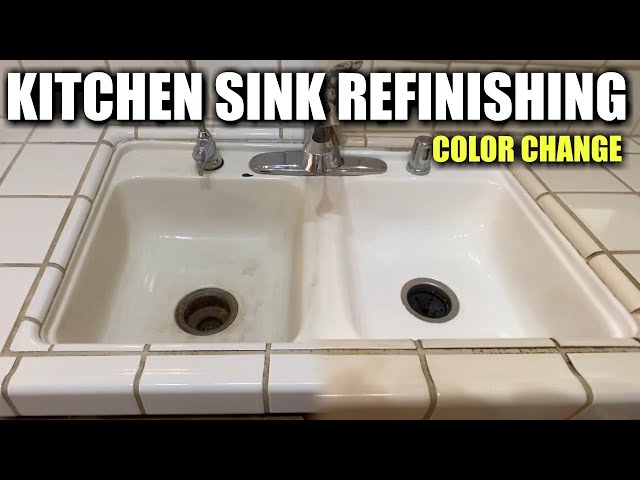
Image Source: i.ytimg.com
Revitalizing Your Kitchen Sink: A Step-by-Step Approach
Updating your kitchen sink doesn’t have to be a costly affair. With a bit of elbow grease and the right materials, you can achieve a professional-looking finish right in your own home. This DIY sink refinishing process is suitable for various sink materials, breathing new life into tired fixtures and elevating your kitchen’s aesthetic.
Deciding if DIY Refinishing is Right for Your Sink
Before you dive in, let’s assess your sink. Is it a good candidate for DIY refinishing?
- Material: Most common kitchen sink materials can be refinished, including porcelain, enamel, cast iron, and stainless steel. However, some materials might require specific products or techniques.
- Damage Severity: Minor chips, scratches, rust spots, and dullness are perfect for DIY refinishing. However, deep cracks, significant structural damage, or severely pitted surfaces might be beyond the scope of a typical DIY kit and may require professional assessment or replacement.
- Your Skill Level: While this is a DIY-friendly project, it does require patience and attention to detail. If you’re comfortable with cleaning, sanding, and careful application of coatings, you can achieve excellent results.
- Budget: DIY refinishing is significantly cheaper than buying a new sink and hiring a plumber for installation.
Gathering Your Supplies: The Essential Toolkit
To embark on your kitchen sink restoration journey, you’ll need a well-stocked arsenal of tools and materials.
Essential Materials for Sink Refinishing
- Kitchen Sink Refinishing Kit: These kits typically contain specialized primers, topcoats, and sometimes hardening agents. Choose a kit specifically designed for kitchen sinks and your sink’s material.
- Degreaser/All-Purpose Cleaner: For initial cleaning.
- TSP (Trisodium Phosphate) or Heavy-Duty Cleaner: For tough grease and grime.
- Sandpaper: Various grits (e.g., 100-grit for initial sanding, 220-grit for smoothing, 400-grit for final prep).
- Sanding Block or Orbital Sander: For even sanding.
- Rust Remover (if applicable): For cast iron or porcelain sinks with rust spots.
- Stain Remover (if applicable): For persistent stains.
- Caulking Remover Tool: To remove old caulk around the sink edges.
- Primer: Often included in kits, but a high-quality bonding primer might be needed for certain surfaces.
- Topcoat: The final color and protective layer.
- Stirring Sticks: For thoroughly mixing paint components.
- Paint Brushes and Rollers: High-density foam rollers and angled brushes are usually best for smooth finishes.
- Painter’s Tape: For masking off surrounding areas.
- Drop Cloths or Plastic Sheeting: To protect countertops and cabinets.
- Ventilation: Fans, open windows, or a respirator mask suitable for chemical fumes.
- Safety Gear: Gloves (chemical-resistant), safety glasses, and a respirator mask.
Tools for Preparation and Application
- Screwdriver: To remove faucet, drain, and other fixtures.
- Adjustable Wrench: For faucet and drain assembly.
- Putty Knife or Scraper: For removing old caulk and stubborn debris.
- Bucket: For cleaning solutions and rinsing.
- Rags and Sponges: For cleaning and wiping.
- Drop Cloths: To protect work areas.
- Respirator Mask: Essential for protecting your lungs from fumes and dust.
- Safety Glasses: To protect your eyes.
- Chemical-Resistant Gloves: To protect your skin.
Preparing Your Workspace and Sink: The Foundation for Success
Proper preparation is the most critical step in achieving a durable and beautiful finish. Skipping this phase will lead to peeling, chipping, or a subpar appearance. This is where the real work of sink resurfacing begins.
Step 1: Protect Your Surroundings
- Clear the Area: Remove all dishes, dish racks, sponges, and any other items from the sink and surrounding countertops.
- Masking: Carefully apply painter’s tape along the edges of the countertops, backsplash, and any fixtures you cannot remove. Ensure a tight seal to prevent any coating from seeping underneath.
- Cover Surfaces: Lay down drop cloths or plastic sheeting over countertops, cabinets, and the floor beneath the sink. Secure them with tape.
Step 2: Remove Fixtures and Hardware
- Faucet Assembly: Turn off the water supply valves under the sink. Unscrew the supply lines from the faucet and the shut-off valves. Then, loosen the mounting nuts holding the faucet to the sink and lift the faucet assembly away.
- Drain Assembly: Loosen the drain flange from the sink basin. You may need to use a putty knife to gently pry it up. Disconnect the P-trap and any tailpieces from the drain assembly underneath the sink.
- Disposal (if applicable): If you have a garbage disposal, ensure the power is turned off at the breaker box before attempting to disconnect it. You might want to consult your disposal’s manual for specific instructions.
- Keep Track: Store all removed hardware and screws in a labeled bag so you can reassemble everything correctly.
Step 3: Thorough Cleaning
This is where you tackle the grime and build-up. Painting a kitchen sink without meticulous cleaning will compromise adhesion.
- Initial Wash: Use a strong degreaser or an all-purpose cleaner to remove any surface grease, food particles, and soap scum. Scrub thoroughly with a sponge or brush.
- Tackling Stubborn Stains: For tougher stains, you might need a more potent cleaner like TSP. Follow the product instructions carefully. For rust spots, especially on cast iron sinks, use a dedicated rust remover.
- Rinse and Dry: Rinse the sink thoroughly with clean water and dry it completely with lint-free cloths. Ensure no cleaning residue remains.
Step 4: Address Existing Damage
This step is crucial for a smooth and lasting finish, especially for porcelain sink repair or cast iron sink refinishing.
- Chipped Porcelain: For minor chips, you can use a porcelain repair epoxy or filler. Clean the chipped area thoroughly, apply the filler according to the product instructions, and allow it to cure completely. Once cured, gently sand it smooth.
- Rust Removal: If you find rust spots, particularly on older sinks, you must remove them entirely. Apply a rust remover and scrub with steel wool or a wire brush. Rinse thoroughly and dry immediately. You may need to repeat this process.
- Scratches: Light scratches can often be buffed out during the sanding phase. Deeper scratches might require a light application of a suitable filler.
Step 5: Sanding for Adhesion
Sanding creates a slightly rough surface that the new coating can grip onto. This is a key part of sink resurfacing.
- Initial Grit: Start with 100-grit sandpaper to scuff up the entire surface of the sink. This removes any remaining gloss and creates a good base for the primer. Use a sanding block or an orbital sander for larger areas to ensure an even finish.
- Smoothing: Move to 220-grit sandpaper to further smooth the surface. This will remove the deeper scratches left by the coarser grit.
- Final Prep Grit: For a very smooth finish, especially before applying the topcoat, you can use 400-grit sandpaper. This is particularly important if you’re painting a kitchen sink with a glossy finish.
- Clean Again: After sanding, thoroughly wipe down the sink with a tack cloth or a slightly damp (with denatured alcohol or mineral spirits) lint-free cloth to remove all sanding dust. Ensure the sink is perfectly clean and dry before proceeding.
Applying the Primer: The Bonding Layer
Primer is essential for ensuring the topcoat adheres properly and lasts longer.
- Mixing the Primer: If your primer requires mixing, stir it thoroughly according to the manufacturer’s instructions.
- Application: Apply a thin, even coat of primer to the entire sink surface using a high-density foam roller or a quality brush. Avoid applying too much, as it can lead to drips and an uneven finish. For tight corners or edges, use an angled brush.
- Drying Time: Allow the primer to dry completely according to the manufacturer’s recommended drying times. This is crucial for proper adhesion.
- Light Sanding (Optional): Once the primer is dry, you can lightly sand it with 400-grit sandpaper if you notice any imperfections or rough spots. Wipe away any dust with a tack cloth.
Applying the Topcoat: Bringing Your Sink Back to Life
This is where you see your kitchen sink restoration really take shape. Whether you’re using a spray-on kit or a brush-on application, technique matters.
Choosing Your Application Method
- Spray Application: Many kitchen sink refinishing kits utilize spray-on coatings. This method often provides the smoothest, most even finish. If using a spray kit, ensure you have excellent ventilation and wear your respirator mask and safety glasses.
- Brush or Roller Application: Some kits are designed for application with brushes and rollers. For a smooth finish with these methods, use high-density foam rollers and apply thin, even coats. Avoid overworking the paint, which can create brush marks.
Application Technique
- Mixing: Thoroughly stir the topcoat according to the kit’s instructions. If it’s a two-part coating, ensure you mix the components precisely as directed.
- First Coat: Apply a thin, even coat of the topcoat. Work in one direction, overlapping your strokes slightly. For spray applications, maintain a consistent distance from the surface and use smooth, sweeping motions.
- Drying Between Coats: This is critical. Allow each coat to dry for the time specified in the kit’s instructions. Rushing this step can lead to peeling or bubbling.
- Subsequent Coats: Apply additional thin coats as recommended by the kit. Most projects will require at least two to three coats for full coverage and durability.
- Smoothness: For a flawless finish, pay close attention to avoiding drips and runs. If you notice any, gently smooth them out with a brush or roller before they dry, or lightly sand them down after drying and reapply a thin coat.
Curing and Reassembly: The Final Steps
After the final coat of paint is applied, the work isn’t quite done. Proper curing is essential for the longevity of your refinished sink.
Allowing the Sink to Cure
- Initial Dry: The sink will feel dry to the touch within a few hours, but this is not the full curing time.
- Full Cure: Most refinishing coatings require 24-72 hours, or even longer, to fully cure and harden. Refer to your specific kit’s instructions for the recommended curing time before exposing the sink to water or heavy use.
- Ventilation: Continue to ensure good ventilation during the curing process.
Reassembling Fixtures
- Gentle Reassembly: Once the sink has fully cured, carefully reassemble the faucet, drain, and any other hardware you removed.
- New Seals: Consider using new gaskets or plumber’s putty for the drain assembly to ensure a watertight seal.
- Leak Check: Turn the water supply back on slowly and check for any leaks at the connections.
Final Touches
- Remove Painter’s Tape: Carefully remove all painter’s tape and drop cloths.
- Clean Up: Dispose of all waste materials properly. Clean your brushes and rollers immediately after use.
- Enjoy: Admire your newly refinished kitchen sink!
Special Considerations for Different Sink Materials
While the general process remains similar, certain materials require specific attention for a successful kitchen sink restoration.
Refinishing Porcelain and Enamel Sinks
Porcelain and enamel sinks are durable but prone to chipping and staining.
- Preparation is Key: Thoroughly clean and sand any chipped areas. Ensure all rust is removed before priming.
- Primer Choice: Use a primer specifically formulated for porcelain or enamel surfaces to ensure good adhesion.
- Coating: Most standard kitchen sink refinishing kits work well on porcelain and enamel. The key is thin, even coats to avoid brush marks or drips.
Refinishing Cast Iron Sinks
Cast iron sinks are heavy and robust, but their enamel coating can chip, revealing the metal underneath, which then rusts.
- Rust Removal: This is paramount for cast iron. Use a strong rust remover and scrub diligently to remove all traces of rust. Failure to do so will result in rust bleeding through the new coating.
- Primer: A high-quality bonding primer designed for metal and enamel is crucial.
- Coating: Kits designed for tubs and sinks are often suitable. The durability of cast iron means it can handle a good refinishing job.
Refinishing Stainless Steel Sinks
Stainless steel sinks are resistant to rust but can be prone to scratches and dullness.
- Surface Preparation: The primary concern here is to remove any existing scratches or dullness. Sanding with progressively finer grits (up to 400 or even higher) is important.
- Direction of Sanding: If you are aiming for a brushed look, always sand in the direction of the existing grain of the stainless steel.
- Coating: While some kits are available for stainless steel, ensure they are specifically designed for the material. Some prefer to buff and polish stainless steel rather than painting it. If you opt for painting, a very thin, smooth coat is best to avoid losing the metallic sheen entirely.
Frequently Asked Questions About Kitchen Sink Refinishing
Q1: How long does a refinished kitchen sink last?
A: With proper care and maintenance, a professionally refinished sink can last anywhere from 10 to 20 years. DIY jobs can vary, but if you follow the steps meticulously, you can expect several years of good service.
Q2: Can I refinish my sink without removing the faucet?
A: While it’s possible to tape off the faucet, it’s highly recommended to remove it. This ensures a cleaner, more thorough coating job and prevents overspray onto the faucet itself.
Q3: What is the best kitchen sink refinishing kit?
A: The “best” kit depends on your sink material and desired finish. Look for kits specifically designed for kitchen sinks, with good reviews regarding durability and ease of application. Brands like Rust-Oleum, Homax, and Daich Coatings offer popular options.
Q4: How do I avoid brush marks when painting a kitchen sink?
A: Use a high-density foam roller or a good quality angled brush. Apply thin, even coats and avoid overworking the paint. For spray applications, maintain a consistent distance and speed.
Q5: Is it cheaper to refinish a sink or replace it?
A: Refinishing a sink is significantly cheaper than replacing it. A DIY refinishing kit typically costs between $50-$150, while a new sink can cost several hundred dollars, plus installation fees.
Q6: Can I refinish the drainboard part of my sink?
A: Yes, the drainboard can be refinished just like the main basin. Ensure it’s thoroughly cleaned, sanded, and prepared.
Q7: What if my sink has deep scratches or chips?
A: For minor chips, use a porcelain repair epoxy or filler before priming. Deeper scratches might require a specialized filler designed for your sink material. If the damage is extensive, it might be more practical to consider sink replacement.
Q8: How do I clean a refinished sink?
A: Use mild, non-abrasive cleaners and soft sponges or cloths. Avoid harsh chemicals, scouring pads, or abrasive cleaners, as these can damage the new finish.
Q9: Can I paint my sink a different color?
A: Yes, most kitchen sink refinishing kits come in a variety of colors, or you can sometimes tint the white base coats. This is a great way to update your kitchen’s look.
Q10: How long does it take to refinish a kitchen sink?
A: The entire process, including preparation, drying, and curing, can take 2-3 days. The actual application time might only be a few hours, but allowing ample drying and curing time between steps is crucial.
By following these detailed steps, you can successfully refinish your kitchen sink, giving it a fresh, new look and extending its lifespan. This DIY project not only saves money but also offers a great sense of accomplishment, transforming a functional necessity into a focal point of your updated kitchen.