
Can you refinish kitchen cabinets with stain? Yes, you absolutely can refinish kitchen cabinets with stain, and it’s a fantastic way to update your kitchen’s look. This guide will walk you through the entire process of refinishing wood cabinets, turning worn-out cabinets into a beautiful focal point. Whether you’re aiming for a subtle change or a dramatic makeover, cabinet staining techniques can achieve stunning results. This project is perfect for DIY cabinet stain enthusiasts looking to do some kitchen cabinet resurfacing.
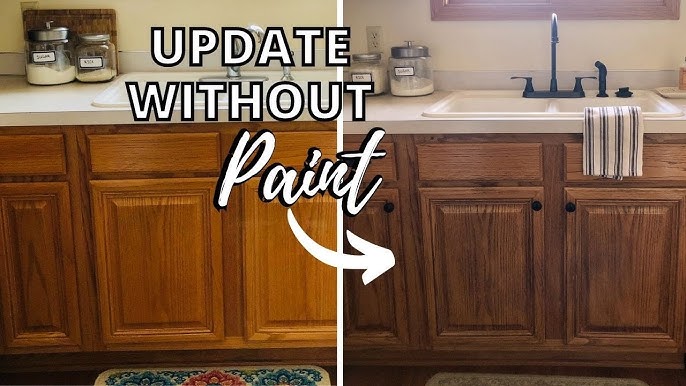
Image Source: i.ytimg.com
Why Refinish Your Kitchen Cabinets?
Refinishing kitchen cabinets with stain is a popular choice for many homeowners. It offers several advantages over other methods like painting or replacing them entirely.
- Cost-Effective: Refinishing is significantly cheaper than buying new cabinets. You get a fresh, updated look without the hefty price tag of replacement.
- Customization: Staining allows you to choose from a vast array of colors and finishes, giving you complete control over your kitchen’s aesthetic. You can match existing decor or create a brand-new style.
- Durability: When done correctly, a stained finish can be very durable and long-lasting, protecting your cabinets from everyday wear and tear.
- Enhances Wood Grain: Stains penetrate the wood, highlighting its natural beauty and grain patterns, which paint often covers up.
- Environmentally Friendly: Refinishing is a greener option than discarding old cabinets and manufacturing new ones.
Planning Your Cabinet Refinishing Project
Before you dive in, good planning makes the job smoother and the results better. Let’s cover the essential steps in planning your cabinet restoration.
Choosing Your Cabinet Stain
Selecting the right stain is crucial. Consider the overall style of your kitchen, the existing color palette, and the type of wood your cabinets are made from.
Types of Wood Stains
- Oil-Based Stains: These are the most common and traditional type. They penetrate wood well, offering rich color and good durability. They require mineral spirits for cleanup.
- Pros: Deep penetration, rich color, good durability.
- Cons: Longer drying times, strong fumes, requires mineral spirits for cleanup.
- Water-Based Stains: These stains dry faster and have low VOCs (volatile organic compounds), making them more environmentally friendly and easier to clean up with water. However, they can sometimes raise the wood grain more than oil-based stains.
- Pros: Fast drying, low VOCs, easy water cleanup, less raised grain.
- Cons: May not penetrate as deeply as oil-based stains, can sometimes appear blotchy on certain woods.
- Gel Stains: These are thicker, more like a paint, and sit on the surface of the wood rather than penetrating deeply. They are excellent for covering existing finishes and for woods that tend to stain unevenly, like pine or maple. They offer more control and are great for DIY cabinet stain projects.
- Pros: Excellent coverage, good for blotch-prone woods, minimal dripping, easier application for beginners.
- Cons: Can look less natural than penetrating stains, may obscure wood grain if applied too thickly.
- Dye Stains: These are transparent and provide color without obscuring the wood grain. They are ideal for achieving rich, deep colors.
- Pros: Transparent color, highlights wood grain beautifully.
- Cons: Can be prone to blotching, requires a protective topcoat.
Factors to Consider When Choosing Cabinet Stain
- Wood Type: Different woods absorb stain differently. Pine, for example, is prone to blotching, while oak stains very evenly.
- Desired Look: Do you want a light, natural look, a deep, rich color, or something modern and bold?
- Existing Kitchen Colors: Coordinate your cabinet stain with countertops, backsplashes, and wall colors.
- Durability: For high-traffic areas like kitchens, choose a stain that offers good protection and can be sealed with a durable topcoat.
- Application Ease: Some stains are easier to apply than others. Gel stains and some water-based stains are generally considered more beginner-friendly.
Tip: Always test your chosen stain on a scrap piece of the same wood or an inconspicuous area of a cabinet door to see how it looks before applying it to all your cabinets.
Best Cabinet Stain Brands
When looking for the best cabinet stain brands, several stand out for their quality, color selection, and ease of use.
- Minwax: A widely available and trusted brand, Minwax offers a vast range of oil-based and water-based wood stains. Their “Pre-Stain Wood Conditioner” is highly recommended for ensuring even color.
- Varathane (Rust-Oleum): Known for their durable finishes, Varathane offers excellent wood stains and protective topcoats. Their “Ultimate Wood Stain” is a popular choice.
- General Finishes: This brand is highly regarded for its professional-grade gel stains, which are fantastic for DIYers due to their easy application and rich, consistent color.
- Behr: Behr offers a good selection of interior wood stains, often available at home improvement stores, making them accessible.
Gathering Your Supplies
Having all your tools and materials ready before you start will save you time and frustration.
Essential Tools and Materials:
- Screwdriver/Drill: To remove cabinet doors and hardware.
- Putty Knife or Scraper: For removing old finishes or filling imperfections.
- Sandpaper: Various grits (e.g., 120, 180, 220) for preparation and smoothing.
- Orbital Sander (Optional but Recommended): For faster and more even sanding.
- Tack Cloths: To remove dust after sanding.
- Clean, Lint-Free Cloths or Foam Brushes: For applying stain.
- Gloves: To protect your hands from stain and chemicals.
- Safety Glasses: To protect your eyes.
- Dust Mask or Respirator: Especially important when sanding or using oil-based products.
- Drop Cloths or Plastic Sheeting: To protect your floors and surrounding areas.
- Wood Filler: To repair any dents or holes.
- Mineral Spirits or Denatured Alcohol (depending on stain type): For cleaning brushes and equipment.
- Cabinet Stain: Your chosen color and type.
- Pre-Stain Wood Conditioner (Recommended for certain woods): To ensure even stain absorption.
- Polyurethane or Other Topcoat: For protection and durability.
- Good Quality Brushes (for topcoat application): Natural bristles for oil-based poly, synthetic for water-based.
- Labeling System: Bags or boxes and labels to keep track of doors and drawers.
Step-by-Step Guide to Refinishing Kitchen Cabinets with Stain
This detailed process covers everything you need to know for successful cabinet restoration.
Step 1: Prepare Your Workspace and Cabinets
This is arguably the most critical step for a professional-looking finish. Proper preparation ensures the stain adheres well and the final result is smooth and even.
Removing Doors and Hardware
- Label Everything: Before you start removing anything, take photos. Then, use masking tape and a marker to label each door and drawer front, noting its location (e.g., “Upper Left,” “Drawer 1”). Place doors and hardware in labeled bags or boxes. This prevents mix-ups later.
- Remove Doors: Use a screwdriver or drill to detach the cabinet doors from the hinges.
- Remove Drawer Fronts: Most drawer fronts are attached to the drawer box with screws from the inside. Remove these screws.
- Remove Hardware: Unscrew hinges, knobs, and pulls from all doors and drawer fronts.
Cleaning the Cabinets
Even if your cabinets look clean, there’s usually a buildup of grease and grime, especially in a kitchen. This must be removed for the stain to adhere properly.
- Degrease: Use a good degreaser or a solution of warm water and dish soap. Wipe down all cabinet surfaces, doors, and drawer fronts thoroughly. A solution of 1 tablespoon of TSP (Trisodium Phosphate) substitute per quart of warm water is also very effective for cutting through grease, but wear gloves and ensure good ventilation.
- Rinse: After degreasing, wipe everything down again with a clean cloth dampened with plain water to remove any residue from the cleaner.
- Dry: Allow all surfaces to dry completely.
Sanding for Stain Adhesion
Sanding is essential to remove any old finish, smooth out imperfections, and create a surface that the stain can penetrate evenly. This is a key step in refinishing wood cabinets.
- Initial Sanding: Start with a medium-grit sandpaper (around 120-150 grit) to remove any existing varnish, paint, or sealant. If your cabinets are already bare wood, you might start with a slightly finer grit.
- Orbital Sander: Use an orbital sander with 120-grit sandpaper for flat surfaces like doors and drawer fronts. For cabinet frames and tight corners, use sandpaper by hand or a sanding sponge.
- Hand Sanding: Sand in the direction of the wood grain. Apply even pressure.
- Smooth Sanding: Once the old finish is removed, switch to a finer grit sandpaper (180-220 grit). This step smooths out any scratches left by the coarser grit and prepares the wood for the stain. Sand all surfaces, edges, and corners.
- Dealing with Old Finishes: If you have a very thick or stubborn finish, you might need to use a chemical stripper first. Follow the product instructions carefully, and always work in a well-ventilated area with protective gear. After stripping, you’ll still need to sand.
- Repair Imperfections: Use wood filler to fill any holes, deep scratches, or dents. Let the filler dry completely according to the manufacturer’s instructions, then sand it smooth with the surrounding wood, using 180-220 grit sandpaper.
- Clean Dust: After sanding, use a shop vacuum with a brush attachment to remove as much dust as possible. Then, wipe all surfaces with tack cloths. Tack cloths are sticky and pick up even the finest dust particles. It’s crucial to remove all dust before staining.
Step 2: Applying Pre-Stain Wood Conditioner (Optional but Recommended)
For woods like pine, maple, or birch, which are prone to blotching (uneven stain absorption), applying a pre-stain wood conditioner is highly recommended. This product seals the wood fibers, allowing the stain to penetrate more uniformly.
- Application: Apply the wood conditioner with a clean brush or cloth, working it into the wood grain.
- Wipe Excess: Allow the conditioner to penetrate for the time recommended by the manufacturer (usually 5-15 minutes). Then, wipe off any excess with a clean, lint-free cloth. Do not let it dry completely on the surface.
- Drying Time: Let the conditioner dry for the time specified by the product before applying stain.
Step 3: Applying the Cabinet Stain
This is where your kitchen cabinets start to transform! Proper application of wood stain is key to achieving a beautiful finish.
Choosing Your Application Method
- Lint-Free Cloths: This is a popular method for applying stain. It allows for good control and even coverage.
- Foam Brushes: These are disposable and can provide a smooth finish, especially for gel stains.
- Bristle Brushes: Good quality natural bristle brushes can also be used, especially for oil-based stains, but be mindful of potential brush marks.
Cabinet Staining Techniques for Even Application
- Stir, Don’t Shake: If using oil-based stain, stir the can thoroughly to mix the pigment. Avoid shaking, as this can introduce air bubbles.
- Test Color: Apply your chosen stain to a scrap piece of wood or an inconspicuous area of a door. Let it dry fully to see the true color. You can leave the stain on for longer or wipe it off sooner to achieve lighter or darker shades.
- Apply Stain:
- Using a lint-free cloth or foam brush, apply the stain in the direction of the wood grain.
- Work on one door or section at a time. Apply a generous, even coat. Don’t overwork the stain, as this can lead to lap marks.
- For vertical surfaces, start at the top and work your way down.
- Wipe Off Excess: This is crucial for achieving the desired color depth.
- After letting the stain penetrate for the recommended time (check the product label – typically 5-15 minutes), use a clean, lint-free cloth to wipe off the excess stain, again working in the direction of the wood grain.
- If you want a darker color, leave the stain on longer. If you want a lighter color, wipe it off sooner.
- Second Coat (Optional): For a richer, deeper color, you can apply a second coat of stain after the first coat has dried according to the manufacturer’s instructions. Follow the same application and wiping process.
- Drying Time: Allow the stain to dry completely. This can take anywhere from 4 to 24 hours, depending on the type of stain, humidity, and temperature. Ensure good ventilation.
Step 4: Applying the Topcoat for Protection
The stain colors the wood, but a topcoat protects it from moisture, grease, and wear. This is a vital part of cabinet finishing.
Choosing Your Topcoat
- Polyurethane: A very durable and common choice.
- Oil-Based Polyurethane: Offers excellent durability and a warm amber tone. It has a slower drying time and requires mineral spirits for cleanup.
- Water-Based Polyurethane (Polyacrylic): Dries faster, is clearer (doesn’t yellow as much), and cleans up with soap and water. It’s a great option for lighter stains.
- Lacquer: Dries very quickly and provides a hard, durable finish. It’s often sprayed and may require more skill.
- Varnish: Similar to polyurethane, offering good protection.
Topcoat Application Tips
- Ensure Dryness: Make sure the stain is completely dry before applying the topcoat. Any moisture trapped can cause problems.
- Light Sanding Between Coats: Lightly sand between each coat of topcoat with very fine-grit sandpaper (220-320 grit) or a fine-grit sanding sponge. This helps the next coat adhere better and creates a smoother finish.
- Clean Between Coats: After sanding, always wipe down the surfaces with a tack cloth to remove all dust before applying the next coat.
- Apply Thin, Even Coats: Use a high-quality brush (synthetic for water-based, natural for oil-based) or a foam applicator. Apply thin, even coats, brushing in the direction of the wood grain. Avoid applying too thickly, as this can lead to drips and an uneven finish.
- Number of Coats: Apply at least two to three coats of topcoat for adequate protection. For high-traffic areas like kitchen cabinets, four coats might be ideal.
- Allow Drying Time: Let each coat dry completely according to the manufacturer’s instructions before applying the next.
- Final Curing: The topcoat will reach its full hardness and durability after several days or even weeks, so be gentle with your newly refinished cabinets during this period.
Step 5: Reassembling and Reinstalling
Once the topcoat is fully dry and cured, it’s time to put your kitchen back together.
- Reattach Hardware: Screw the original or new knobs and pulls back onto the doors and drawer fronts.
- Rehang Doors: Carefully reattach the cabinet doors to the hinges and then to the cabinet frames.
- Reinsert Drawers: Slide the drawer boxes back into place and reattach the drawer fronts if you removed them separately.
- Clean Up: Remove all drop cloths and clean your workspace.
Maintaining Your Refinished Cabinets
To keep your newly refinished cabinets looking their best, follow these simple maintenance tips:
- Wipe Spills Immediately: Don’t let liquids sit on the surface.
- Gentle Cleaning: Use a soft, damp cloth with mild soap for regular cleaning. Avoid abrasive cleaners or harsh chemicals.
- Avoid Excessive Moisture: While the topcoat protects, prolonged exposure to moisture can still damage the finish.
- Be Mindful of Heat: Hot pans or appliances placed directly on the surface can damage the finish. Use trivets.
Frequently Asked Questions (FAQ)
Here are some common questions people have when refinishing kitchen cabinets with stain:
Q1: How long does it take to refinish kitchen cabinets?
The time it takes varies greatly depending on the size of your kitchen, your experience level, and whether you’re doing all the work yourself. It can take anywhere from a weekend for a small project to a week or more for a full kitchen, including drying times between coats.
Q2: Can I stain cabinets that are already painted?
Yes, but it requires more prep work. You’ll need to completely strip or sand off all the existing paint down to the bare wood before you can apply stain.
Q3: How do I avoid brush marks when staining?
Use a high-quality brush or foam applicator, apply thin, even coats, and always work in the direction of the wood grain. For the topcoat, lightly sanding between coats and wiping with a tack cloth is crucial for a smooth finish.
Q4: What is the best way to clean cabinets before staining?
Thoroughly degrease them with a good degreaser or a TSP substitute solution, then rinse with clean water and let them dry completely.
Q5: How many coats of stain should I apply?
This depends on the wood and the depth of color you desire. Typically, one or two coats are sufficient. Always allow adequate drying time between coats and wipe off excess stain for the best results.
Q6: Can I stain over existing stain?
Yes, if the existing stain is in good condition and you are only looking for a color change, you can often apply a new stain over it after a thorough cleaning and light sanding. However, for a dramatic color change or if the old stain is damaged, it’s best to remove it and start with bare wood.
Q7: What’s the difference between stain and a wood conditioner?
Stain adds color to the wood. A pre-stain wood conditioner is applied before the stain. It helps the wood absorb the stain more evenly, preventing blotchy patches, especially on woods like pine, maple, or cherry.
By following these steps, you can successfully refinish your kitchen cabinets with stain, giving your kitchen a beautiful, updated look that you can be proud of. This process of kitchen cabinet resurfacing can truly transform your space and is a rewarding DIY project. Happy staining!