
Can you replace a kitchen hood yourself? Yes, with the right tools and guidance, you can definitely replace your kitchen hood yourself. This comprehensive range hood replacement guide will walk you through every step, from choosing a new unit to safely installing it. Whether you’re upgrading to a more powerful model, switching to a ductless range hood swap, or simply replacing a broken one, this guide will help you achieve a successful DIY range hood upgrade. We’ll cover everything from kitchen vent hood installation to basic ventilation hood repair tips.
A functional kitchen hood is more than just a light fixture. It’s a vital part of your kitchen’s ventilation system maintenance, removing smoke, grease, and odors that can build up during cooking. Replacing an old or inefficient hood can dramatically improve your kitchen’s air quality and make cooking a more pleasant experience. This cooker hood replacement process, while requiring some effort, is a rewarding project for any DIY enthusiast.
This guide focuses on replacing an existing hood, typically an under cabinet range hood change or a microwave that incorporates a range hood. We’ll also touch upon microwave range hood removal as a specific step within the broader process.
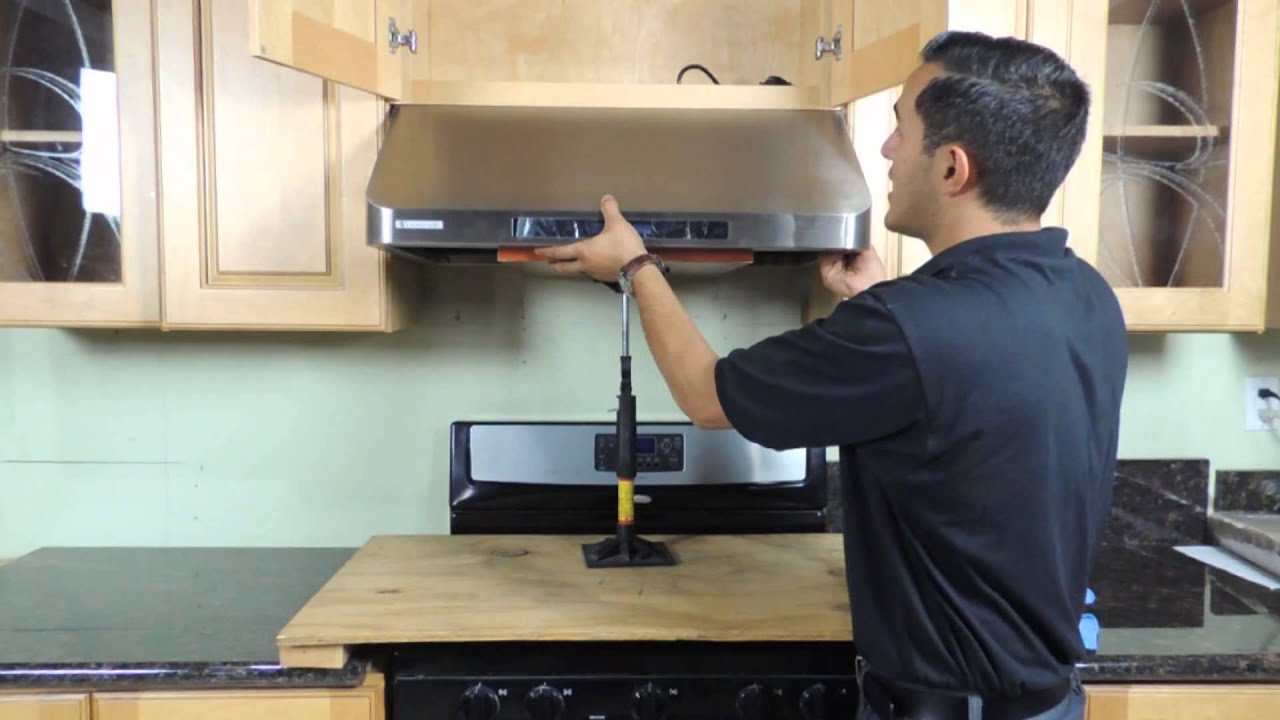
Image Source: i.ytimg.com
Preparing for Your Kitchen Hood Replacement
Before you start, proper preparation is key. This involves selecting the right replacement hood and gathering all necessary tools and materials.
Choosing Your New Kitchen Hood
There are several types of kitchen hoods, and your choice will depend on your kitchen layout, cooking habits, and ventilation needs.
Types of Kitchen Hoods:
- Under-Cabinet Range Hoods: These are mounted directly beneath kitchen cabinets. They are common, relatively easy to install, and can be ducted or ductless.
- Wall-Mount Range Hoods: These are mounted on the wall above your stove. They often make a statement and can offer powerful ventilation.
- Island Range Hoods: Designed for kitchens with a central island cooktop, these are mounted to the ceiling and are often more decorative.
- Downdraft Systems: These are integrated into the cooktop or rise from behind it, pulling air downwards. They are less common for DIY replacement due to their specialized installation.
- Microwave Range Hoods: These combine a microwave oven with a built-in ventilation hood. Replacing one involves disconnecting both appliances.
Key Features to Consider:
- CFM (Cubic Feet per Minute): This measures how much air the hood can move. Higher CFM is better for powerful cooking, but you need to ensure your ductwork can handle it or consider a ductless option. A general rule of thumb is 100 CFM for every 10,000 BTUs of your cooktop.
- Ducting vs. Ductless:
- Ducted Hoods: These vent air and grease particles outside your home through a duct system. They are more effective at removing pollutants and odors.
- Ductless Hoods: These use charcoal filters to clean the air and recirculate it back into the kitchen. They are easier to install but require regular filter replacement and are less effective at removing grease and moisture.
- Noise Level (Sones): Lower sone ratings mean a quieter hood.
- Lighting: Most hoods have built-in lights to illuminate your cooking surface.
- Filter Type: Metal mesh filters are usually washable, while charcoal filters in ductless hoods need periodic replacement.
- Size: Ensure the new hood is the same width or slightly larger than your cooktop for optimal capture.
Gathering Your Tools and Materials
Having everything ready before you begin will make the process smoother and safer.
Essential Tools:
- Safety Glasses: Protect your eyes from dust and debris.
- Work Gloves: Protect your hands.
- Screwdrivers: Phillips and flathead, in various sizes.
- Drill/Driver: With appropriate bits for screws and pilot holes.
- Adjustable Wrench or Socket Set: For any nuts and bolts.
- Pliers: For gripping and manipulating wires.
- Wire Strippers/Cutters: For electrical connections.
- Voltage Tester (Non-Contact or Multimeter): Crucial for confirming power is off.
- Measuring Tape: To ensure correct placement.
- Stud Finder: To locate wall studs for secure mounting.
- Utility Knife: For cutting caulk or seals.
- Caulk Gun and Caulk: For sealing around vents or the hood.
- Level: To ensure the hood is installed straight.
- Ladder or Sturdy Step Stool: For reaching the hood area.
- Duct Tape (if applicable): For sealing duct connections.
- Reciprocating Saw or Drywall Saw (if modifying ductwork): For cutting holes.
Materials:
- New Kitchen Hood: Your chosen replacement.
- Mounting Hardware: Usually included with the new hood, but check.
- Ducting Materials (if converting to ducted or replacing existing ducts): Metal or foil ducting, clamps, elbows.
- Electrical Wire Connectors (Wire Nuts): For safe electrical connections.
- Mounting Screws: Appropriate length and type for your cabinets or wall.
- Gasket or Sealant (if required): For a proper seal against the cabinet or wall.
Safety First: Disconnecting Power and Old Hood
This is the most critical step. Never skip it.
1. Turn Off Power to the Hood
- Locate your home’s electrical panel (breaker box).
- Identify the circuit breaker that controls the kitchen hood or the relevant kitchen lighting circuit.
- Flip the breaker to the “OFF” position.
- Crucially, label the breaker “DO NOT TURN ON – WORKING ON KITCHEN HOOD” to prevent accidental power restoration.
- If you’re unsure which breaker it is, turn off the main breaker for the entire house, but this is less convenient.
- Test the circuit: Use your voltage tester at the hood’s electrical connection point (usually inside a junction box behind the hood or in the cabinet above) to confirm there is no power. Test all wires.
2. Removing the Old Kitchen Hood
This process can vary slightly depending on the type of hood and how it was installed.
For Under-Cabinet or Wall-Mount Hoods:
- Access the Filter(s): Most hoods have removable filters. Slide or unlatch them to remove. This often provides better access to mounting screws or the unit itself.
- Locate Mounting Screws: Look for screws securing the hood to the underside of cabinets or to the wall. They are often on the front, sides, or top of the unit.
- Disconnect Electrical Wiring:
- Carefully remove the cover of the electrical junction box. This might be a small metal plate on the hood unit itself or in the cabinet above.
- You’ll see wires connected using wire nuts. Gently twist the wire nuts counter-clockwise to loosen them.
- Separate the house wiring from the hood wiring. Ensure the house wires are safely tucked back into the junction box or secured with wire nuts to prevent them from touching anything.
- If your hood has a plug that plugs into an outlet, simply unplug it.
- Support the Hood: Once screws are removed and wiring is disconnected, the hood will be loose. Get someone to help you support it, or brace it securely with blocks of wood or books.
- Remove Mounting Screws: Unscrew any remaining screws that hold the hood in place.
- Carefully Lower the Hood: With help, gently pull the hood away from the wall or cabinet and lower it to the ground.
For Microwave Range Hood Removal:
This is a more complex process as you are also dealing with a heavy appliance.
- Ensure Microwave is Unplugged: Most microwave range hoods plug into an outlet inside the cabinet above. Unplug it.
- Empty the Microwave: Remove any food or items from inside.
- Locate Mounting Hardware: Microwave range hoods are typically mounted to the wall with heavy-duty screws that go into wall studs, and often secured to the cabinet above with screws as well.
- Support the Microwave: This is absolutely critical. These units are heavy. Use sturdy blocks, books, or have at least two people ready to support the weight.
- Remove Wall Mounting Screws: These are usually at the back of the unit. You might need to remove the filter or access panel on the front to get to some screws.
- Remove Cabinet Mounting Screws: There might be screws going down from the cabinet into the top of the microwave.
- Carefully Lower the Microwave: With all screws removed and the unit fully supported, carefully lower it away from the wall and cabinet.
3. Preparing the Area for the New Hood
- Clean the Space: Wipe down the cabinet underside or wall where the old hood was mounted. Remove any old caulk, grease, or debris.
- Inspect Ductwork (if applicable): If you have a ducted hood, check the existing duct connection. Ensure it’s clean and in good condition. If you’re changing duct size or type, you may need to make modifications.
- Check Electrical Wiring: Ensure the existing wiring in the junction box is in good condition and compatible with your new hood’s electrical requirements. If the wiring is old or damaged, consult a qualified electrician.
Installing Your New Kitchen Hood: Step-by-Step
This section details the installation process for a typical under-cabinet or wall-mount hood.
1. Mounting Brackets and Preparing for Placement
Many hoods come with a mounting bracket that attaches to the cabinets or wall first.
- Position the Bracket: Hold the mounting bracket (if provided) against the underside of the cabinet or the wall at the desired height. Use a level to ensure it’s straight.
- Mark Screw Holes: Use a pencil to mark where the screws will go.
- Drill Pilot Holes: Remove the bracket and drill pilot holes at your marked locations. This makes it easier to drive screws and prevents wood from splitting.
- Secure the Bracket: Re-position the bracket and secure it with the appropriate mounting screws. Ensure it’s firmly attached, especially to wall studs if mounting directly to a wall.
2. Connecting the Ductwork (for Ducted Hoods)
If your new hood is ducted, you’ll need to connect it to your home’s ventilation system.
- Align Ducting: Position the new hood near its final location. Align the hood’s exhaust outlet with the duct opening in your wall or cabinet.
- Attach Ducting:
- For flexible ducting, slide it over the hood’s exhaust collar and secure it with a duct clamp. Tighten the clamp firmly.
- For rigid ducting, use appropriate connectors and clamps.
- Seal Connections: Use aluminum foil tape or specialized duct sealant to ensure all connections are airtight. This is crucial for efficient ventilation and to prevent air leaks.
- Check Duct Path: Ensure the ducting has a smooth, unobstructed path to the outside. Avoid sharp bends, which can reduce airflow. Keep duct runs as short as possible.
3. Electrical Connections
This step requires careful attention to safety.
- Access the Junction Box: Open the junction box on the new hood.
- Prepare Wires: Strip about 1/2 to 3/4 inch of insulation from the ends of the house wires and the hood’s wires using wire strippers.
- Connect Wires:
- Typically, you’ll connect the house’s black wire (hot) to the hood’s black wire.
- The house’s white wire (neutral) to the hood’s white wire.
- The house’s green or bare copper wire (ground) to the hood’s green or copper ground wire.
- Use wire nuts to secure each connection. Twist them clockwise until snug. Gently tug on each wire to ensure it’s secure within the nut.
- Tuck Wires: Carefully tuck the connected wires back into the junction box.
- Replace Junction Box Cover: Secure the cover back onto the junction box.
4. Mounting the New Hood
Now it’s time to lift and secure the hood.
- Position the Hood: With help, lift the new kitchen hood and align it with the mounting bracket or the pre-drilled holes in the cabinets/wall.
- Secure the Hood:
- For under-cabinet hoods, screws will typically go up through the mounting bracket into the hood unit, or directly into the cabinet floor from the hood.
- For wall-mount hoods, screws will go through the back of the hood into the wall studs or mounting brackets.
- Tighten Screws: Ensure all mounting screws are tightened securely but avoid over-tightening, which can strip the threads or damage the cabinet/wall.
- Check for Levelness: Use your level to make sure the hood is installed straight. Adjust if necessary before fully tightening.
5. Installing Filters and Final Touches
- Install Filters: Slide or clip the new filters into place according to the manufacturer’s instructions.
- Attach Cover Plates: If there are any decorative cover plates or trim pieces, install them now.
- Clean Up: Wipe down the new hood and the surrounding area.
6. Testing the New Hood
This is the moment of truth!
- Restore Power: Go back to your electrical panel and flip the breaker back to the “ON” position.
- Test Functionality: Turn on the hood’s fan at all speed settings. Check the lights. Listen for any unusual noises.
- Check for Airflow: Place your hand near the exhaust outlet (inside the hood) to feel the suction. If ducted, go outside to the vent termination point and check for air being expelled.
- Troubleshooting: If the hood doesn’t work, immediately turn off the power at the breaker again and re-check your electrical connections. Ensure all filters are correctly installed and not obstructing airflow.
Specific Considerations for Different Hood Types
Ductless Range Hood Swap
If you’re switching to a ductless system, the installation is generally simpler as you won’t need to connect to external ductwork.
- Installation: Follow the mounting steps above.
- Filters: Ensure the charcoal filters are properly installed according to the manufacturer’s instructions. These are essential for the filtration process.
- Maintenance: Remember that ductless hoods require regular replacement of charcoal filters and cleaning of grease filters. This is a key aspect of ventilation system maintenance for these units.
Microwave Range Hood Removal and Replacement
Replacing a microwave range hood is like a two-part job: removing the old and installing the new.
- Removal: Follow the steps outlined earlier for microwave range hood removal. Be extremely careful due to the weight.
- Installation:
- Mounting Bracket: Most new microwave hoods will come with a specific wall mounting bracket that needs to be securely screwed into studs.
- Electrical: Connect the wiring as described above. Often, there’s a junction box concealed within the new microwave unit.
- Lifting and Securing: Again, this requires at least two people. Lift the new microwave hood onto the mounting bracket and secure it with screws through the top into the cabinet and through the back into the wall.
- Final Checks: Ensure it’s level, secure, and plug it in. Test all functions, including the microwave and the ventilation.
Common Issues and Ventilation Hood Repair Tips
Even with careful installation, issues can arise. Here are some common problems and basic ventilation hood repair approaches.
Hood Not Turning On
- Check Power: First, ensure the breaker is on and power is reaching the unit. Test the outlet or junction box.
- Check Wiring: Re-examine your electrical connections. Are the wire nuts secure? Are the wires correctly matched (hot to hot, neutral to neutral, ground to ground)?
- Faulty Switch or Control Panel: If power is present but the hood still doesn’t respond, the issue might be with the hood’s internal switch or control panel. This may require replacement of the component or professional repair.
Fan Not Working, but Lights Do
- Motor Issue: This often indicates a problem with the fan motor itself.
- Capacitor: Fan motors often have a capacitor that helps them start. If this fails, the fan won’t spin.
- Control Board: The fan speed control on the main board could be faulty.
Poor Suction or Airflow
- Blocked Filters: This is the most common cause. Clean or replace the filters.
- Blocked Ductwork: Grease and debris can build up in ducts over time, reducing airflow. This requires cleaning the ductwork.
- Duct Leakage: Check all duct connections for leaks and seal them with foil tape.
- Undersized Hood/Ducting: If your cooking produces a lot of steam and smoke, your hood’s CFM might be too low, or your ducting might be too narrow or long.
- Damaged Fan Blades: The fan blades might be damaged or obstructed.
Noisy Hood
- Loose Parts: Check for any loose screws, brackets, or covers.
- Fan Imbalance: The fan motor or blades might be unbalanced.
- Ductwork Resonance: Sharp bends or improperly secured ductwork can cause rattling or humming.
- Motor Bearing Issues: A worn motor bearing will cause a grinding or whirring noise.
Exhaust Fan Installation for Hoods
The exhaust fan is the heart of your kitchen hood. When installing a new hood, you’re essentially installing a new exhaust fan assembly. Ensure the fan motor is correctly seated and secured. If you’re replacing just the fan motor due to failure, follow the manufacturer’s manual for your specific model. This involves disconnecting the old motor, often held by mounting brackets or screws, and carefully installing the new one, reconnecting its wiring.
Maintaining Your Ventilation System
Regular maintenance ensures your hood functions efficiently and lasts longer.
- Clean Filters Regularly: Grease filters should be washed weekly or bi-weekly, depending on cooking habits. Charcoal filters in ductless hoods need replacement every 3-6 months.
- Clean the Hood Exterior and Interior: Wipe down the hood housing and the fan blades periodically to prevent grease buildup.
- Check Ductwork: Annually, inspect the ductwork for any signs of blockage or damage. If you have ducted hoods, consider professional duct cleaning every few years.
Frequently Asked Questions (FAQ)
Q1: Do I need to hire a professional to replace my kitchen hood?
A1: For most under-cabinet and standard wall-mount hoods, a confident DIYer with basic electrical and carpentry skills can manage the replacement. However, if you are uncomfortable with electrical work, have complex ducting, or are installing a very heavy unit like an island hood or a powerful professional-style hood, it’s best to hire a qualified electrician or appliance installer.
Q2: What is the difference between ducted and ductless range hoods?
A2: Ducted range hoods vent cooking fumes, grease, and moisture outside your home through a duct system. Ductless range hoods recirculate the air after filtering it through grease and charcoal filters. Ducted hoods are generally more effective.
Q3: How often should I replace the charcoal filters in a ductless hood?
A3: Charcoal filters in ductless hoods typically need to be replaced every 3 to 6 months, depending on how often you cook and the intensity of your cooking. They cannot be washed or cleaned effectively.
Q4: Can I use flexible ducting for my range hood?
A4: While flexible ducting can be used, rigid metal ducting is generally recommended for better airflow and efficiency. If using flexible ducting, ensure it is kept as straight as possible with minimal bends and that all connections are sealed airtight with appropriate tape.
Q5: My new hood is noisy. What could be the problem?
A5: Noise can be caused by several factors: the fan motor itself, loose mounting screws, improper duct connections causing vibration, or a blockage in the ductwork. Ensure the hood is securely mounted, all screws are tight, and the ducting is smooth and sealed.
Q6: I’m replacing a microwave range hood with a standard under-cabinet hood. What do I need to consider?
A6: You’ll need to disconnect the electrical supply to the microwave, remove the entire unit, and then potentially patch any holes left from the microwave’s installation and mounting. You’ll then install the under-cabinet hood as per its instructions, connecting to the existing electrical wiring. Ensure the new hood fits the space and has adequate venting.
By following these steps, you can confidently tackle your kitchen hood replacement project, improving your kitchen’s environment and enjoying a fresher cooking experience. Remember to prioritize safety and consult your appliance’s manual for specific instructions.