
Can you replace fluorescent tubes with LEDs? Yes, you absolutely can replace fluorescent tubes with LEDs! This is a fantastic way to update your kitchen lighting and make it more modern, energy-efficient, and brighter.
Is it time for a kitchen lighting renovation? If your kitchen still relies on outdated fluorescent lights, the answer is likely a resounding yes! Those old fixtures can hum, flicker, and cast a dull light that makes your cooking space feel less inviting. Fortunately, modernizing your kitchen ceiling light upgrade is more accessible and affordable than ever. This guide will walk you through everything you need to know to transition from fluorescent to LED lighting, transforming your kitchen into a brighter, more energy-efficient, and stylish hub.
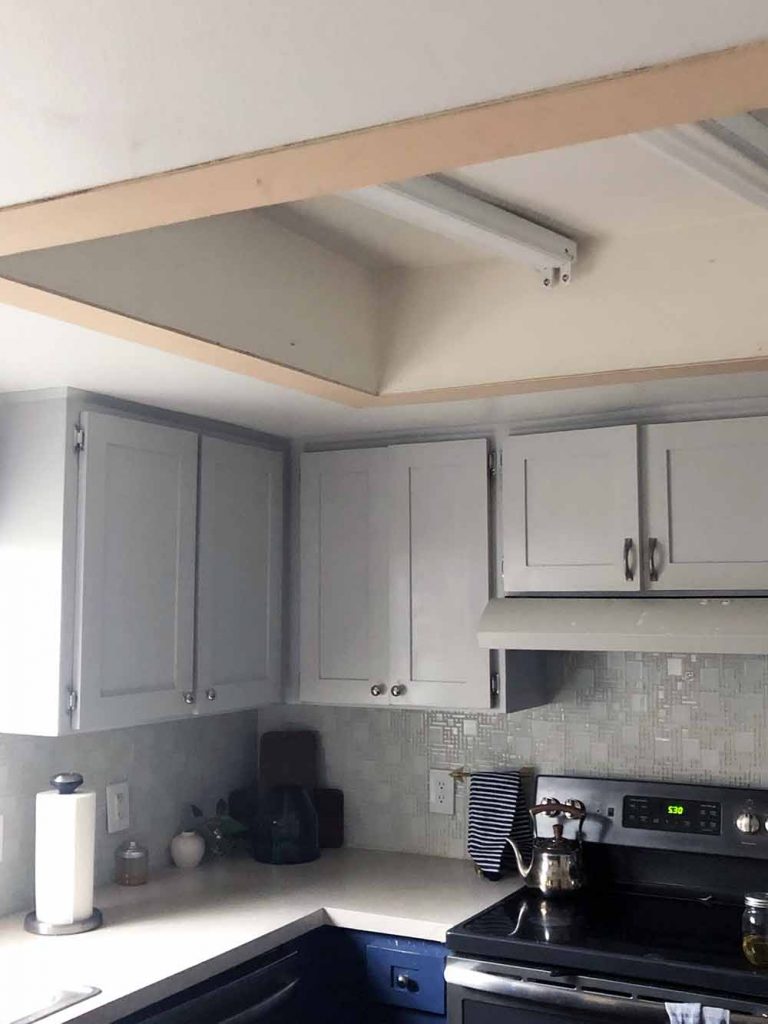
Image Source: mydesignrules.com
Why Make the Switch? The Benefits of LED Lighting
Moving away from fluorescent lights offers a host of advantages. LED technology has advanced significantly, providing superior performance and features that fluorescent bulbs simply can’t match.
Superior Light Quality
- Brighter Kitchen Lighting: LEDs offer a much cleaner, more consistent light output. They don’t have the same flickering or color-shifting issues that can plague older fluorescent bulbs, especially as they age. This results in a more pleasant and functional illumination for your kitchen activities.
- Better Color Rendering: LEDs excel at rendering colors accurately. This means the food you prepare will look more appetizing, and the overall ambiance of your kitchen will be more vibrant and true-to-life. Look for bulbs with a high Color Rendering Index (CRI) for the best results.
Enhanced Energy Efficiency
- Significant Energy Savings: LEDs consume considerably less electricity than fluorescent lights. This translates directly into lower energy bills for your household. Over the lifespan of the bulbs, the savings can be substantial.
- Longer Lifespan: LED bulbs last much longer than fluorescent tubes. While fluorescent tubes might last 10,000 to 20,000 hours, LEDs can easily last 50,000 hours or more. This means fewer bulb changes and less waste.
Improved Functionality and Aesthetics
- Instant On: Unlike some fluorescent lights that require a warm-up period, LEDs turn on to full brightness instantly.
- Dimmable Options: Many LED options are dimmable, allowing you to control the ambiance of your kitchen. This is perfect for creating different moods, from bright task lighting for cooking to a softer glow for evening meals.
- Sleeker Fixture Designs: Modern kitchen lights often feature sleeker, more integrated designs that complement contemporary kitchen aesthetics. Replacing old, bulky fluorescent fixtures with new LED units can dramatically improve your kitchen’s look.
Options for Fluorescent to LED Conversion
When it comes to updating your fluorescent kitchen lighting, you have several pathways. Each offers a different approach to achieving your goal of modern, efficient illumination.
Option 1: LED Retrofit Kits
What are LED retrofit kits? LED retrofit kits are designed to allow you to convert existing fluorescent fixtures to LED without replacing the entire fixture. This is often the most cost-effective and straightforward solution for many kitchen ceiling light upgrade projects.
How they work: These kits typically consist of LED tubes that plug directly into the existing ballast connections or use a new driver that bypasses the old ballast. They are designed to fit within the footprint of your current fluorescent fixture.
Pros:
- Cost-Effective: Generally cheaper than replacing the entire fixture.
- Easy Installation: Often a simpler DIY lighting installation process.
- Preserves Existing Fixture: Good if you like the look of your current fixture housing.
- Energy Savings: Provides the benefits of LED technology.
Cons:
- Fixture Compatibility: Not all fixtures are compatible with retrofit kits. The internal wiring and size of the fixture need to be suitable.
- Potential for Ballast Issues: If the kit requires the ballast to remain, a failing ballast could still cause problems. However, many kits are designed to bypass or eliminate the ballast.
- Aesthetics: While the light is better, the overall fixture appearance might not be as modern as a completely new unit.
Option 2: Replacing Fluorescent Tubes with LED Equivalents
Can I just replace fluorescent tubes with LED ones? Yes, this is a popular and often simple DIY lighting installation. You can buy LED tubes that are designed to be direct replacements for your existing fluorescent tubes.
How they work: These LED tubes come in standard lengths (like T8 or T12) and have the same connection types as fluorescent tubes. There are two main types:
- Ballast-Compatible (Plug-and-Play): These tubes work with your existing fluorescent ballast. You simply remove the old fluorescent tube and install the LED one. This is the easiest method, but you’re still relying on the existing ballast, which can eventually fail.
- Ballast-Bypass (Direct Wire): These tubes require you to remove or bypass the old ballast and wire the LED tubes directly to the mains power. This is a more permanent and efficient solution, as it eliminates the ballast entirely. It requires more electrical knowledge for DIY lighting installation.
Pros:
- Simplicity (Plug-and-Play): Very easy to replace the tubes.
- Cost-Effective: Cheaper than buying new fixtures.
- Immediate Brightness Improvement: Instant upgrade in light quality.
- Energy-Efficient Lighting: Benefits from LED technology.
Cons:
- Ballast-Compatible Limitations: You’re still reliant on the ballast, which can reduce overall efficiency and lifespan compared to ballast-bypass options.
- Ballast-Bypass Complexity: Requires more electrical work, potentially needing a qualified electrician.
- Fixture Limitations: The older fixture housing might not offer the best heat dissipation for the LEDs, potentially shortening their lifespan compared to dedicated LED fixtures.
Option 3: Replacing the Entire Fixture
When should I consider replacing the entire fixture? If your existing fluorescent fixtures are old, damaged, or you desire a completely new aesthetic, replacing the entire fixture is the best route. This is often part of a comprehensive kitchen ceiling light upgrade.
How it works: You’ll remove the old fluorescent fixture entirely and install a new LED fixture. This gives you the widest range of design options and ensures optimal performance for the LED technology.
Pros:
- Modern Aesthetic: Allows you to choose from a vast array of stylish, modern kitchen lights.
- Optimized Performance: LED fixtures are designed from the ground up for LED technology, ensuring proper heat management and longevity.
- Eliminates Ballast Issues: No old, potentially failing ballasts to worry about.
- Higher Efficiency: Often more energy-efficient overall than retrofitting.
- Brighter Kitchen Lighting: You can select fixtures specifically designed for maximum brightness.
Cons:
- Higher Cost: Replacing fixtures is typically more expensive than simply changing tubes or using retrofit kits.
- More Involved Installation: Requires more electrical work and potentially modifying the ceiling opening.
Choosing the Right LED Solution for Your Kitchen
The best approach for your kitchen lighting renovation depends on your budget, DIY comfort level, and desired aesthetic outcome.
Factors to Consider:
- Budget: How much are you willing to spend? Retrofit kits and replacement tubes are generally more budget-friendly.
- DIY Skill Level: Are you comfortable with basic electrical work? Ballast-bypass and fixture replacement will require more skill.
- Fixture Condition: Are your current fixtures in good working order and aesthetically pleasing, or are they dated and damaged?
- Desired Look: Do you want to maintain the appearance of your current fixtures or completely revamp your kitchen’s style with new, modern kitchen lights?
- Light Quality Needs: Do you need specific color temperatures or dimming capabilities?
Common Kitchen Lighting Scenarios and Solutions:
| Kitchen Lighting Scenario | Recommended Solution | Key Benefits |
|---|---|---|
| Budget-conscious, good existing fixtures, DIY friendly | Replace fluorescent tubes with ballast-compatible LEDs. | Quick, easy, cost-effective, immediate brightness improvement. |
| Budget-conscious, willing for some wiring, efficiency focus | Replace fluorescent tubes with ballast-bypass LEDs. | More efficient, eliminates ballast issues, longer lifespan than ballast-compatible. |
| Want to improve aesthetics and efficiency, moderate budget | Use LED retrofit kits or replace with new LED fixtures. | Modern look, improved efficiency, brighter kitchen lighting, potentially simpler installation. |
| Desire a complete style overhaul, willing to invest | Replace entire fluorescent fixtures with new LED units. | Maximum aesthetic impact, optimal performance, access to the latest in modern kitchen lights. |
Step-by-Step Guide to Updating Your Kitchen Lighting
Let’s delve into the practical steps for undertaking your kitchen lighting renovation. We’ll focus on the most common DIY methods: replacing tubes and using retrofit kits.
Safety First!
Before you begin any electrical work, it is crucial to prioritize safety.
- Turn off the power: Locate the circuit breaker that controls your kitchen lights and switch it off. It’s a good practice to also turn off the main breaker if you’re unsure which one it is.
- Verify power is off: Use a non-contact voltage tester to confirm that there is no power to the fixture.
- Use proper tools: Ensure you have insulated screwdrivers, wire strippers, and a sturdy ladder.
- If in doubt, call a professional: If you’re not comfortable with electrical work, hire a qualified electrician.
Replacing Fluorescent Tubes with LED Equivalents (Ballast-Bypass Method)
This method offers superior efficiency by eliminating the old ballast.
Tools and Materials:
- LED tubes (ballast-bypass type)
- Non-contact voltage tester
- Screwdriver set
- Wire strippers/cutters
- Wire nuts
- Electrical tape
- Ladder
Steps:
- Turn off Power: As mentioned, ensure the power is completely off at the breaker.
- Access the Fixture: Open the diffuser or lens of your fluorescent fixture to access the tubes and internal components.
- Remove Old Tubes: Gently twist and pull out the old fluorescent tubes.
- Remove the Ballast:
- Locate the ballast, usually a rectangular metal box.
- Carefully disconnect the wires from the ballast. There might be wire nuts or terminal blocks.
- Unscrew and remove the ballast from the fixture.
- Bypass the Ballast:
- Refer to the wiring diagram provided with your new LED tubes. This is critical.
- Typically, you’ll be connecting the “line” (hot) and “neutral” wires directly to the designated input pins on one end of the LED tube(s).
- The output wires from the ballast will no longer be used and should be capped off with wire nuts and secured with electrical tape.
- Ensure all connections are secure and properly insulated.
- Install LED Tubes:
- Insert the new LED tubes into the fixture sockets. They usually twist into place.
- Test the Lights:
- Before closing everything up, turn the power back on at the breaker.
- Check if the LED lights illuminate correctly.
- Reassemble Fixture: If everything works, turn off the power again, reattach the diffuser or lens, and ensure the fixture is securely mounted.
Installing an LED Retrofit Kit
This is a good option if you like your current fixture but want to upgrade the internals.
Tools and Materials:
- LED retrofit kit (ensure it’s compatible with your fixture)
- Non-contact voltage tester
- Screwdriver set
- Wire strippers/cutters
- Wire nuts
- Electrical tape
- Ladder
Steps:
- Turn off Power: Ensure power is off at the breaker and verified with a voltage tester.
- Access Fixture Internals: Remove the diffuser or lens to expose the fluorescent tubes and ballast.
- Remove Old Tubes: Twist and pull out the old fluorescent tubes.
- Remove Existing Ballast (if required by the kit): Some retrofit kits require ballast removal, while others might work with it. Follow your kit’s specific instructions. If you need to remove it, disconnect wires and unscrew it.
- Install Retrofit Components:
- The kit will usually include LED strips or modules and possibly a new driver.
- Follow the kit’s specific wiring diagram meticulously. You’ll connect the LED components to the driver, and the driver will connect to the power source, often bypassing the original ballast wiring.
- Secure any new components within the fixture.
- Connect Power: Wire the driver to the main power supply of the fixture, typically connecting to the wires that used to go to the ballast or directly to the power source if the ballast is removed.
- Test Lights: Turn the power back on at the breaker to test the new LED lighting.
- Reassemble: If the lights work, turn the power off again, reattach the diffuser, and secure the fixture.
Exploring Modern Kitchen Lights and Under Cabinet Lighting Solutions
Beyond the main ceiling fixture, consider other ways to enhance your kitchen’s illumination.
Under Cabinet Lighting Solutions
This is a highly effective way to improve task lighting and add ambiance.
- LED Strip Lights: Flexible LED strips can be easily adhered under cabinets for a clean, modern look. They come in various colors and brightness levels.
- Puck Lights: Small, circular LED lights that can be mounted individually under cabinets or in pantries.
- Integrated LED Fixtures: Slim, hardwired LED bars designed specifically for under-cabinet mounting. These offer a very sleek and professional finish.
Benefits of Under Cabinet Lighting:
- Reduces Glare: Illuminates countertops directly, reducing shadows cast by overhead lights.
- Enhances Task Performance: Makes food preparation, chopping, and reading recipes much easier.
- Adds Ambiance: Creates a warm and inviting atmosphere in the kitchen.
- Modernizes the Space: A key element in many modern kitchen designs.
Other Modern Kitchen Lights to Consider
- Recessed LED Downlights: For a clean, minimalist look, recessed lights provide general illumination without taking up visual space.
- Pendant Lights: Over islands or peninsulas, pendant lights add a decorative and functional focal point.
- Track Lighting: Offers flexibility to direct light where needed most.
- Smart Lighting: Integrate smart bulbs or fixtures that can be controlled via smartphone apps, voice assistants, and even programmed for different times of day.
Frequently Asked Questions (FAQ)
Here are some common questions people have about updating fluorescent kitchen lighting.
Q1: Will LED tubes work in my old fluorescent fixture?
A1: It depends on the type of LED tube. Ballast-compatible LED tubes are designed to work with existing ballasts, but compatibility can vary. Ballast-bypass LED tubes require direct wiring and will work in most fixtures once the ballast is bypassed. Always check the manufacturer’s specifications and compatibility lists.
Q2: Do I need to remove the ballast when switching to LED tubes?
A2: It depends on the type of LED tube you choose. Ballast-compatible tubes do not require ballast removal. Ballast-bypass tubes require the ballast to be removed and the fixture to be rewired directly to the mains power.
Q3: What are the benefits of bypassing the ballast?
A3: Bypassing the ballast makes your lighting system more energy-efficient because the ballast itself consumes power. It also eliminates a component that can fail, leading to a more reliable system and a longer lifespan for your LED bulbs.
Q4: How do I know if my current fluorescent fixture can use a retrofit kit?
A4: Most standard fluorescent fixtures can accommodate retrofit kits, but it’s crucial to check the kit manufacturer’s specifications for compatibility. Look at the internal dimensions and wiring of your fixture.
Q5: Can I mix fluorescent and LED tubes in the same fixture?
A5: It is generally not recommended to mix fluorescent and LED tubes in the same fixture, especially if you are using ballast-compatible LED tubes. The different electrical requirements can lead to flickering, reduced lifespan for both types of bulbs, or even damage to the ballast.
Q6: What is the best color temperature for kitchen lighting?
A6: For kitchens, a color temperature of around 3000K to 4000K (Kelvin) is often preferred. 3000K provides a warm white light, good for general ambiance and dining areas, while 4000K offers a cooler, brighter white light that is excellent for task lighting and food preparation. Many people opt for a brighter, cooler white for their main ceiling light upgrade to achieve brighter kitchen lighting.
Q7: Are LED retrofit kits safe?
A7: Yes, LED retrofit kits are safe when installed correctly according to the manufacturer’s instructions. Ensure you follow all electrical safety precautions, including turning off the power and verifying it’s off. If you are unsure about the installation, hire a qualified electrician.
Q8: How much brighter is LED lighting compared to fluorescent?
A8: LEDs can be significantly brighter than fluorescent lights, especially when comparing equivalent wattage. They also produce a more focused and consistent light output, making the space feel brighter and more open. You can achieve much brighter kitchen lighting with LEDs.
Q9: How do I dispose of old fluorescent tubes?
A9: Fluorescent tubes contain a small amount of mercury and should be disposed of properly. Check with your local waste management services or home improvement stores for designated recycling or disposal locations. Do not simply throw them in the regular trash.
Q10: Can I install dimmable LEDs in my kitchen?
A10: Yes, many LED replacement tubes and fixtures are dimmable. However, you will need to ensure that your existing dimmer switch is compatible with LED technology. Older dimmer switches designed for incandescent or fluorescent bulbs may not work correctly with LEDs, leading to flickering or poor performance. You might need to replace your dimmer switch with an LED-compatible model.
By following these guidelines and choosing the right approach for your kitchen, you can successfully update your fluorescent lighting, creating a more modern, energy-efficient, and welcoming space. Enjoy your brighter, more functional kitchen!